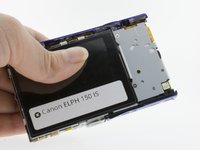
Ana içeriğe geç

Canon PowerShot ELPH 150 IS Back Plate/Menu Button Replacement

Neye ihtiyacın var

  1. Canon PowerShot ELPH 150 IS  Back Plate/Menu Button Replacement, Back Plate/Menu Buttons: adım 1, 2 resimden 1. Canon PowerShot ELPH 150 IS  Back Plate/Menu Button Replacement, Back Plate/Menu Buttons: adım 1, 2 resimden 2.
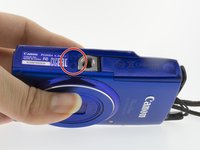
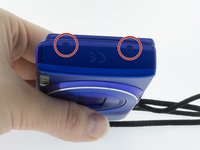
    • Locate the ON/Off button on the top of the camera and hold it down until the screen and all lights on the camera go dark.

  2. Canon PowerShot ELPH 150 IS  Back Plate/Menu Button Replacement: adım 2, 1 resimden 1.
    • Locate the back plate of the camera (contains the LCD screen and menu buttons).

  3. Canon PowerShot ELPH 150 IS  Back Plate/Menu Button Replacement: adım 3, 2 resimden 1. Canon PowerShot ELPH 150 IS  Back Plate/Menu Button Replacement: adım 3, 2 resimden 2.
    • To remove the back plate you will need to unscrew the 6 support screws securing it to the camera.

    • Use a Phillips #00 screwdriver to remove the first 2 screws on the bottom of the camera.

  4. Canon PowerShot ELPH 150 IS  Back Plate/Menu Button Replacement: adım 4, 3 resimden 1. Canon PowerShot ELPH 150 IS  Back Plate/Menu Button Replacement: adım 4, 3 resimden 2. Canon PowerShot ELPH 150 IS  Back Plate/Menu Button Replacement: adım 4, 3 resimden 3.
    • Remove the next 2 screws located behind the AV port using the same Phillips #00 screwdriver.

  5. Canon PowerShot ELPH 150 IS  Back Plate/Menu Button Replacement: adım 5, 2 resimden 1. Canon PowerShot ELPH 150 IS  Back Plate/Menu Button Replacement: adım 5, 2 resimden 2.
    • Use a Phillips #00 screwdriver to remove the final 2 screws from the blue side panel.

  6. Canon PowerShot ELPH 150 IS  Back Plate/Menu Button Replacement: adım 6, 3 resimden 1. Canon PowerShot ELPH 150 IS  Back Plate/Menu Button Replacement: adım 6, 3 resimden 2. Canon PowerShot ELPH 150 IS  Back Plate/Menu Button Replacement: adım 6, 3 resimden 3.
    • Use your hands or a spudger to gently pry the front and back case apart along the seams on the bottom of the camera.

    • Completely remove the back plate.

Sonuç

To reassemble your device, follow these instructions in reverse order.

Alex Larrimore

Üyelik tarihi: 03/05/17

305 İtibar

3 adet Kılavuz yazıldı

Ekip

0 Yorum

Yorum Ekle

İstatistikleri Görüntüle:

Son 24 Saat: 1

Son 7 gün: 2

Son 30 gün: 7

Her zaman: 420