Bu çeviri bir makine tarafından oluşturulmuştur ve henüz bir kişi tarafından incelenmemiştir. Bu dili konuşuyor musunuz? İnceleme için.
Giriş
Canon PowerShot SD870 IS cihazınızdaki bozuk flaş ünitesini sökmek için bu kılavuzu kullanın.
Neye ihtiyacın var
-
-
-
Kameranın alt kısmındaki iki adet 4 mm'lik Yıldız vidayı çıkarın.
-
El kayışı bağlantısının yanındaki vidayı çıkarın.
-
"A/V OUT DIGITAL" kapağını yukarı çekin ve USB bağlantı noktasının üzerindeki vidayı çıkarın.
-
-
-
Hafifçe yukarı doğru baskı uygulayarak ön kameranın kapağını çekip çıkarın.
-
-
-
Kameranın düz ucundaki iki adet Yıldız vida #00'ı çıkarın.
-
Siyah L şeklindeki yan kapak plakasını çıkarın.
-
Gümüş renkli U şeklindeki tutucu plakayı çıkarın.
-
-
-
-
-
Çıkarılması gereken ilk vida, kameranın alt kısmında, sol tarafta yer alır.
-
Yıldız #00 tornavida kullanarak alt sol taraftaki 3,4 mm'lik gümüş vidayı çıkarın.
-
-
-
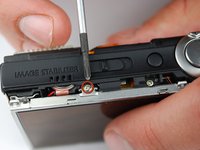
Çıkarılması gereken ikinci vida, kameranın üst kısmında bulunur.
-
Aynı yıldız tornavidayı kullanarak, son 3,4 mm'lik gümüş vidayı çıkarın.
-
Bu, LCD ekranı yerinde tutan gümüş, U şeklindeki parçayı ayıracaktır. Parçayı çıkarın ve kenara koyun.
-
-
-
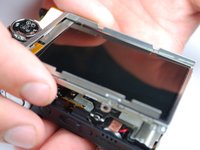
LCD ekran artık sadece LCD veri kablosuyla bağlı olmalıdır.
-
Ekranı sağ tarafından kaldırın ve küçük bir tornavida veya başka bir küçük açma aracı kullanarak, bağlantının (konnektörün) kilidini açmak için siyah kısmını yukarı doğru çevirin.
-
Veri kablosunu dikkatlice bağlantıdan (konnektörden) kaydırarak çıkarın.
-
LCD hâlâ arka ışık kablosuyla bağlı olmalıdır.
-
-
-
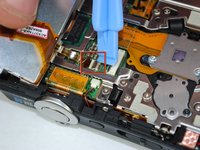
Arka aydınlatma kablosunu çıkarmak için, arka aydınlatma kablosunun kilidini açmak adına başka bir küçük açma aparatı kullanın.
-
Arka aydınlatma kablosunu dikkatlice kaydırarak çıkarın.
-
LCD ekran artık kamera gövdesinden tamamen ayrılmış olmalıdır.
-
-
-
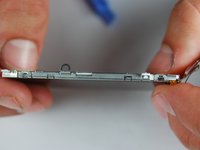
LCD ekran kasası, sol ve sağ tarafın üst ve alt kısımlarında bulunan 4 tırnakla bağlıdır.
-
Tırnakları sırayla hafifçe kanırtıp dikkatlice ayırın.
-
Tırnaklar ayrıldıktan sonra kasanın arkası, arka ışık kablosuyla ön kasaya bağlı kalmaya devam edecektir.
-
Arka ışık kablosunu dikkatlice kasadan ayırın.
-
-
-
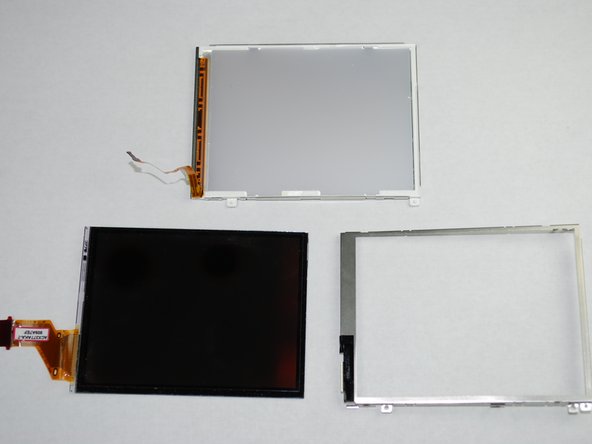
LCD ekran ve kasa artık üç parça halinde olmalıdır:
-
LCD ekran
-
LCD ekran çerçevesi
-
LCD ekran arka kasası
-
LCD ekranın kendisi artık çıkarılabilir ve onarılabilir/değiştirilebilir.
-
-
-
-
-
Kasa ve LCD ekran çıkarılmış durumdayken, açma düğmesini çıkarmaya hazırsınız.
-
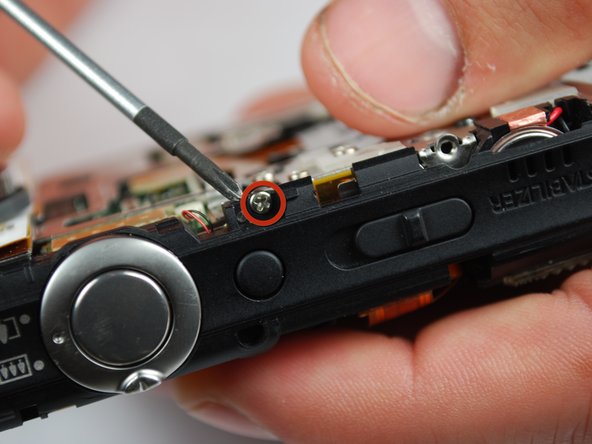
Öncelikle Philips #00 tornavidayı kullanarak kameranın üst ve ön kısmındaki iki adet gümüş rengi 4 mm (0,159 inç) vidayı çıkarın.
-
-
-
Serbest bırakma düğmesini tutan üst plastik parça, anakarta giden kırmızı-siyah bir kablo konnektörüyle bağlı olmalıdır.
-
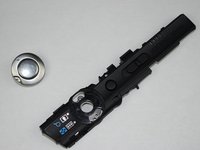
Konnektörü anakarttan ayırın ve serbest bırakma düğmesi yuvasını kameradan çıkarın.
-
-
-
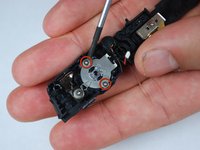
Serbest bırakma düğmesinin plastik muhafazası kameradan çıkarılmış durumdayken, iki adet 0,090 inç gümüş vidayı sökmek için Philips #00 tornavida kullanın.
-
Serbest bırakma düğmesi artık çıkarılabilir ve onarılabilir ya da değiştirilebilir.
-
-
-
-
-
Kameranın sol tarafındaki iki adet gümüş 2 mm vidayı çıkararak başlayın.
-
-
-
Kasa, LCD ekran ve serbest bırakma düğmesi yuvası çıkarıldığında, arızalı flaş ünitesi yerinden çıkarılabilir ve değiştirilebilir.
-
İşe, kameranın üst kısmındaki konnektörden sarkan flaş/hoparlör ünitesinin bağlantısını keserek başlayın.
-
-
-
Ardından, flaş/hoparlör kablolamasının üst kısmındaki plastik parçayı, her iki taraftaki tırnakları dikkatlice açarak ayırın.
-
Flaş ünitesi artık çıkarılabilir ve değiştirilebilir.
-
-

 FixBot'a Sor


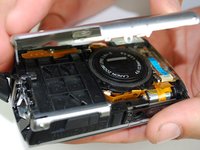
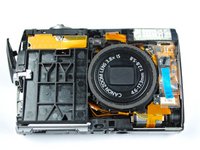


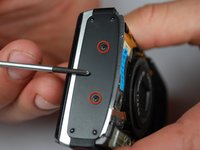
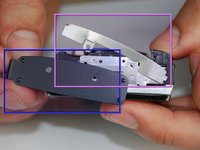










Cihazınızı tekrar monte etmek için bu talimatları tersten uygulayın.

Ekip

Cal Poly, Team 10-45, Garner Spring 2010 Cal Poly, Team 10-45, Garner Spring 2010 üyesi
CPSU-GARNER-S10S10G45
4 Üyeler
72 adet Kılavuz yazıldı
