Giriş
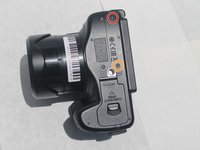
If any of the controls located on the top cover of the Canon PowerShot SX60 HS are broken use this guide to replace the top cover.
This part houses important user interfaces, such as the function wheel, shutter button and power button. A faulty top cover is identified by either clear physical damage or if any of the top buttons or wheels are broken.
Before using this replacement guide please review our troubleshooting guide.
Before starting this guide ensure that you have powered off your device.
Neye ihtiyacın var
-
-
Make sure to power off the device before completing any more steps.
-
Remove the battery by releasing the orange clip in the battery compartment.
-
-
-
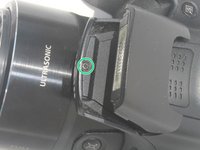
Remove the rubber eye piece by pulling it back.
-
Use the Phillips #00 screwdriver to remove the two 5mm #00 screws located on the side of the viewfinder.
-
-
-
Use the Phillips #00 screwdriver to remove the 4mm #00 screw located on the bottom left of the device.
-
Use the Phillips #00 screwdriver to remove the 5mm #00 screw located on the bottom center of the device.
-
Use the Phillips #00 screwdriver to remove the 7mm #00 screw on the right top corner of the camera, just above the media ports.
-
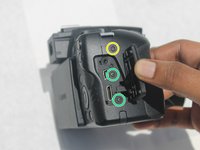
Use the Phillips #00 screwdriver to remove the two 5mm #00 screws located on the right side, under the media port dust cover.
-
-
-
Bu adımda kullanılan alet:Tweezers$4.99
-
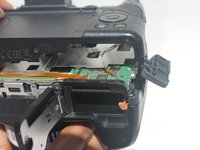
Use the iFixit opening tool to pry off the back panel.
-
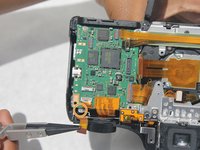
Use the black spudger to unclip the ribbon located behind the battery compartment. Then remove it using the nylon tipped tweezers.
-
Once the ribbon is unplugged, remove the back panel from the camera body.
The first step is a little confusing to me—can you clarify what you mean? Also, be sure to check end punctuation on each step.
On the third step, only the thin plastic ribbon comes out, the brown and gray plastic parts are the connector and will stay with the board, I pulled the gray plastic part and broke the connector.
-
-
-
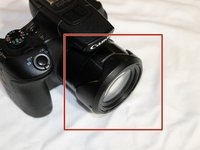
Remove the sunshade located on the front of the lens by twisting it 90 degrees in either direction, then pull straight off the lens.
-
-
-
Remove the 5mm Phillips #00 screw located on the left side below the microphone connection.
-
Remove the 4mm Phillips #00 screw located on the bottom left of the camera.
-
Remove the 5mm Phillips #00 screw located on the bottom center of the camera.
-
Pop open the flash and remove the 5mm Phillips #00 screw located under the flash.
-
-
-
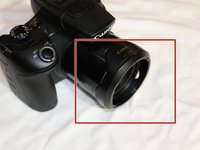
Remove the front cover by pulling along the lens housing while holding the body of the camera.
This is a great example of the final shot that I think some of your other guides need, which iFixit was referring to in the feedback.
-
-
-
Remove one silver 2mm #00 Philips screw on the front side located next the flash assembly.
-
-
Bu adımda kullanılan alet:Tweezers$4.99
-
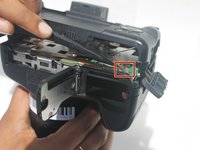
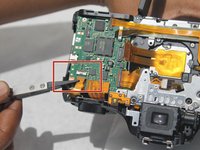
Use the black spudger to unclip the ribbon on the top right corner and then remove it using the nylon tipped tweezers.
-
Remove one silver 2mm #00 Philips screw found underneath the ribbon.
-
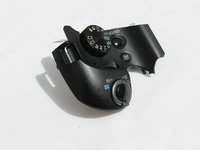
Once the screw is removed, the top panel is completely detached from the device. To remove it, grab it by hand and gently pull it off the device.
Check capitalization here, and see specifically the lack of clarity in the orange bullet. How will the top cover come free—does the user need to lift it off? will it fall off? Etc.
-


To reassemble your device, follow these instructions in reverse order.
To reassemble your device, follow these instructions in reverse order.
Ekip

Embry-Riddle Aeronautical University, Team S3-G7, Watkins Summer 2019 Embry-Riddle Aeronautical University, Team S3-G7, Watkins Summer 2019 üyesi
ERAU-WATKINS-SU19S3G7
4 Üyeler
8 adet Kılavuz yazıldı