Ana içeriğe geç

Canon PowerShot SX600 HS Flash Assembly Replacement

Neye ihtiyacın var

  1. Canon PowerShot SX600 HS Flash Assembly Replacement, Battery: adım 1, 1 resimden 1.
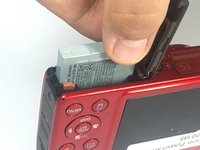
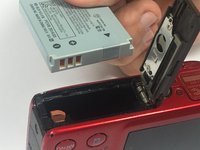
    • To remove the battery, locate the battery cover on the bottom of the camera.

    • Using your thumb, press down on the cover and slide it outwards.

  2. Canon PowerShot SX600 HS Flash Assembly Replacement: adım 2, 1 resimden 1.
    • Depress the orange lever holding the battery in place to unlock it.

  3. Canon PowerShot SX600 HS Flash Assembly Replacement: adım 3, 2 resimden 1. Canon PowerShot SX600 HS Flash Assembly Replacement: adım 3, 2 resimden 2.
    • Use your fingers to remove the battery.

    • Be sure to remember the alignment of the nodes for reassembly.

  4. Canon PowerShot SX600 HS Flash Assembly Replacement, Power and Shutter Buttons: adım 4, 1 resimden 1.
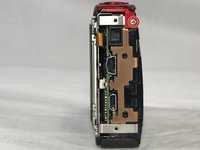
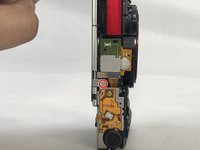
    • Use a #000 Phillips screwdriver to unscrew the four 4mm screws located on the sides of the camera (2 for each side).

  5. Canon PowerShot SX600 HS Flash Assembly Replacement: adım 5, 1 resimden 1.
    • Unscrew the four 2mm located on the bottom of the camera using a Phillips #000 screwdriver.

  6. Canon PowerShot SX600 HS Flash Assembly Replacement: adım 6, 1 resimden 1.
    • Use a plastic opening tool to loosen and remove both the front and back plates of the camera, as well as the two side pieces.

  7. Canon PowerShot SX600 HS Flash Assembly Replacement: adım 7, 2 resimden 1. Canon PowerShot SX600 HS Flash Assembly Replacement: adım 7, 2 resimden 2.
    • Unscrew the three 2mm screws attaching the piece to the camera frame with a #000 Phillips screwdriver.

  8. Canon PowerShot SX600 HS Flash Assembly Replacement: adım 8, 1 resimden 1.
    • Use an opening tool to gently remove the power and shutter button assembly from the frame.

  9. Canon PowerShot SX600 HS Flash Assembly Replacement, Display Screen: adım 9, 2 resimden 1. Canon PowerShot SX600 HS Flash Assembly Replacement, Display Screen: adım 9, 2 resimden 2.
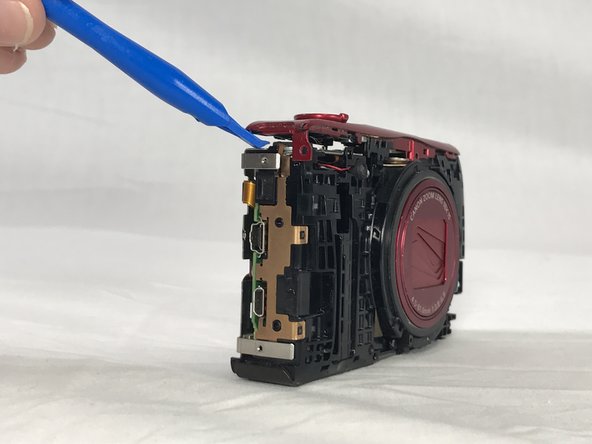
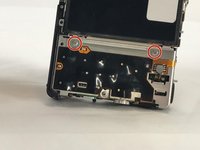
    • Unscrew the 2mm screw connections of the main board protector from the camera frame using a #000 Phillips head screwdriver (2 on front, 1 on top)

  10. Canon PowerShot SX600 HS Flash Assembly Replacement: adım 10, 1 resimden 1.
    • Use a Phillips #000 screwdriver to unscrew the 4mm screw.

  11. Canon PowerShot SX600 HS Flash Assembly Replacement: adım 11, 1 resimden 1.
    Bu adımda kullanılan alet:
    Tweezers
    $4.99
    Satın Al
    • Use a pair of tweezers to remove the no-fuss connector from its holder.

  12. Canon PowerShot SX600 HS Flash Assembly Replacement: adım 12, 1 resimden 1.
    • Gently lift the protector from the frame.

  13. Canon PowerShot SX600 HS Flash Assembly Replacement: adım 13, 1 resimden 1.
    • Lift the LCD screen ZIF connector tab and remove the ribbon cable.

    • Detach the no-fuss connector.

    • Lift the screen from its holder.

  14. Canon PowerShot SX600 HS Flash Assembly Replacement, Flash Assembly: adım 14, 1 resimden 1.
    • Unplug the assembly from the main no-fuss connector.

  15. Canon PowerShot SX600 HS Flash Assembly Replacement: adım 15, 1 resimden 1.
    • Unplug the assembly from its flat-top connection.

  16. Canon PowerShot SX600 HS Flash Assembly Replacement: adım 16, 1 resimden 1.
    • Use a #000 Phillips screwdriver to remove the three 4mm screws that hold the assembly to the frame.

  17. Canon PowerShot SX600 HS Flash Assembly Replacement: adım 17, 1 resimden 1.
    • Gently lift the assembly out of its place.

Sonuç

Fix your Canon's flash in order to take bright, vibrant photographs.

Bir başkası bu kılavuzu tamamladı.

Scott Childress

Üyelik tarihi: 02/15/17

698 İtibar

3 adet Kılavuz yazıldı

Ekip

USF Tampa, Team S6-G4, Lacy Spring 2017 USF Tampa, Team S6-G4, Lacy Spring 2017 üyesi

USFT-LACY-S17S6G4

3 Üyeler

9 adet Kılavuz yazıldı

0 Yorum

Yorum Ekle

İstatistikleri Görüntüle:

Son 24 Saat: 0

Son 7 gün: 2

Son 30 gün: 9

Her zaman: 844