Giriş
For this particular fix you will need a few items; your hands, a plastic opening tool, a Phillips screw, and a magnetic mat to keep the screws in place. As well as a marker to organize where each screw needs to be placed when reassembling. It is important to have the audio speaker replaced so that the camcorder will have sound.
Neye ihtiyacın var
-
-
Turn the camcorder upside down and remove the three 3x4 mm Phillips screws securing the black plastic case.
-
Flip open the LCD screen.
-
Remove the three 3x4 mm Phillips screws securing the black panel plastic case.
-
-
-
-
From the inner corner in between the panel and the LCD screen, remove the two 2x2.5 mm Phillips screws and the 3x4 mm Phillips screw.
-
Remove the black plastic covering with your fingers. Underneath the covering, you will find a screw hinge.
-
Remove the 2x2.25 mm Phillips screw located at the top of the screw hinge.
-
-
-
Using your fingers, remove the panel from the base of the camcorder.
-
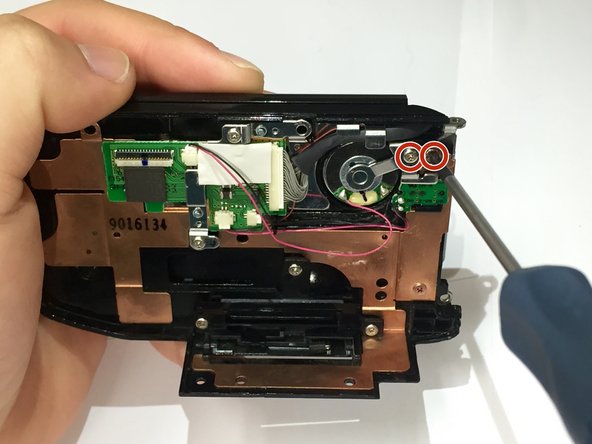
After removing the panel, remove the two 2x2.25 mm Phillips screws located at the top right of the inside of the panel.
-
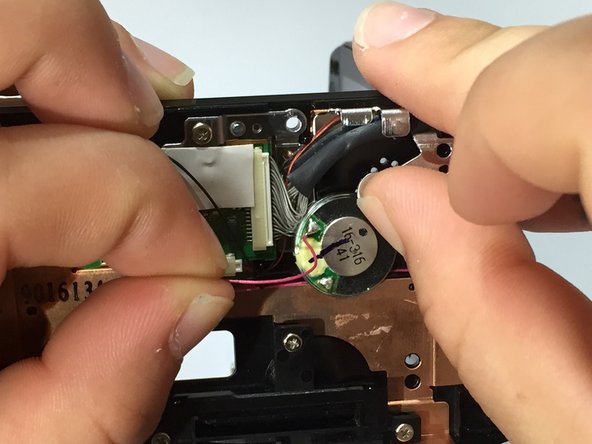
Using one hand, gently move the silver piece holding the speaker down while using the other hand to remove the speaker.
-


To reassemble your device, follow these instructions in reverse order.
To reassemble your device, follow these instructions in reverse order.
Ekip

Sam Houston State, Team 13-1, Blackburne Winter 2015 Sam Houston State, Team 13-1, Blackburne Winter 2015 üyesi
SHSU-BLACKBURNE-W15S13G1
4 Üyeler
9 adet Kılavuz yazıldı