Ana içeriğe geç
Casio fx-82MS Button Replacement

Casio fx-82MS Button Replacement

Rebecca Dowling

Rebecca Dowling ve 4 diğer katkıda bulunanlar

En son October 21, 2023 tarihinde güncellendi

10 dakika
Kolay

The Casio fx-82MS is a commonly used simple calculator in many schools. It has a very long lifetime. But sometimes a button stops working, which can be very annoying. In this guide we will guide you through the steps to fix this problem.

Neye ihtiyacın var

Aletler

Daha fazlasını göster…

  1. Casio fx-82MS Button Replacement, Button: adım 1, 2 resimden 1. Casio fx-82MS Button Replacement, Button: adım 1, 2 resimden 2.
    • This is the calculator in question.

    • The tools you will need are: a Phillips screwdriver, a spudger and a soldering iron.

    • If you don't have access to a solding iron, you need a stanley knife instead.

  2. Casio fx-82MS Button Replacement: adım 2, 1 resimden 1.
    • Flip over the calculator.

    • Locate the 6 screws on the backside.

    • Remove all six screws.

  3. Casio fx-82MS Button Replacement: adım 3, 1 resimden 1.
    • Once all six screws have been removed, take the back part off of the calculator.

  4. Casio fx-82MS Button Replacement: adım 4, 2 resimden 1. Casio fx-82MS Button Replacement: adım 4, 2 resimden 2.
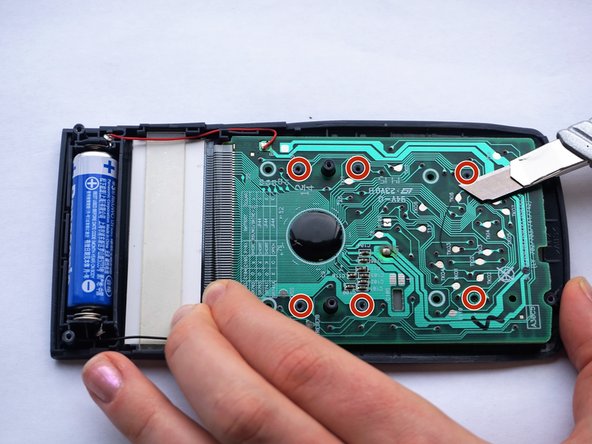
    • Locate the rubber contact points.

    • Solder the rubber contact points, while using the spudger to pry the PCB loose.

    • PCB stands for Printed Circuit Board.

    • Toxic gasses might be created. Hence, do this in a well ventilated room.

    • Start with the lower plugs (left on the photo). Gently pry the PCB loose at the same time.

    • For this step a third person is required for safety. One person uses the solder iron, the other one uses the spudger to pry the PCB loose.

    • If you don't have accessibility to a solder iron, use a utility knife to remove the plugs.

  5. Casio fx-82MS Button Replacement: adım 5, 1 resimden 1.
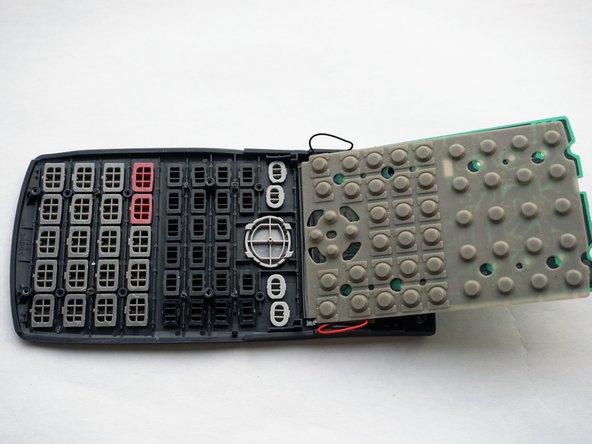
    • After having soldered away all six plugs, lift up the PCB.

    • Flip the board sideways as shown in the picture.

  6. Casio fx-82MS Button Replacement: adım 6, 2 resimden 1. Casio fx-82MS Button Replacement: adım 6, 2 resimden 2.
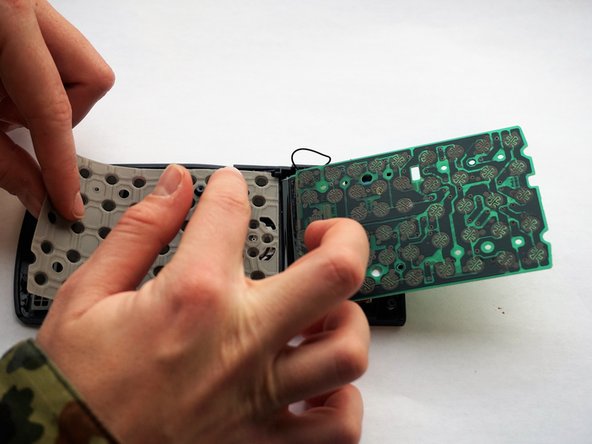
    • Remove the rubber mat.

    • Do this carefully, to make sure the buttons stay in their place.

  7. Casio fx-82MS Button Replacement: adım 7, 2 resimden 1. Casio fx-82MS Button Replacement: adım 7, 2 resimden 2.
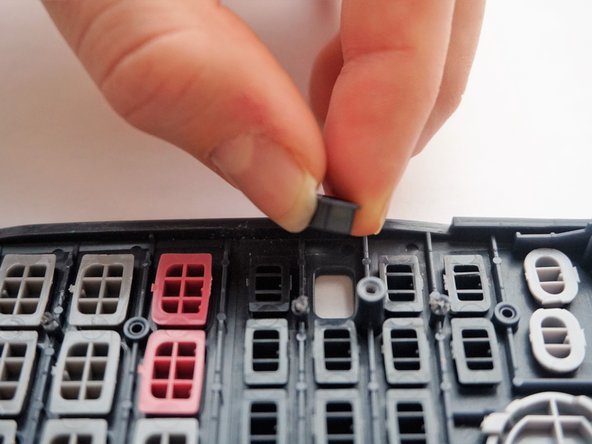
    • Replace the broken button.

  8. Casio fx-82MS Button Replacement: adım 8, 2 resimden 1. Casio fx-82MS Button Replacement: adım 8, 2 resimden 2.
    • Put the rubber mat back in its place.

    • Make sure you push the six slightly damaged plugs through the rubber mat.

  9. Casio fx-82MS Button Replacement: adım 9, 1 resimden 1.
    • Push the PCB back into place.

    • Again make sure you push the slightly damaged plugs through the PCB, to make everything fits perfectly again.

  10. Casio fx-82MS Button Replacement: adım 10, 1 resimden 1.
    • Place the back side of the casing back on top of the front.

  11. Casio fx-82MS Button Replacement: adım 11, 1 resimden 1.
    • Put all six screws back in the back side of the casing.

Bitiş Çizgisi

Bir başkası bu kılavuzu tamamladı.
0Kılavuz Yorumları

Yorum Ekle

İstatistikleri Görüntüle:

Son 24 Saat: 0

Son 7 gün: 3

Son 30 gün: 36

Her zaman: 3,344