Giriş
You need a set of small screwdrivers, at least 2 sizes of Philips were used to complete the screen swap.
Neye ihtiyacın var
-
-
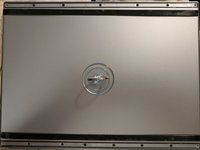
First, find a soft cloth/sweater/felt mat to use as a work surface so that you don't scuff or scratch the lovely finish of the case.
-
Ensure you have good lighting, and take better photos so we can update the guide to less shadowy ones. :)
 FixBot'a Sor
-
-
-
Flip over the laptop and observe the rubber strips running end to end.
-
Gently using your fingernails or the edge of a credit card or an iFixIt spudger, pry up a strip from the corner and carefully peel it off.
-
If done carefully/properly the sticky strip stays intact and you can reuse it if it doesn't get dusty (or your cats don't steal it to play with).
-
Remove and set aside the MANY screws that hold the base plate to the bottom of the laptop.
-
-
-
-
Remove the base plate by lifting a corner or using an iFixIt suction cup to make the process easier.
-
Take a picture so you remember where all the pretty colored screws from inside the case go. (Note the Google logo colors spectrum of screws.)
-
Unplug the battery connection so that you don't accidentally short something and fry up your expensive laptop that has almost zero replaceable parts.
-
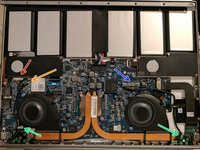
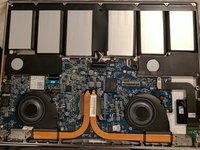
Unplug the cables connecting the screen to the motherboard, there is one for the video, one for the touchscreen, and a couple tiny connectors for the wireless. See second image for locations.
-
Remove the green screws that hold the hinge of the lid into the case. There are a number of them, and there is one on each side with a grounding/cable management clip around it, the screw isn't different than the others, but don't lose the clip. See second image for locations.
-
Swap out the screen for your replacement likely obtained on eBay and carefully replug the video and touch and wireless cables back into their connectors.
-
If you are very careful you can test your new screen and it's touch capability without screwing it back into the case, if you aren't foolhardy, you will put a couple screws in so that you can turn over the laptop without having the screen yank the cables off the motherboard.
-
-
-
Put in the rest of the screws for the hinge and make sure you get the clips on the right screws or your cables won't reach properly.
-
Make sure the cables are snugly connected to the motherboard and put the base plate back on, making sure the FCC/CE labeling is towards the hinge side of the laptop.
-
Install all the screws back into the baseplate.
-
Carefully put the rubber strips back into their channels, it will be too long when you first put it in, but firmly stroke it from one end to the other to ease it into place like an inchworm.
-
-
-
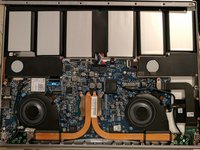
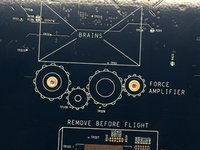
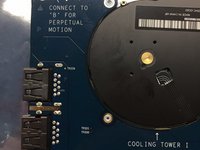
These are some images of both sides of the motherboard where you can see the humor and level of detail of the engineers.
-


To reassemble your device, see the last step.
İptal et: Bu kılavuzu tamamlamadım.
10 farklı kişi bu kılavuzu tamamladı.
10Kılavuz Yorumları
Excellent teardown. Thanks!
Very excellent teardown. I think this would help a lot of people.
Great teardown, really helpful since there are basically no teardowns of this laptop online.