Giriş
This guide will show how to clean a Model 3xx Scooba at the end of a cleaning run so it will be ready for the next use. This will not only apply to the Model 390 which was the last model in this series, but will apply to the Models 5800, 5801, 5806, 5900, 6000, 6050, 6051, 33501, and the 385 which was sold in Europe. There are subtle differences in all of these models, but nothing that will affect this guide. I have all of these models but the 385 in my collection. My experience comes from buying these off Ebay in a "For Parts" condition, and cleaning them and making repairs when necessary. I plan to write more repair guides, but for now, there needs to be a cleaning guide because many of my Scoobas only needed a thorough cleaning and a new battery to bring them back to running condition.
Neye ihtiyacın var
-
-
I start with the tank as it needs to be drained, rinsed and then set aside so water in the tank can run to the drain ports for sucking out at the end.
-
Drain the Dirty and Clean ports. If you have just done a cleaning run, there should be very little water from the "Clean" port and very filthy water from the "Dirty" port. Re-fill both ports with clean water and close the ports again and slosh the tank horizontally and then re-open the ports and drain the tank.
-
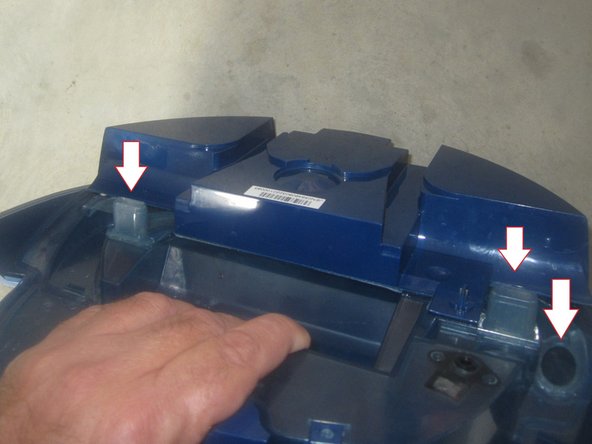
I then flip the tank over and run water into the two oval shaped Cleaning Head ports and the round Dry Port hole. I will even run a Pipe Brush into the dry port hole until it comes out the Filter port. If you are cleaning the tank for the first time from an Ebay purchase, don't be shocked if a large wad of hair and dirt come out.
-
When done running water through the vacuum port, hold the tank vertically and rotate it so the filter port is down and drain excess water from the filter port. Then, stand the tank vertically with the Clean and Dirty ports down so that remaining water in the tanks drains towards them.
-
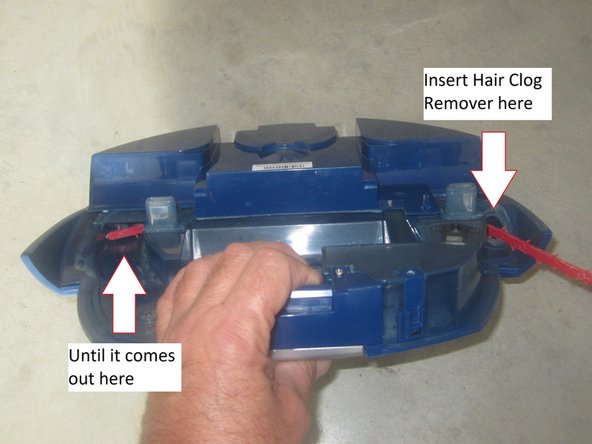
I also use a 6" zip tie inserted into the oval shaped Seals to Cleaning Head ports to push crud into the long tube between the vacuum and filter ports.
-
-
-
Remove the Filter. Shake it over the garbage can. This will be full of dirt, lint, and sand. I run water through the rounded point of the filter from outside and then flush water through both outsides and set it aside.
-
Pull the filter tube and rinse it out.
-
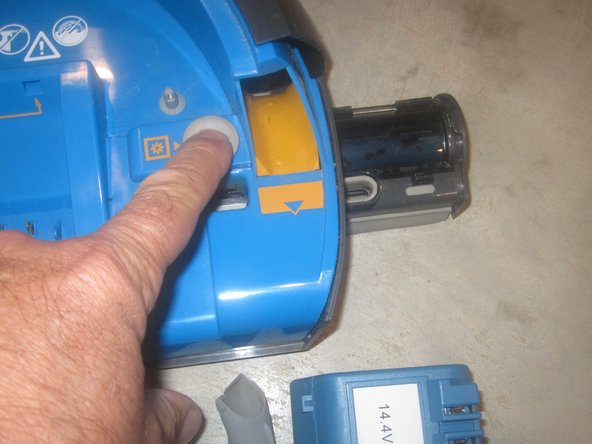
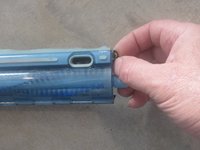
Eject the brush by pressing the button next to the vacuum tube.
-
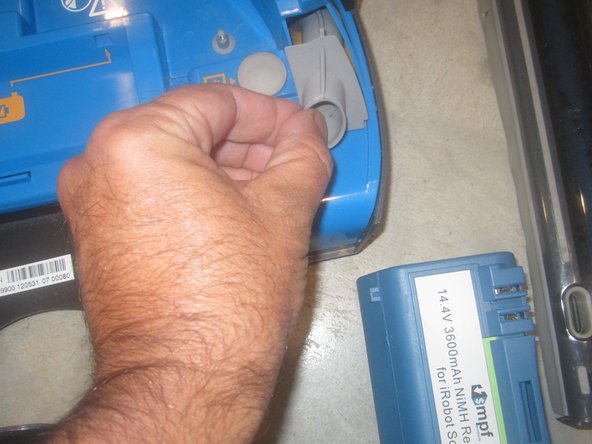
Lift out the battery and set it on the charger (if you have an External Charger) Otherwise, just set it away from splashing water for now.
-
-
-
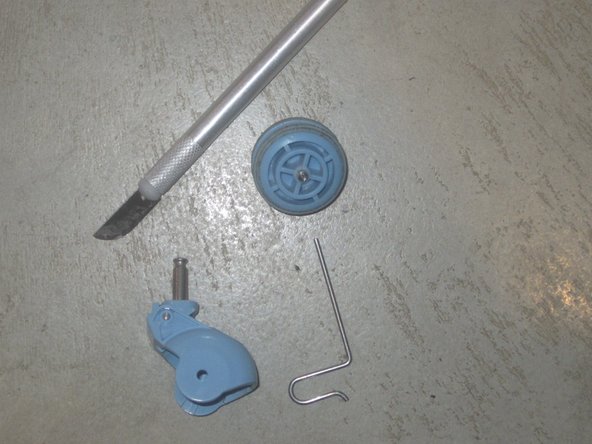
The Front Castor can easily be removed from the chassis by pulling up on the castor.
-
The Castor should be able to spin freely. A quick flick of a finger should give you multiple revolutions of the wheel and several up/downs of the wire at the top of the Castor column.
-
The castor can be pried apart for cleaning. The wheel is built like a Yo-Yo but the center axel is a bit off center. Use a small knife to cut away the hair or thread.
-
The Up/Down motion of the wire is detected in a sensor in the RCON tower and this helps determine if the Scooba is moving or not.
-
-
-
-
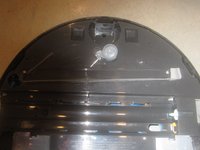
GENTLY wipe the rubber Squeegies off. Both the long and short wipers. There is signage here to not spray water. Use a damp cloth and wipe off the Squeegies and the brush area of the underside of the Scooba Chassis. Don't forget to wipe off the wheels! Replace the Front Castor Wheel.
-
When you are done, you can move the Main Body (Core) to your storage. I like to store my Scoobas upside down on a shelf. This prevents flat spots forming on the wheels, but it exposes the RCON to damage so be gentle when setting the Core on the shelf. Flat spots seem to quickly go away when the wheels get wet on the next use.
-
IF you do not have an External Battery Charger, then you will need to store the core upright and put the battery back in the battery holder of the core and plug in the charger.
-
-
-
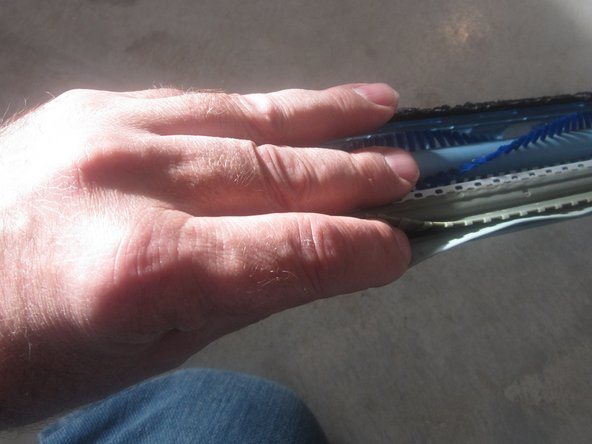
With your left hand, hold the brush with your thumb on the end cap of the brush. Gently insert your pointer finger between the squeeges, your middle finger supporting the brush and your ring finger on the wiper brush and your little finger backing the brush assembly.
-
With your Right hand, thumb on the down arrow, pointer finger under the up arrow, you should be able to open the brush at both ends.
-
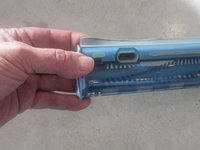
With your right thumb, middle and ring fingers slightly lift the end of the brush and pull the brush from the assembly while supporting the brush with the middle finger of your left hand until it is clear of the bearing on the left endcap.
-
-
-
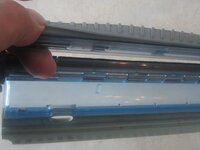
Once the brush assembly is opened and the brush removed, what to clean should be fairly obvious. The rubber wiper that forms the front of the wet vacuum port can be gently pushed aside and a toothbrush can be used to clean this area out.
-
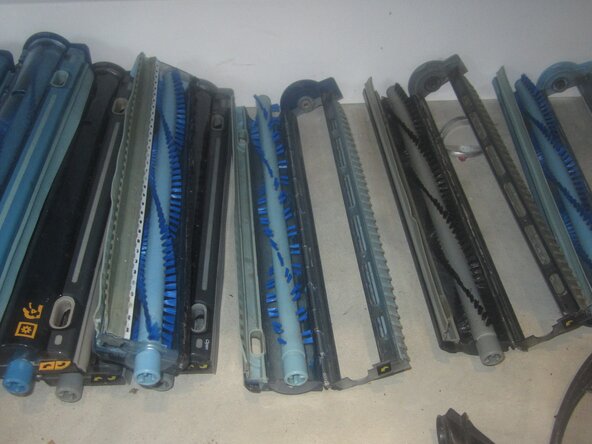
Once the brush assembly is cleaned, I lay it out to dry. A day later, I will re-assemble the brush and stack it with all the other brushes.
-
-
-
Back in Step one we left the tank standing vertically with the Clean and Dirty ports down. Use the Scooba Bulb (Nasal Aspirator) to suck the water out of the Clean side of the tank. All the water can be shaken out of the Dirty side, but the Clean side needs to be sucked out.
-
I typically set the tank on top of the upside down Scooba core with the Clean and Dirty flaps open so the tank can dry out completely.
-
-
-
Best is to use an external charger as shown here. After the second green "Charging" LED goes out, I flip the battery over as shown on the right charger. Lacking that, the Internal charger can be used. Just re-insert the battery into the Scooba core and plug the core in.
-
On the 5900 and some of the 5800 models, there was a "Bug" in that the "Done Charging" voltage level was set to a level that the battery couldn't reach and many batteries were wrecked because of overcharging. This can be avoided by removing the battery from the charger after about 4 hours of charging.
-
Once a NiMH battery has been placed into use, it is best to cycle the battery at least once a week. Do NOT let the Scooba sit for long periods of time in storage.
-


When properly cleaned, the iRobot Scooba was and still is the pinnacle of residential robot cleaners. The tank cleaning instructions in Step 1 are the most critical part of maintaining your Scooba. This step was not covered in the iRobot cleaning instructions and this probably led to the Scooba getting a reputation for being unreliable.
When properly cleaned, the iRobot Scooba was and still is the pinnacle of residential robot cleaners. The tank cleaning instructions in Step 1 are the most critical part of maintaining your Scooba. This step was not covered in the iRobot cleaning instructions and this probably led to the Scooba getting a reputation for being unreliable.