Neye ihtiyacın var
-
Bu adımda kullanılan alet:Tweezers$4.99
-
Press the eject button to view the laser inside.
-
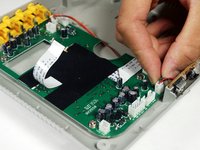
Using the blue plastic tool and the tweezers, remove the ribbon cable.
 FixBot'a Sor
-
-
-
Remove the six 1cm screws on the bottom of the device with the Phillips #1 screwdriver.
-
Pry the top of the device open from the right side where the buttons are located.
-
-
-
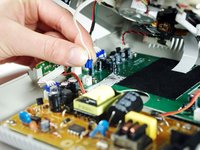
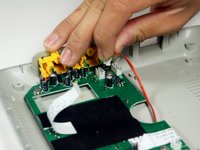
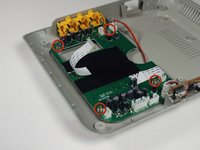
Pinch the plastic adapter with two fingers to remove the wires circled in red from the circuit board.
-
-
-
-
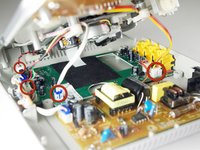
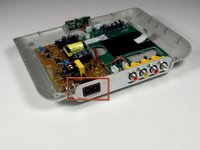
Position the DVD player so that the power and AVI ports are facing you.
-
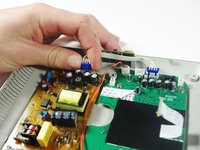
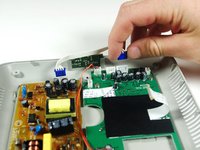
Pull the white cable with the blue adapters off of the circuit boards.
-
-
-
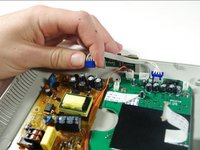
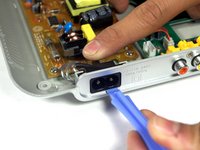
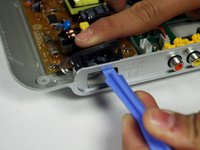
Using the plastic opening tool and your finger, push on the black tab on the inner part of the power port and lift the bottom outer portion of the power port with the plastic opening tool simultaneously.
-
Lift the power port out of the its slot.
-
-
-
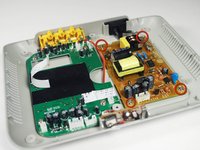
Remove the four 5mm screws circled in red.
-
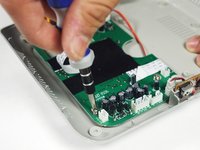
Place the blue plastic tool opener underneath the circuitboard and lift up gently.
-
-
-
Unplug the two, 3-pin ribbon cables, which are attached to the circuitboard.
-
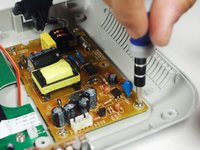
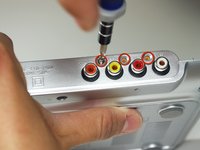
For the other circuit board (the one connected to the AVI ports) there are three 6.35mm screws to remove on the outside of the device.
-
-
-
Remove the four 5mm screws circled in red.
-
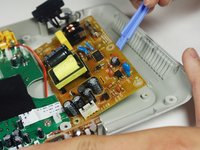
Place the plastic opening tool underneath the circuit board, and lift up genttly. As you lift up, slide the circuitboard in a direction away from the AVI ports.
-
-
-
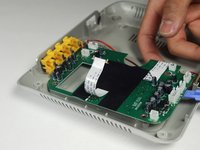
Desolder the items circled in red from the first circuit board you removed.
-


To reassemble your device, follow these instructions in reverse order.
İptal et: Bu kılavuzu tamamlamadım.
Bir başkası bu kılavuzu tamamladı.
Ekip

Cal Poly, Team 10-36, Amido Winter 2012 Cal Poly, Team 10-36, Amido Winter 2012 üyesi
CPSU-AMIDO-W12S10G36
4 Üyeler
7 adet Kılavuz yazıldı