Ana içeriğe geç

ColecoVision Cartridge Reader Replacement

Neye ihtiyacın var

  1. ColecoVision Cartridge Reader Replacement, Cartridge Reader: adım 1, 1 resimden 1.
    • Flip the console upside down and remove the eight 15mm Phillips #1 screws.

  2. ColecoVision Cartridge Reader Replacement: adım 2, 2 resimden 1. ColecoVision Cartridge Reader Replacement: adım 2, 2 resimden 2.
    • Use the metal spudger along the bottom rim of the front panel to safely remove the top of the console. Set aside the top.

  3. ColecoVision Cartridge Reader Replacement: adım 3, 2 resimden 1. ColecoVision Cartridge Reader Replacement: adım 3, 2 resimden 2.
    • Remove the two 15mm Phillips #1 screws holding the casing in place.

    • Remove the casing to reveal the cartridge reader.

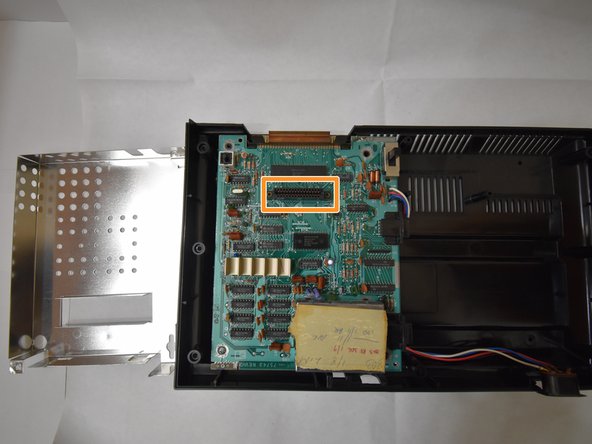
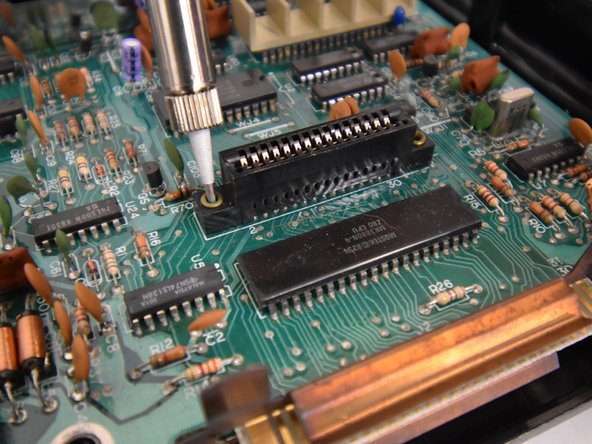
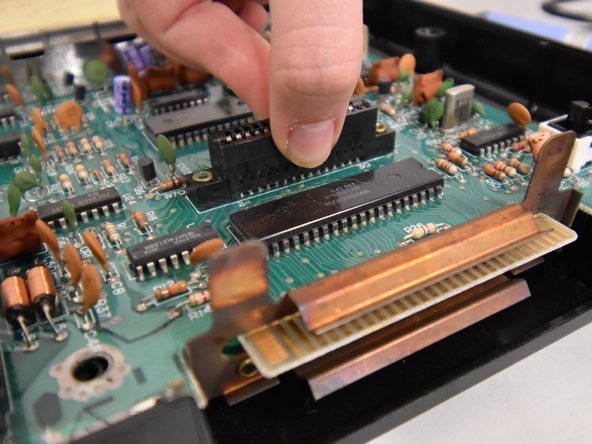
  4. ColecoVision Cartridge Reader Replacement: adım 4, 3 resimden 1. ColecoVision Cartridge Reader Replacement: adım 4, 3 resimden 2. ColecoVision Cartridge Reader Replacement: adım 4, 3 resimden 3.
    Bu adımda kullanılan alet:
    Desoldering Pump
    $3.99
    Satın Al
    • Desolder the sides of the cartridge reader using the soldering iron and desolder pump.

    • Refer to this soldering technique guide for reference

    • Patiently wait for the cartridge reader to cool down after being desoldered.

    • It's very important to remove all the tin from the motherboard and cartridge reader before lifting it from the motherboard. Failure to do so could damage the motherboard.

    • Carefully lift up the cartridge reader. A plastic spudger might be helpful in order to easily remove the cartridge reader.

Sonuç

To reassemble your device, follow these instructions in reverse order.

Anastazia Kidder

Üyelik tarihi: 10/17/18

109 İtibar

1 Kılavuz yazıldı

Ekip

UW Tacoma, Team S1-G2, Rose Fall 2018 UW Tacoma, Team S1-G2, Rose Fall 2018 üyesi

UWT-ROSE-F18S1G2

4 Üyeler

12 adet Kılavuz yazıldı

0 Yorum

Yorum Ekle

İstatistikleri Görüntüle:

Son 24 Saat: 0

Son 7 gün: 3

Son 30 gün: 16

Her zaman: 1,516