Ana içeriğe geç
Onarım Topluluğuna Katılın - Hesap Oluşturun

Compaq Mini 110 Hard Drive Replacement

Neye ihtiyacın var

  1. Compaq Mini 110 Hard Drive Replacement, Battery: adım 1, 2 resimden 1. Compaq Mini 110 Hard Drive Replacement, Battery: adım 1, 2 resimden 2.
    • Locate the battery and the battery tabs on the bottom of the Compaq Mini.

    FixBot'a Sor

    Yorum Ekle

  2. Compaq Mini 110 Hard Drive Replacement: adım 2, 3 resimden 1. Compaq Mini 110 Hard Drive Replacement: adım 2, 3 resimden 2. Compaq Mini 110 Hard Drive Replacement: adım 2, 3 resimden 3.
    • Push both tabs inward simultaneously and slide the battery out.

    FixBot'a Sor

    Yorum Ekle

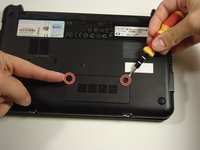
  3. Compaq Mini 110 Hard Drive Replacement, RAM: adım 3, 2 resimden 1. Compaq Mini 110 Hard Drive Replacement, RAM: adım 3, 2 resimden 2.
    • Use a Philips #0 screwdriver to unscrew the two screws covering the memory compartment on the bottom of the laptop and remove the cover.

    FixBot'a Sor

    Yorum Ekle

  4. Compaq Mini 110 Hard Drive Replacement: adım 4, 1 resimden 1.
    • Push out the side tabs simultaneously and pull out the old RAM module.

    • When inserting a new RAM stick, be sure to evenly insert the gold pins in the same orientation that the old module was removed. While sliding the module in, press the side tabs in place.

    FixBot'a Sor

    Yorum Ekle

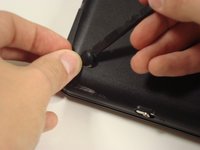
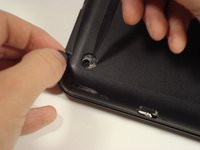
  5. Compaq Mini 110 Hard Drive Replacement, Keyboard: adım 5, 2 resimden 1. Compaq Mini 110 Hard Drive Replacement, Keyboard: adım 5, 2 resimden 2.
    • Remove the rubber pads located on the corners of your Compaq Mini.

    • There may be junk underneath it. This is residue left from the glue that held on the rubber pad. Just scrape it away to find the screw.

    FixBot'a Sor

    Yorum Ekle

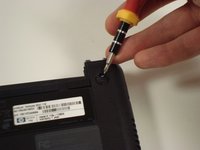
  6. Compaq Mini 110 Hard Drive Replacement: adım 6, 2 resimden 1. Compaq Mini 110 Hard Drive Replacement: adım 6, 2 resimden 2.
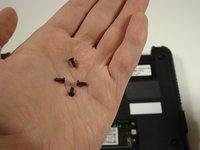
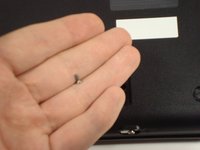
    • Unscrew all the corner screws. There are four total, one under each rubber pad.

    FixBot'a Sor

    Yorum Ekle

  7. Compaq Mini 110 Hard Drive Replacement: adım 7, 2 resimden 1. Compaq Mini 110 Hard Drive Replacement: adım 7, 2 resimden 2.
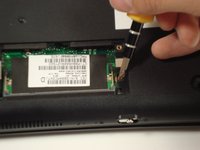
    • Unscrew the screw for the bottom case located in the RAM compartment.

    FixBot'a Sor

    Yorum Ekle

  8. Compaq Mini 110 Hard Drive Replacement: adım 8, 2 resimden 1. Compaq Mini 110 Hard Drive Replacement: adım 8, 2 resimden 2.
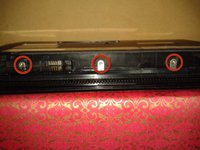
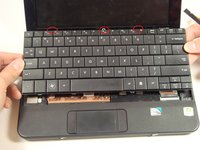
    • Remove the three screws in the silver tabs at the back of the keyboard.

    • These are located at the back of the base under the screen.

    • Lift the keyboard away from the laptop.

    FixBot'a Sor

    Yorum Ekle

  9. Compaq Mini 110 Hard Drive Replacement, Hard Drive: adım 9, 1 resimden 1.
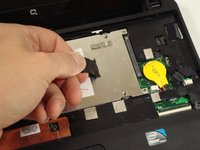
    • Remove the three screws holding the panel in place.

    FixBot'a Sor

    Yorum Ekle

  10. Compaq Mini 110 Hard Drive Replacement: adım 10, 2 resimden 1. Compaq Mini 110 Hard Drive Replacement: adım 10, 2 resimden 2.
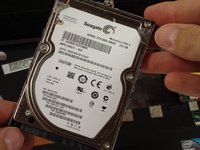
    • Pull up on the tab to remove the hard drive.

    FixBot'a Sor

    Yorum Ekle

Sonuç

To reassemble your device, follow these instructions in reverse order.

İptal et: Bu kılavuzu tamamlamadım.

16 farklı kişi bu kılavuzu tamamladı.

alea

Üyelik tarihi: 10/06/10

1.429 İtibar

14 adet Kılavuz yazıldı

Ekip

Cal Poly, Team 22-2, Maness Fall 2010 Cal Poly, Team 22-2, Maness Fall 2010 üyesi

CPSU-MANESS-F10S22G2

6 Üyeler

20 adet Kılavuz yazıldı

2Kılavuz Yorumları

still cannot remove back of my compacq mini. i have taken all screws out as told but back refuses to part.

madudman - Yanıt Paylaş

still cannot remove back of my compact after removing all screws. are ther any more hidden clips ? mike

madudman - Yanıt Paylaş

Yorum Ekle

İstatistikleri Görüntüle:

Son 24 Saat: 2

Son 7 gün: 23

Son 30 gün: 68

Her zaman: 40,076