Ana içeriğe geç
Creative Nomad Jukebox Zen Display Screen Replacement

Creative Nomad Jukebox Zen Display Screen Replacement

Austin Shaw

Austin Shaw ve 4 diğer katkıda bulunanlar

En son May 17, 2017 tarihinde güncellendi

40 dakika
Orta

Hello! This guide will show you the steps to replace the damaged/cracked screen in your Creative Nomad Jukebox Zen Device and have you listening to your music again in no time! Please use caution when using the soldering tool.

Neye ihtiyacın var

Aletler

Daha fazlasını göster…

  1. Creative Nomad Jukebox Zen Display Screen Replacement, Front and Back Cover: adım 1, 3 resimden 1. Creative Nomad Jukebox Zen Display Screen Replacement, Front and Back Cover: adım 1, 3 resimden 2. Creative Nomad Jukebox Zen Display Screen Replacement, Front and Back Cover: adım 1, 3 resimden 3.
    • Use a J0 screwdriver to remove the eight 3.5mm screws.

  2. Creative Nomad Jukebox Zen Display Screen Replacement: adım 2, 3 resimden 1. Creative Nomad Jukebox Zen Display Screen Replacement: adım 2, 3 resimden 2. Creative Nomad Jukebox Zen Display Screen Replacement: adım 2, 3 resimden 3.
    • Use the plastic opening tool to open the top cover by carefully prying at each corner.

  3. Creative Nomad Jukebox Zen Display Screen Replacement, Screen Cover: adım 3, 1 resimden 1.
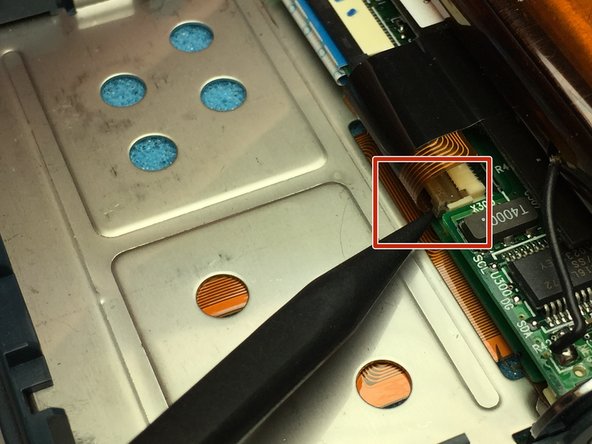
    • Once the front face is removed, remove the three 6.8mm J0 screws from the metal cover and remove it.

  4. Creative Nomad Jukebox Zen Display Screen Replacement, Display Screen: adım 4, 1 resimden 1.
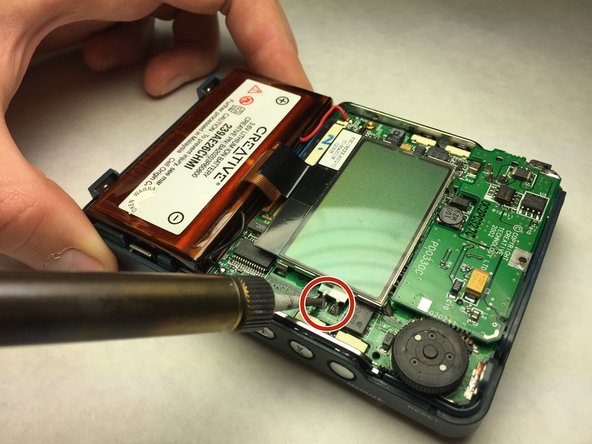
    • Using the plastic opening tool to pop the metal tab holding the battery in place.

    • By breaking the sticker, it could void your warranty

  5. Creative Nomad Jukebox Zen Display Screen Replacement: adım 5, 2 resimden 1. Creative Nomad Jukebox Zen Display Screen Replacement: adım 5, 2 resimden 2.
    • Use the spudger tool to unclip the screens wiring pigtail clipped into the motherboard.

  6. Creative Nomad Jukebox Zen Display Screen Replacement: adım 6, 2 resimden 1. Creative Nomad Jukebox Zen Display Screen Replacement: adım 6, 2 resimden 2.
    • Use soldering iron to melt the solder used to hold the display screen to the motherboard.

    • Using soldering gun with care as it becomes extremely hot and can cause burns.

  7. Creative Nomad Jukebox Zen Display Screen Replacement: adım 7, 1 resimden 1.
    • Using the spudger tool, gently pry up the corners of the display screen to remove it.

Sonuç

To reassemble your device, follow these instructions in reverse order.

Austin Shaw

Üyelik tarihi: 03/08/17

101 İtibar

1 Kılavuz yazıldı

Ekip

IUPUI, Team S4-G5, Baechle Spring 2017 IUPUI, Team S4-G5, Baechle Spring 2017 üyesi

IUPUI-BAECHLE-S17S4G5

4 Üyeler

5 adet Kılavuz yazıldı

0 Yorum

Yorum Ekle

İstatistikleri Görüntüle:

Son 24 Saat: 1

Son 7 gün: 3

Son 30 gün: 7

Her zaman: 591