Giriş
This guide will demonstrate how to replace a faulty battery. Tools needed are: 1mm Phillips head screwdriver and a blunt flat edged tool (a plastic card will work). Keep in mind that since the Creative Zen Vision M was released in 2005, and now discontinued, you may have difficulty purchasing a new battery.
Neye ihtiyacın var
-
-
Pop off the top plastic on the device with a flat tool like a flathead screwdriver.
-
Unscrew and remove the two exposed Phillips head screws
 FixBot'a Sor
-
-
-
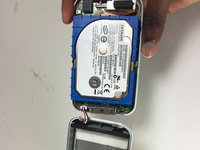
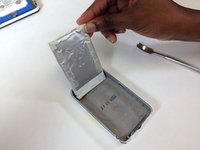
Work your way around the recess of the device with a flat tool like a flathead screwdriver.
-
Don't try attempt to open it from the recess between the buttons and the device.
-
-
-
-
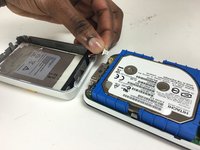
To detach wires from the screen, gently tug on the wires connected to the battery. They are located on the bottom half of the screen.
-
-
-
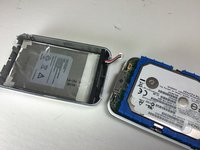
To begin removing the battery, move the wires out from under the black foam at the bottom of the device
-
-
-
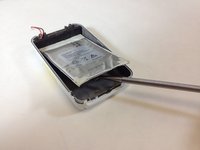
Use a plastic opening tool or nylon spudger to lift up the battery.
-


To reassemble your device, follow these instructions in reverse order.
İptal et: Bu kılavuzu tamamlamadım.
7 farklı kişi bu kılavuzu tamamladı.
Ekip

Texas Tech, Team 12-1, Bennett Fall 2016 Texas Tech, Team 12-1, Bennett Fall 2016 üyesi
TTU-BENNETT-F16S12G1
4 Üyeler
4 adet Kılavuz yazıldı
4Kılavuz Yorumları
Step 1 does not mention that the bottom cover needs to also be removed to access two more screws. Make note of the screw lengths and where they come from.. Two are shorter.
Seconding this, if you try to separate the top and bottom covers before unscrewing the two screws to the sides of the charging/data port you may damage your device irreparably. In my case I had already watched a guide online and I did not damage mine, but after so many years the plastic has degraded and it's very easy to see how you could do some serious damage if you're not careful.
Does anyone know, what do you do if the existing battery goes completely flat, and the unit will not charge. I believe the battery needs replacing. Are these batteries available, and if they do, what is the shelf life of a new battery?
Note that last Vision:M firmware's versions are not compatible with most third-party batteries, especially those with a capacity different than 1400mAh. The symptoms are a battery that is always recognized to be empty and that doesn't charge at all. If it is you case, you need to downgrade to firmware 1.41.01 (or remplace the battery controller board ...). See eg https://www.reddit.com/r/DHExchange/comm...