Ana içeriğe geç

Cricut Explore Air 2 Belt Replacement

Neye ihtiyacın var

  1. Cricut Explore Air 2 Belt Replacement, Front Door: adım 1, 2 resimden 1. Cricut Explore Air 2 Belt Replacement, Front Door: adım 1, 2 resimden 2.
    • On both the left and right sides of the Cricut, locate the two internal screws.

    • Use a Phillips #1 screwdriver bit to unscrew the top 10.8 mm screw and the lower 9.1 mm screw on each side, four screws in total.

  2. Cricut Explore Air 2 Belt Replacement: adım 2, 1 resimden 1.
    • Rotate the Cricut so the bottom faces upwards.

  3. Cricut Explore Air 2 Belt Replacement: adım 3, 2 resimden 1. Cricut Explore Air 2 Belt Replacement: adım 3, 2 resimden 2.
    • Locate the four screws, two on the left and two on the right, with pads attached.

    • Using a Phillips #2 screwdriver, remove all four of the screws and their pads.

  4. Cricut Explore Air 2 Belt Replacement: adım 4, 1 resimden 1.
    • Rotate the Cricut back to an upright position.

  5. Cricut Explore Air 2 Belt Replacement: adım 5, 1 resimden 1.
    • Gently lift the left and right sides of the Cricut's plastic shell off.

  6. Cricut Explore Air 2 Belt Replacement: adım 6, 2 resimden 1. Cricut Explore Air 2 Belt Replacement: adım 6, 2 resimden 2.
    • On the right side of the Cricut, locate the circuit board screwed in to the cover just removed.

    • Locate the four screws securing the circuit board to the shell.

    • Use a Phillips #1 screwdriver to unscrew each of the four 10 mm screws.

  7. Cricut Explore Air 2 Belt Replacement: adım 7, 1 resimden 1.
    • Gently unplug the connector from the circuit board, freeing the right side of the plastic shell completely.

  8. Cricut Explore Air 2 Belt Replacement: adım 8, 2 resimden 1. Cricut Explore Air 2 Belt Replacement: adım 8, 2 resimden 2.
    • On both the left and right sides of the back plastic panel.

    • Using a Phillips #2 screwdriver, unscrew each of the four 5mm screws.

  9. Cricut Explore Air 2 Belt Replacement: adım 9, 2 resimden 1. Cricut Explore Air 2 Belt Replacement: adım 9, 2 resimden 2.
    • Wedge a plastic pryer tool next to the left side of the back panel.

    • Gently pry the left side of the back door from the rest of the machine.

    • Repeat with the right side of the back door to completely remove the back panel.

  10. Cricut Explore Air 2 Belt Replacement: adım 10, 2 resimden 1. Cricut Explore Air 2 Belt Replacement: adım 10, 2 resimden 2.
    • On both the left and right sides, locate the screws securing the top door's hinge.

    • Use a Phillips #1 screwdriver to remove the two 6.5 mm screws on each side, four in total.

  11. Cricut Explore Air 2 Belt Replacement: adım 11, 1 resimden 1.
    • Gently lift the lid off of the Cricut.

  12. Cricut Explore Air 2 Belt Replacement: adım 12, 2 resimden 1. Cricut Explore Air 2 Belt Replacement: adım 12, 2 resimden 2.
    • Locate the screws on the corners of the metal interior plate on both the left and right sides.

    • Unscrew the two the 8 mm screws on each side, four in total.

  13. Cricut Explore Air 2 Belt Replacement: adım 13, 1 resimden 1.
    • Gently lean the metal interior and all that comes with it backwards, exposing the bottom plastic shell of the Cricut.

  14. Cricut Explore Air 2 Belt Replacement: adım 14, 2 resimden 1. Cricut Explore Air 2 Belt Replacement: adım 14, 2 resimden 2.
    • Locate the screws securing the front door hinge to the bottom plate of the Cricut.

    • Unscrew each of the four 5 mm screws on each side, 8 in total.

  15. Cricut Explore Air 2 Belt Replacement: adım 15, 1 resimden 1.
    • Gently remove the front door from the bottom plate of the Cricut.

  16. Cricut Explore Air 2 Belt Replacement, Belt: adım 16, 2 resimden 1. Cricut Explore Air 2 Belt Replacement, Belt: adım 16, 2 resimden 2.
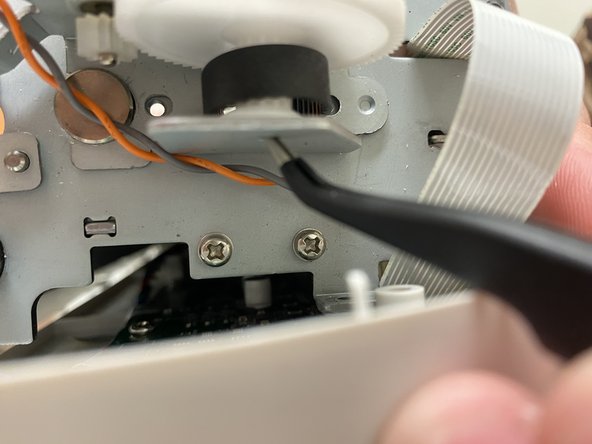
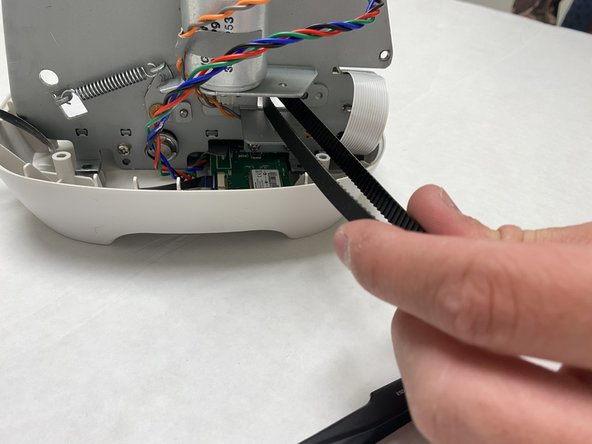
    • On the left side of the Cricut, locate the c-clip attached on the bottom of the belt's housing.

    • Using tweezers, remove the c-clip.

  17. Cricut Explore Air 2 Belt Replacement: adım 17, 1 resimden 1.
    • Pull out the pin that was secured by the c-clip, which runs vertically through the belt's housing.

    • Repeat on the right side of the Cricut.

  18. Cricut Explore Air 2 Belt Replacement: adım 18, 2 resimden 1. Cricut Explore Air 2 Belt Replacement: adım 18, 2 resimden 2.
    • On the left side of the Cricut, gently pull the plastic gear to remove the belt's housing.

    • Do not pull quickly or the belt will tear.

    • Repeat on the right side to fully free the belt.

  19. Cricut Explore Air 2 Belt Replacement: adım 19, 1 resimden 1.
    • From the center of the Cricut, gently pull the belt to remove it from the machine.

Sonuç

To reassemble your device, follow these instructions in reverse order.

0 Yorum

Yorum Ekle

İstatistikleri Görüntüle:

Son 24 Saat: 0

Son 7 gün: 4

Son 30 gün: 28

Her zaman: 68