Bu sürüm, hatalı düzenlemeler içerebilir. En son doğrulanmış bellek kopyası dönün.
Neye ihtiyacın var
-
Bu adım çevrilmemiş. Çevrilmesine yardım edin
-
Place the projector upside down to access the screws on the bottom.
-
Remove the five 7mm long screws using a #3 Phillips screwdriver at least 2 inches long.
-
-
Bu adım çevrilmemiş. Çevrilmesine yardım edin
-
Flip the projector over and then remove the cover by lifting it up.
-
-
Bu adım çevrilmemiş. Çevrilmesine yardım edin
-
Remove the three 6mm PH2 phillips head screws.
-
Disconnect the ribbon cable by flipping up the latch on the connector and then pull the ribbon out.
-
-
-
Bu adım çevrilmemiş. Çevrilmesine yardım edin
-
Disconnect the three wire connectors. Grasp both sides of the connector and pull apart.
-
Lift the motherboard up and place it out of the way.
-
-
Bu adım çevrilmemiş. Çevrilmesine yardım edin
-
Remove the five 7mm PH2 phillips head screws on the black plate and lift the plate out.
-
Lift the aluminum heat sink up to remove it from the projector.
-
-
Bu adım çevrilmemiş. Çevrilmesine yardım edin
-
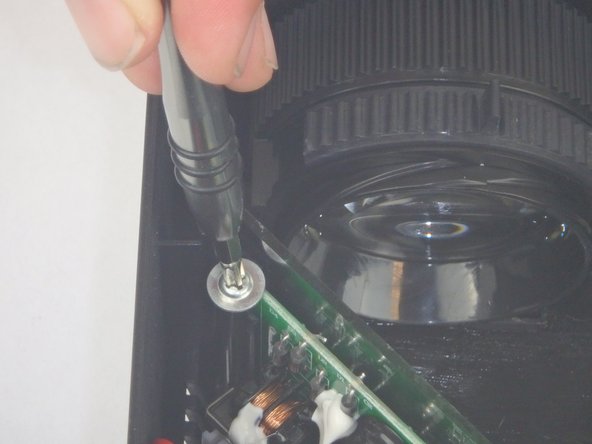
Remove the two 9mm PH2 phillips head screws.
-
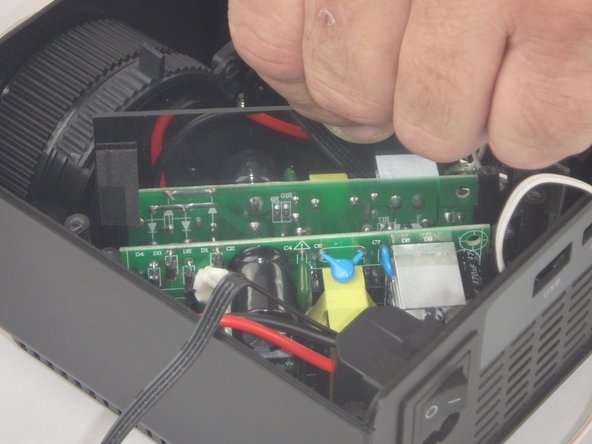
Lift the mirror behind the power supply circuit out to gain access to the circuit board.
-
-
Bu adım çevrilmemiş. Çevrilmesine yardım edin
-
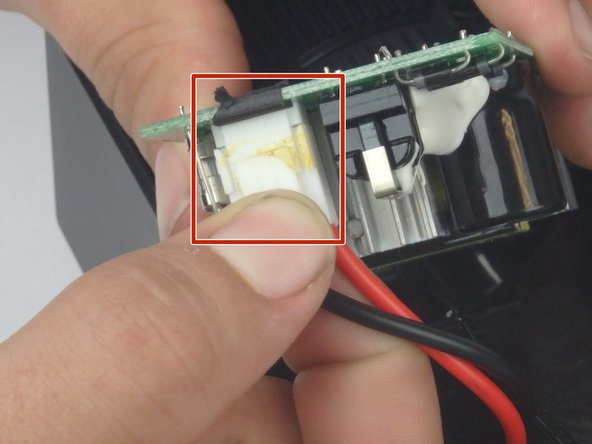
Lift the power supply circuit board out of the projector.
-
Disconnect the cable connector by pulling the two sides of the connector apart.
-
-
Bu adım çevrilmemiş. Çevrilmesine yardım edin
-
Flip the projector over and remove the two 6mm PH2 phillips head screws.
-
Flip the projector over so that the opening is facing up.
-
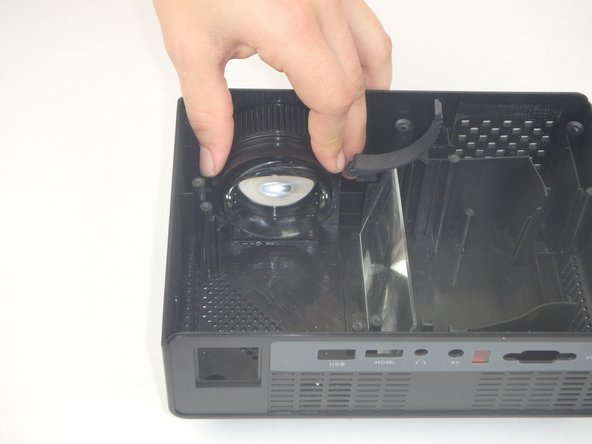
Lift the lens up slightly and then move it towards the interior of the projector before lifting it up and out of the way.
-


İptal et: Bu kılavuzu tamamlamadım.
Bir başkası bu kılavuzu tamamladı.
Ekip

USF Tampa, Team S5-G3, Eyestone Spring 2018 USF Tampa, Team S5-G3, Eyestone Spring 2018 üyesi
USFT-EYESTONE-S18S5G3
3 Üyeler
9 adet Kılavuz yazıldı