Ana içeriğe geç

Bu sürüm, hatalı düzenlemeler içerebilir. En son doğrulanmış bellek kopyası dönün.

Neye ihtiyacın var

  1. Bu adım çevrilmemiş. Çevrilmesine yardım edin

    : adım 1, 1 resimden 1.
    • WARNING: Before working inside your computer, read the safety information that shipped with your computer and follow the steps in Before You Begin.

    • WARNING: If you remove the hard drive from the computer when the drive is hot, do not touch the metal housing of the hard drive.

    • Loosen the captive screws that secure the hard-drive assembly to the computer base.

  2. Bu adım çevrilmemiş. Çevrilmesine yardım edin

    : adım 2, 1 resimden 1.
    • Using the pull-tab, lift the hard-drive assembly to disconnect it from the connector on the system board.

  3. Bu adım çevrilmemiş. Çevrilmesine yardım edin

    : adım 3, 1 resimden 1.
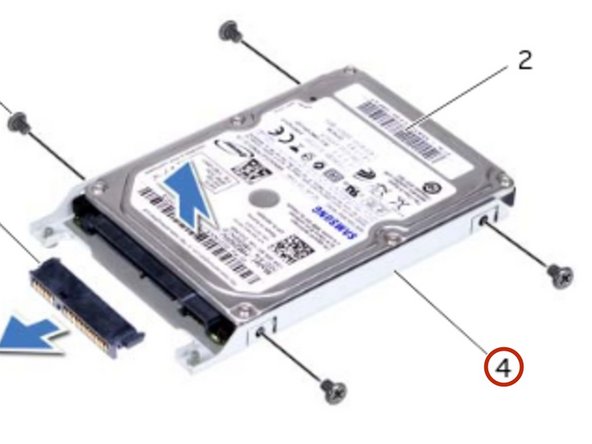
    • Lift the hard-drive assembly out of the computer base.

  4. Bu adım çevrilmemiş. Çevrilmesine yardım edin

    : adım 4, 1 resimden 1.
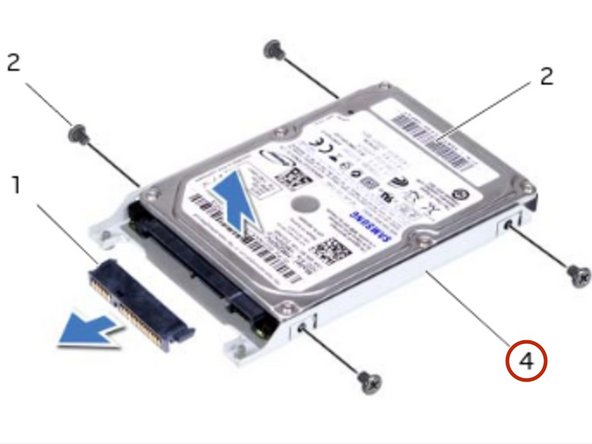
    • Remove the screws that secure the hard drive to the hard-drive bracket.

  5. Bu adım çevrilmemiş. Çevrilmesine yardım edin

    : adım 5, 2 resimden 1. : adım 5, 2 resimden 2.
    • Lift the hard-drive off the hard-drive bracket.

  6. Bu adım çevrilmemiş. Çevrilmesine yardım edin

    : adım 6, 1 resimden 1.
    • Remove the interposer from the hard drive.

  7. Bu adım çevrilmemiş. Çevrilmesine yardım edin

    : adım 7, 2 resimden 1. : adım 7, 2 resimden 2.
    • Connect the interposer to the NEW hard drive.

  8. Bu adım çevrilmemiş. Çevrilmesine yardım edin

    : adım 8, 2 resimden 1. : adım 8, 2 resimden 2.
    • Place the hard drive in the hard-drive bracket.

  9. Bu adım çevrilmemiş. Çevrilmesine yardım edin

    : adım 9, 1 resimden 1.
    • Replace the screws that secure the hard drive to the hard-drive bracket.

  10. Bu adım çevrilmemiş. Çevrilmesine yardım edin

    : adım 10, 1 resimden 1.
    • Align the connector on the hard drive with the connector on the system board and press the hard drive until it is fully seated.

  11. Bu adım çevrilmemiş. Çevrilmesine yardım edin

    : adım 11, 1 resimden 1.
    • Tighten the captive screws that secure the hard-drive assembly to the computer base.

Bitiş Çizgisi

Terrence15

Üyelik tarihi: 12/18/17

79.131 İtibar

441 adet Kılavuz yazıldı

Ekip

RampUP America, Inc. RampUP America, Inc. üyesi

Community

42 Üyeler

1.986 adet Kılavuz yazıldı

0 Yorum

Yorum Ekle

İstatistikleri Görüntüle:

Son 24 Saat: 0

Son 7 gün: 6

Son 30 gün: 14

Her zaman: 1,525