Bu sürüm, hatalı düzenlemeler içerebilir. En son doğrulanmış bellek kopyası dönün.
Neye ihtiyacın var
-
Bu adım çevrilmemiş. Çevrilmesine yardım edin
-
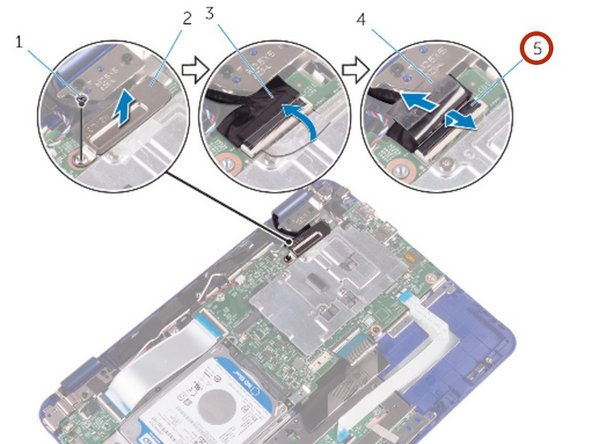
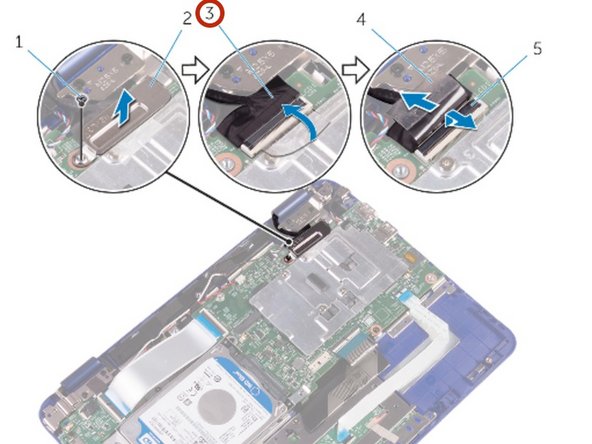
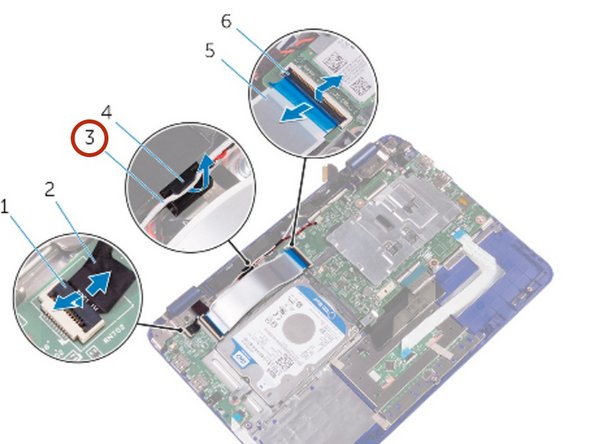
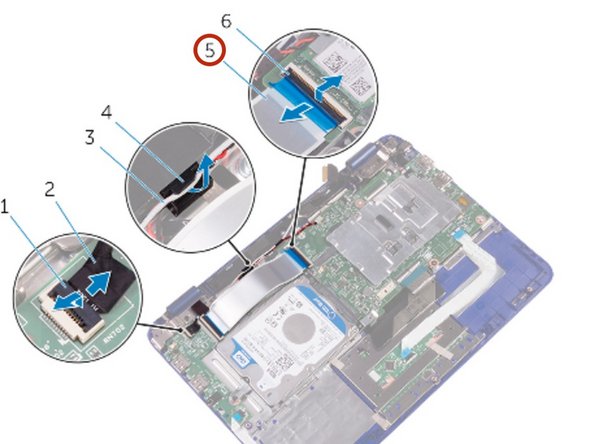
Remove the screw that secures the display-cable bracket to the system board.
-
-
Bu adım çevrilmemiş. Çevrilmesine yardım edin
-
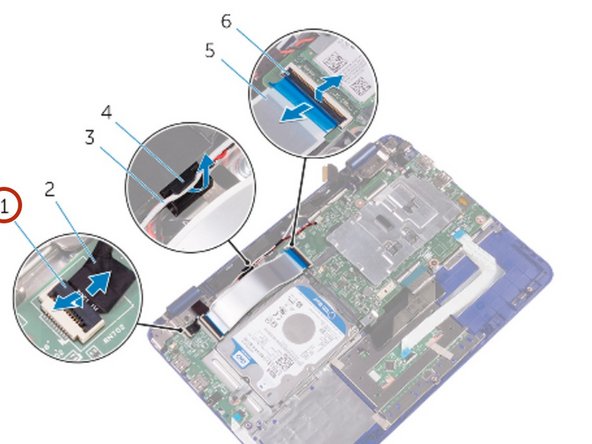
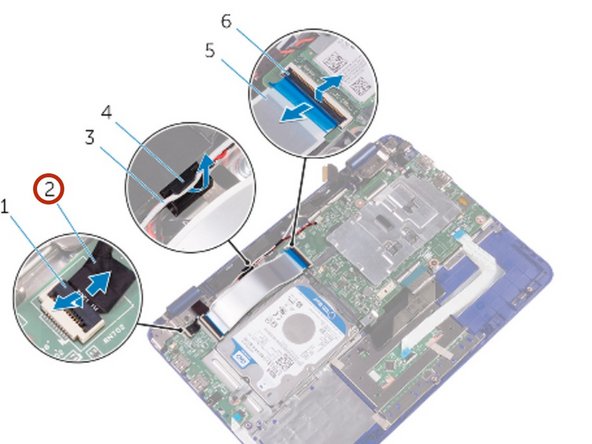
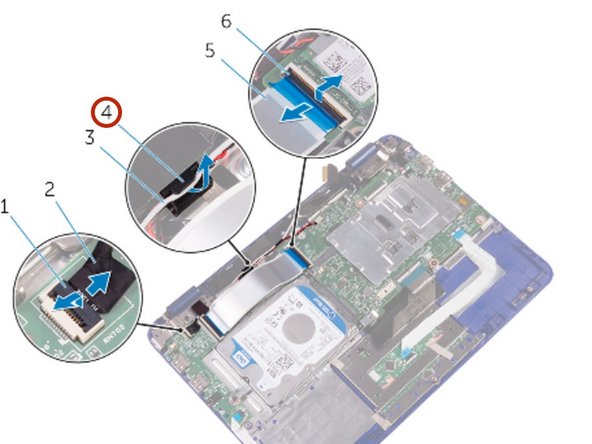
Open the latch and disconnect the sensor-board cable from the I/O board.
-
-
Bu adım çevrilmemiş. Çevrilmesine yardım edin
-
Remove the antenna cable from the routing guide on the right speaker.
-
-
Bu adım çevrilmemiş. Çevrilmesine yardım edin
-
Open the latch and disconnect the I/O-board cable from the system board.
-
-
-
Bu adım çevrilmemiş. Çevrilmesine yardım edin
-
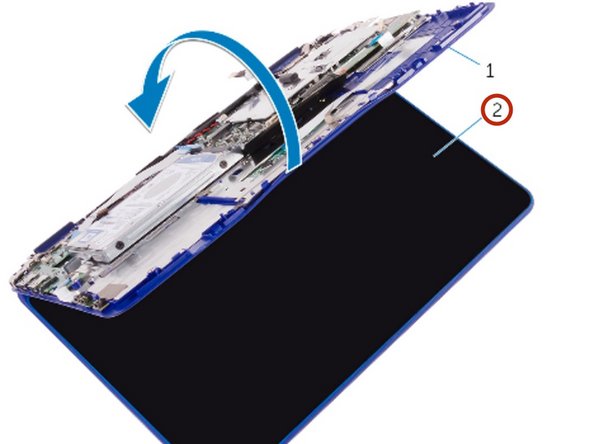
Turn the computer over and open the display as far as possible.
-
-
Bu adım çevrilmemiş. Çevrilmesine yardım edin
-
Place the computer face down on a flat surface.
-
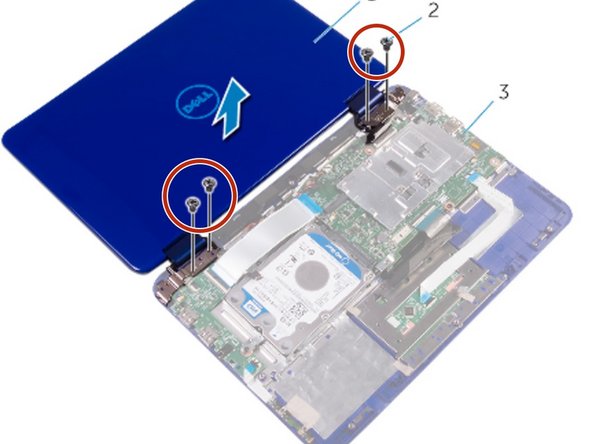
Remove the screws that secure the display assembly to the palm-rest and keyboard assembly.
-
-
Bu adım çevrilmemiş. Çevrilmesine yardım edin
-
Lift the display assembly off the palm-rest and keyboard assembly.
-
-
Bu adım çevrilmemiş. Çevrilmesine yardım edin
-
Place the NEW display assembly on the palm-rest and keyboard assembly.
-
-
Bu adım çevrilmemiş. Çevrilmesine yardım edin
-
Align the screw holes on the display hinges with the screw holes on the palm-rest and keyboard assembly.
-
-
Bu adım çevrilmemiş. Çevrilmesine yardım edin
-
Replace the screws that secure the display assembly to the palm-rest and keyboard assembly.
-
-
Bu adım çevrilmemiş. Çevrilmesine yardım edin
-
Turn the computer over and close the display.
-
Slide the I/O-board cable into its slot on the system board and press down the latch to secure the cable.
-
-
Bu adım çevrilmemiş. Çevrilmesine yardım edin
-
Route the antenna cable through its routing on the right speaker.
-
-
Bu adım çevrilmemiş. Çevrilmesine yardım edin
-
Slide the sensor-board cable into its slot on the I/O board and press down the latch to secure the cable.
-
-
Bu adım çevrilmemiş. Çevrilmesine yardım edin
-
Slide the display cable into its slot on the system board and press down the latch to secure the cable.
-
-
Bu adım çevrilmemiş. Çevrilmesine yardım edin
-
Align the screw hole on the display-cable bracket with the screw hole on the system board.
-
-
Bu adım çevrilmemiş. Çevrilmesine yardım edin
-
Replace the screw that secures the display-cable bracket to the system board.
-


Ekip
