Bu sürüm, hatalı düzenlemeler içerebilir. En son doğrulanmış bellek kopyası dönün.
Neye ihtiyacın var
-
Bu adım çevrilmemiş. Çevrilmesine yardım edin
-
Remove the 10 - M2.5 x 8mm screws located on the bottom of the device.
-
Detach and remove the Bottom Base Cover using an opening tool to pry it off.
-
-
Bu adım çevrilmemiş. Çevrilmesine yardım edin
-
Unplug and gently pull the hard drive cable to loosen it.
-
Remove the 2 - M2 x 3mm screws.
-
Remove the Battery.
-
-
Bu adım çevrilmemiş. Çevrilmesine yardım edin
-
Remove the 2 - M2 x 3mm hard drive screws.
-
Remove the Hard Drive.
-
-
Bu adım çevrilmemiş. Çevrilmesine yardım edin
-
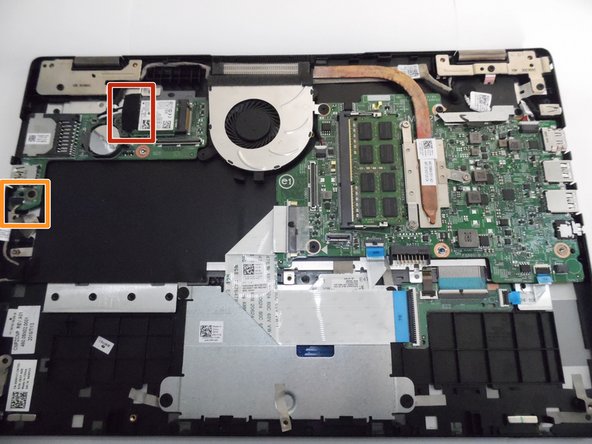
Unplug the fan cable.
-
Unplug and remove the daughter board cable.
-
-
Bu adım çevrilmemiş. Çevrilmesine yardım edin
-
Unplug the antenna cables.
-
Unplug the power button cable.
-
-
Bu adım çevrilmemiş. Çevrilmesine yardım edin
-
Remove the 1 - M2 x 3mm screw.
-
Remove the USB / SD Card Circuit Board.
-
-
-
Bu adım çevrilmemiş. Çevrilmesine yardım edin
-
Remove the 1 - M2 x 3mm and 1 - M2 x 2mm Wafer screw.
-
Remove the Cooling Fan.
-
-
Bu adım çevrilmemiş. Çevrilmesine yardım edin
-
Remove the 2 - M2 x 3mm bracket screws.
-
Remove the LCD cable bracket.
-
-
Bu adım çevrilmemiş. Çevrilmesine yardım edin
-
Open the screen.
-
Loosen the LCD cable and peel it off of the base (highlighted with arrow).
-
Remove the 3 - M2.5 x 8mm hinge screws.
-
-
Bu adım çevrilmemiş. Çevrilmesine yardım edin
-
Unplug the cable.
-
Remove the 1 - M2 x 3mm screw.
-
Remove the DC Jack.
-
-
Bu adım çevrilmemiş. Çevrilmesine yardım edin
-
Loosen the keyboard cable tape.
-
Loosen the keyboard cable latches.
-
Unplug the keyboard cable.
-
-
Bu adım çevrilmemiş. Çevrilmesine yardım edin
-
Unplug the keyboard backlight cable.
-
Unplug the touchpad cable.
-
-
Bu adım çevrilmemiş. Çevrilmesine yardım edin
-
Remove the 1 - M2 x 2mm Wafer screw.
-
Remove the Motherboard.
-
The piece remaining is the Palmrest Keyboard.
-
-
Bu adım çevrilmemiş. Çevrilmesine yardım edin
-
Unscrew the 4 - 2x2mm wafer screws.
-
Peel back any tape holding the back plate on.
-
Lift and remove back plate.
-
-
Bu adım çevrilmemiş. Çevrilmesine yardım edin
-
Peel back under-button tape.
-
Remove touchpad.
-
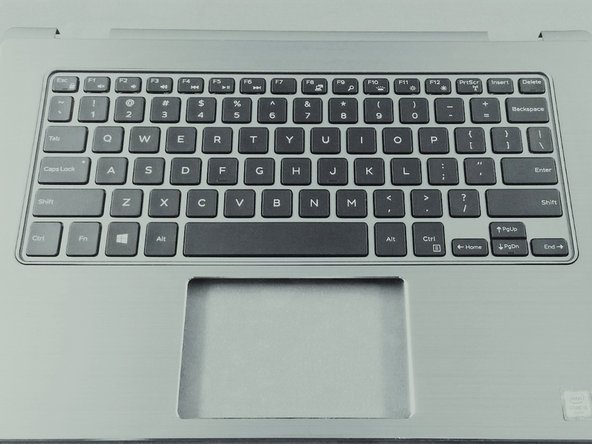
You have now stripped the keyboard! It is ready to be replaced.
-


İptal et: Bu kılavuzu tamamlamadım.
5 farklı kişi bu kılavuzu tamamladı.
Ekli Belgeler
Ekip

University of Memphis, Team S2-G2, Kim Spring 2017 University of Memphis, Team S2-G2, Kim Spring 2017 üyesi
UM-KIM-S17S2G2
4 Üyeler
1 Kılavuz yazıldı