Giriş
Use this guide to replace the DC jack in your Dell Inspiron 15 5584.
The DC jack is a piece of hardware that allows for the intake of charge to your battery, and therefore, power to the rest of your computer. If the DC jack fails, your laptop will not take charge and will eventually lose power, becoming unable to function.
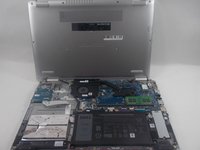
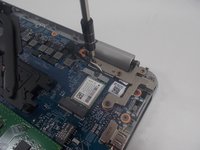
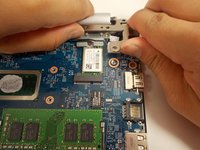
Before using this guide, ensure that the issue is not your charger or wall outlet. Utilize caution when removing the DC jack as it is linked into the motherboard, which is sensitive and easy to damage. Furthermore, ensure your device's battery is drained and your device is shut off.
Neye ihtiyacın var
-
-
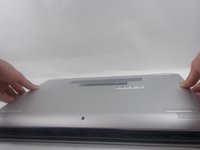
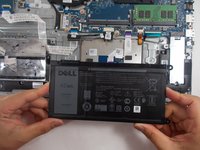
Turn over the laptop so that the bottom is facing upwards, and the Inspiron logo is upside-down.
-
-
-
-
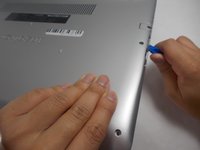
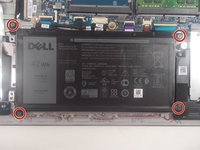
Remove the four 3.5 mm screws holding the battery down with a JIS #0 screwdriver.
-
-
-
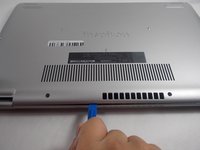
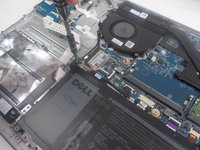
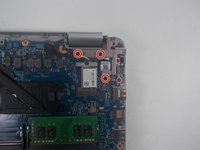
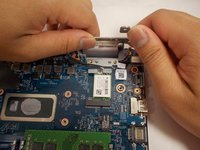
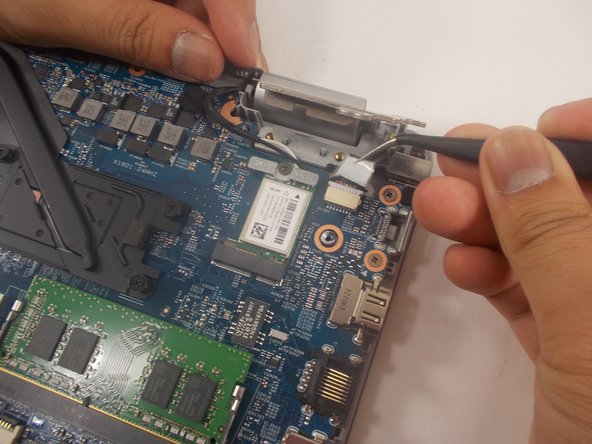
Remove the three 6 mm screws holding down the screen hinge in the upper right corner using a JIS #0 screwdriver.
-


To reassemble your device, follow these instructions in reverse order.
To reassemble your device, follow these instructions in reverse order.
İptal et: Bu kılavuzu tamamlamadım.
Bir başkası bu kılavuzu tamamladı.

Ekip

UMass Dartmouth, Team 1-1, Mellen Spring 2022 UMass Dartmouth, Team 1-1, Mellen Spring 2022 üyesi
UMASSD-MELLEN-S22S1G1
3 Üyeler
10 adet Kılavuz yazıldı
1Rehber Yorum
it is important to replace an OEM and New dc jack, you may check these pages:
https://www.dcjks.com/dell-inspiron-5584...
Amazon.com: Laptop DC Power Jack for DELL Inspiron 15 5584 P85F 0TM5N3 TM5N3 New : Electronics