Giriş
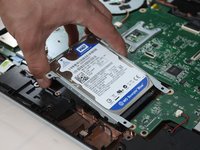
This guide will walk you through removing and replacing your Dell Inspiron 17R-N7110 hard drive. You will be handling and working with delicate electronic components, so be sure to wear the anti-static wrist strap for this replacement.
Neye ihtiyacın var
-
Bu adımda kullanılan alet:Anti-Static Wrist Strap$7.95
-
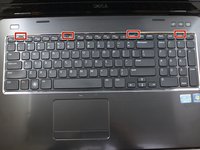
Place the laptop on a flat surface with the Dell logo upside down.
-
Flip the laptop over. The battery will be in the top center.
-
-
-
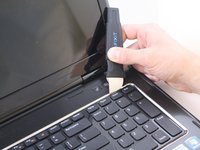
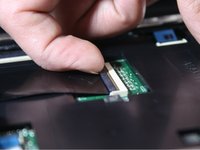
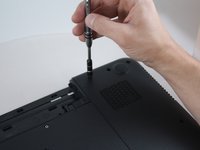
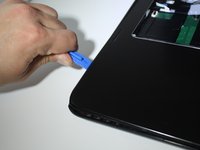
Flip over and open your device. Gently wedge the metal Jimmy into the rightmost hole at a 45-degree angle. Make sure that the Jimmy is between the silver metal portion of the keyboard and the silver plastic edge around the keyboard.
-
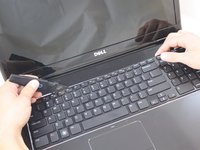
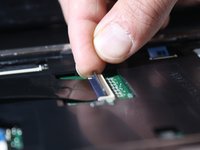
Tilt the metal jimmy away from you to pry up the edge of the keyboard.
-
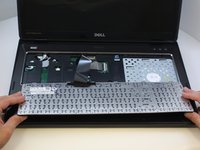
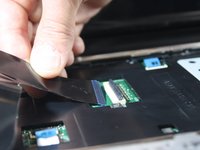
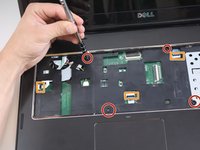
Repeat the previous actions on each of the other three holes to release the keyboard.
-
-
-
-
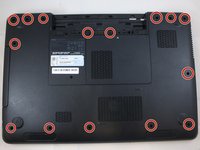
Flip the laptop over so it is bottom-up.
-
Use a Phillips #0 screwdriver to unscrew the fifteen 5mm screws pictured.
-
-
-
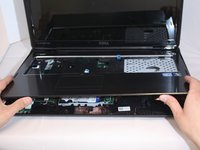
Optical drive MUST be removed beforehand: remove the screw on bottom of laptop on the small panels that has the service tag number. Then use a paperclip to eject the drive and pull it out. This reveals the two small silver screws that attach the top cover. Remove those screws prior to prying off the cover.
-


To reassemble your device, follow these instructions in reverse order.
To reassemble your device, follow these instructions in reverse order.
İptal et: Bu kılavuzu tamamlamadım.
17 farklı kişi bu kılavuzu tamamladı.
Ekip

Eastern Washington University, Team S1-G4, Carnegie Spring 2018 Eastern Washington University, Team S1-G4, Carnegie Spring 2018 üyesi
EWU-CARNEGIE-S18S1G4
4 Üyeler
7 adet Kılavuz yazıldı
5 Yorum
Good guide, but missing a step. In the one I disassembled, the optical drive needed to be removed (it just slides out), and two screws that were holding in the keyboard needed to be removed before the keyboard would come out.
Yes that step is ESSENTIAL. Had I known that, I’d have saved 15 minutes as I tried to remove the top cover without destroying my client’s laptop. Really unfortunate to not have that step included NOW, it really can’t be isolated in the comments.
frank -