Giriş
This guide will walk you through removing and replacing your Dell Inspiron 17R-N7110 RAM stick(s). You will be handling delicate electronic components during this process, so be sure to wear the anti-static wrist strap for this replacement.
Neye ihtiyacın var
-
Bu adımda kullanılan alet:Anti-Static Wrist Strap$7.95
-
Place the laptop on a flat surface with the Dell logo upside down.
-
Flip the laptop over. The battery will be in the top center.
-
-
-
-
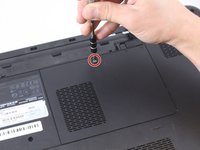
Using a Phillips #1 screwdriver, unscrew the .7mm screw at the top of the RAM compartment as pictured.
-
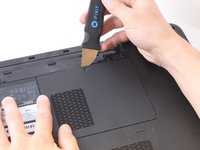
Use a metal Jimmy to pry open the RAM cover from the top of the compartment.
-
-
Bu adımda kullanılan alet:Anti-Static Wrist Strap$7.95
-
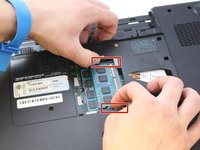
There are two small plastic prongs to the sides of the first RAM stick. Push the prongs away from each other to release the RAM stick.
-
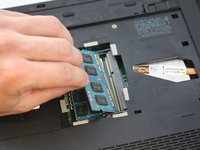
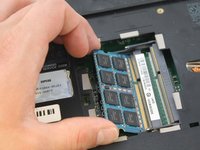
Gently remove the RAM stick.
-
If your laptop has a second RAM stick located underneath the first one, repeat this step to remove it.
-


To reassemble your device, follow these instructions in reverse order.
To reassemble your device, follow these instructions in reverse order.
İptal et: Bu kılavuzu tamamlamadım.
2 farklı kişi bu kılavuzu tamamladı.
Ekip

Eastern Washington University, Team S1-G4, Carnegie Spring 2018 Eastern Washington University, Team S1-G4, Carnegie Spring 2018 üyesi
EWU-CARNEGIE-S18S1G4
4 Üyeler
7 adet Kılavuz yazıldı