Bu sürüm, hatalı düzenlemeler içerebilir. En son doğrulanmış bellek kopyası dönün.
Neye ihtiyacın var
-
Bu adım çevrilmemiş. Çevrilmesine yardım edin
-
Switch off the laptop and remove the battery.
-
The keyboard is held by 4x locking clips.
-
By using cutter, carefully lift up the one side of the keyboard and start opening the locking clips.
-
-
Bu adım çevrilmemiş. Çevrilmesine yardım edin
-
Remove the RAM memory cover and the DVD drive.
-
Now you have 12x M 2.5x5.0 screws.
-
-
Bu adım çevrilmemiş. Çevrilmesine yardım edin
-
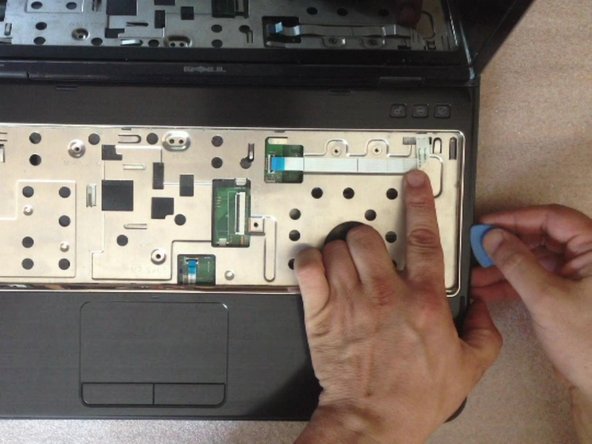
Unscrew 4x M 2.5x5.0 screws and disconnect the 3x flex cables:
-
Power on flex cable
-
Mouse pad flex cable
-
Hot keys flex cable
-
By using a plastic tool remove the upper case.
-
-
-
Bu adım çevrilmemiş. Çevrilmesine yardım edin
-
Disconnect:
-
The LCD display flex cable
-
The WiFi & Blue-tooth coaxial cables
-
The speaker connector.
-
Remove 4x M 2.5.0.5 screws from the Display module hinges.
-
Now you can remove the LCD display module.
-
-
Bu adım çevrilmemiş. Çevrilmesine yardım edin
-
5x M 2,5x5.0 screws hold the motherboard to the down bezel.
-
Be careful with these two connectors:
-
between motherboard and the additional charging port board,
-
between motherboard and the additional WiFi card slot, USB connectors board.
-
Start removing the motherboard from right side, near to the DVD drive connector.
-
-
Bu adım çevrilmemiş. Çevrilmesine yardım edin
-
Finally you can find the hard disk drive on the back side of the motherboard.
-
Remove the last two screws securing the hard drive.
-
-
Bu adım çevrilmemiş. Çevrilmesine yardım edin
-
When you are installing the new HDD, hold the SATA connector with one finger.
-
Now assemble the system. I hope everything was successful.
-
.
-


İptal et: Bu kılavuzu tamamlamadım.
48 farklı kişi bu kılavuzu tamamladı.

Ekip

20 Yorum
My model seemed to be slightly different and I couldn't get the upper case off from the side. I started from the top left near the power button.
My model was also just a little different. There were two screws holding a bracket to the MB located on the upper edge of the hard drive in your final picture. I had to remove these two screws and then there were 4 screws mounting this bracket to the HD. Also there was some adhesive strips on the under side of the hard drive that stuck the HD to the MB. I had to slowly pull the hard drive from the SATA connector.
Well I think I will leave it to the experts