Ana içeriğe geç

Dell Latitude 7390 Bottom Panel Replacement

Neye ihtiyacın var

  1. Dell Latitude 7390 Bottom Panel Replacement, Bottom Panel: adım 1, 1 resimden 1.
    • Orient your Dell Latitude 7390 laptop so that it is facing towards you as if you're going to open it.

  2. Dell Latitude 7390 Bottom Panel Replacement: adım 2, 3 resimden 1. Dell Latitude 7390 Bottom Panel Replacement: adım 2, 3 resimden 2. Dell Latitude 7390 Bottom Panel Replacement: adım 2, 3 resimden 3.
    • Flip your laptop over so that the bottom is facing up.

  3. Dell Latitude 7390 Bottom Panel Replacement: adım 3, 1 resimden 1.
    • Using your Phillips #1 screwdriver, remove the eight 6 mm screws around the border of the bottom panel.

  4. Dell Latitude 7390 Bottom Panel Replacement: adım 4, 2 resimden 1. Dell Latitude 7390 Bottom Panel Replacement: adım 4, 2 resimden 2.
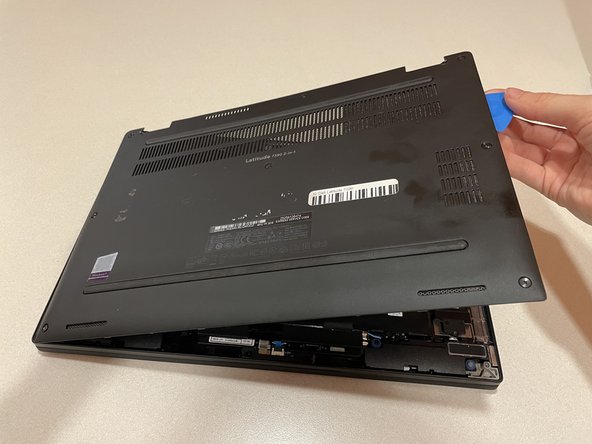
    • Using an opening tool or picks, work your way around the periphery and pry the back case off.

  5. Dell Latitude 7390 Bottom Panel Replacement: adım 5, 1 resimden 1.
    • Finally, lift the back panel off to uncover the inside of your Dell Latitude 7390.

Sonuç

To reassemble your device, follow these instructions in reverse order.

Julia Blahut

Üyelik tarihi: 02/22/22

303 İtibar

2 adet Kılavuz yazıldı

Ekip

Clemson, Team 1-4, Hunter Spring 2022 Clemson, Team 1-4, Hunter Spring 2022 üyesi

CLEM-HUNTER-S22S1G4

5 Üyeler

5 adet Kılavuz yazıldı

0 Yorum

Yorum Ekle

İstatistikleri Görüntüle:

Son 24 Saat: 4

Son 7 gün: 9

Son 30 gün: 23

Her zaman: 678