Ana içeriğe geç
Onarım Topluluğuna Katılın - Hesap Oluşturun

Dell Vostro 1710 Keyboard Replacement

Neye ihtiyacın var

  1. Dell Vostro 1710 Keyboard Replacement, Battery: adım 1, 2 resimden 1. Dell Vostro 1710 Keyboard Replacement, Battery: adım 1, 2 resimden 2.
    • Make certain that the power to your laptop is off.

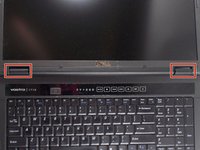
    • Press and slide the two buttons outwards and away from the battery.

    FixBot'a Sor
  2. Dell Vostro 1710 Keyboard Replacement: adım 2, 1 resimden 1.
    • Slide the battery away and parallel from the laptop.

    FixBot'a Sor
  3. Dell Vostro 1710 Keyboard Replacement: adım 3, 1 resimden 1.
    • Remove the battery from the slot.

    FixBot'a Sor
  4. Dell Vostro 1710 Keyboard Replacement, Keyboard: adım 4, 3 resimden 1. Dell Vostro 1710 Keyboard Replacement, Keyboard: adım 4, 3 resimden 2. Dell Vostro 1710 Keyboard Replacement, Keyboard: adım 4, 3 resimden 3.
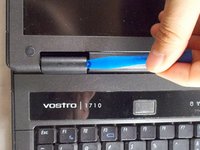
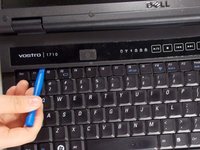
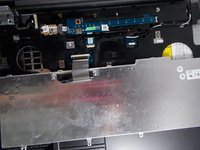
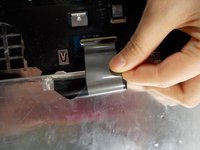
    • Use the plastic opening tool to loosen the plastic hinge cover that is located above the keyboard.

    FixBot'a Sor
  5. Dell Vostro 1710 Keyboard Replacement: adım 5, 2 resimden 1. Dell Vostro 1710 Keyboard Replacement: adım 5, 2 resimden 2.
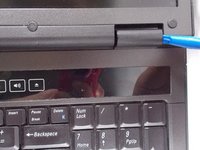
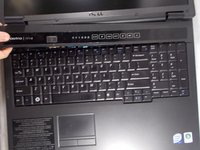
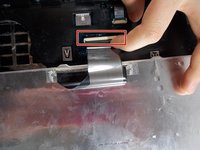
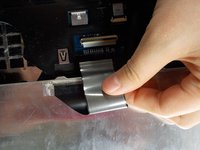
    • Remove plastic hinge cover by gently lifting up the cover with a plastic opening tool from one side to the other.

    FixBot'a Sor
  6. Dell Vostro 1710 Keyboard Replacement: adım 6, 2 resimden 1. Dell Vostro 1710 Keyboard Replacement: adım 6, 2 resimden 2.
    • Remove the four 3mm Philips #1 head screws.

    FixBot'a Sor
  7. Dell Vostro 1710 Keyboard Replacement: adım 7, 2 resimden 1. Dell Vostro 1710 Keyboard Replacement: adım 7, 2 resimden 2.
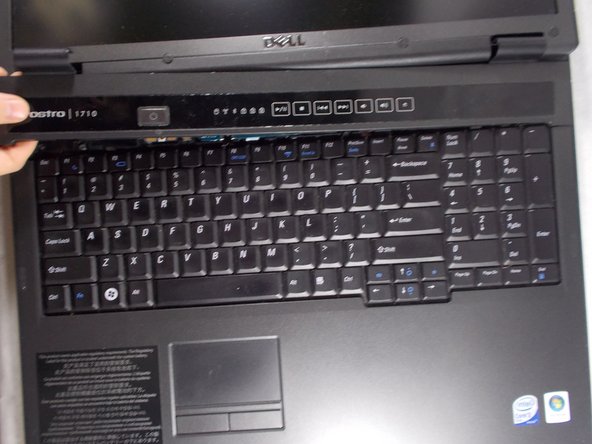
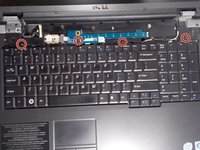
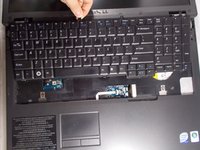
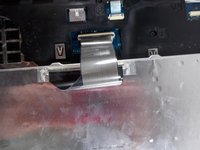
    • Gently lift up the keyboard to remove.

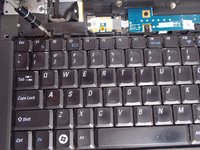
    • Flip it over as it shown in the picture.

    FixBot'a Sor
  8. Dell Vostro 1710 Keyboard Replacement: adım 8, 2 resimden 1. Dell Vostro 1710 Keyboard Replacement: adım 8, 2 resimden 2.
    • Lift the black tab that the keyboard is plugged into.

    FixBot'a Sor
  9. Dell Vostro 1710 Keyboard Replacement: adım 9, 2 resimden 1. Dell Vostro 1710 Keyboard Replacement: adım 9, 2 resimden 2.
    • Pull directly outwards to remove the keyboard completely.

    FixBot'a Sor
Sonuç

To reassemble your device, follow these instructions in reverse order.

Tangxiao Sun

Üyelik tarihi: 03/19/18

496 İtibar

4 adet Kılavuz yazıldı

Ekip

UMass Dartmouth, Team S3-G7, Peak Spring 2018 UMass Dartmouth, Team S3-G7, Peak Spring 2018 üyesi

UMASSD-PEAK-S18S3G7

3 Üyeler

8 adet Kılavuz yazıldı

0Kılavuz Yorumları

Yorum Ekle

İstatistikleri Görüntüle:

Son 24 Saat: 1

Son 7 gün: 8

Son 30 gün: 37

Her zaman: 946