Ana içeriğe geç

Dell Vostro 3560 Hard Drive Replacement

Neye ihtiyacın var

  1. Dell Vostro 3560 Hard Drive Replacement, Identify your laptop: adım 1, 2 resimden 1. Dell Vostro 3560 Hard Drive Replacement, Identify your laptop: adım 1, 2 resimden 2.
    • Make sure you have the right laptop by checking the sticker.

  2. Dell Vostro 3560 Hard Drive Replacement, Remove Battery: adım 2, 2 resimden 1. Dell Vostro 3560 Hard Drive Replacement, Remove Battery: adım 2, 2 resimden 2.
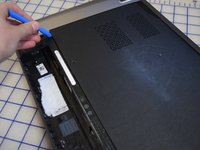
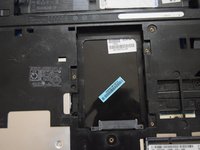
    • Start with your PC shut off and upside down.
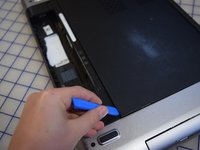
    • Pull out tabs.

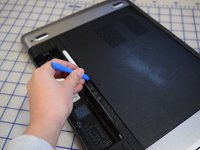
    • Pull up on rail to remove battery.

  3. Dell Vostro 3560 Hard Drive Replacement, Remove Back Panel: adım 3, 1 resimden 1.
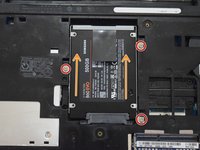
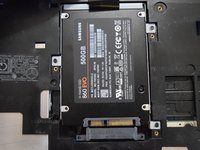
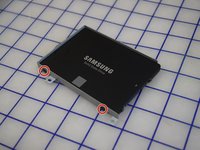
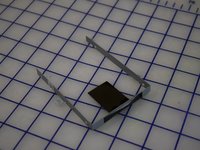
    • Remove the two screws:

    • One M2 Phillips screw (Fixed)

    • One 5-mm M2 Phillips screw

  4. Dell Vostro 3560 Hard Drive Replacement: adım 4, 3 resimden 1. Dell Vostro 3560 Hard Drive Replacement: adım 4, 3 resimden 2. Dell Vostro 3560 Hard Drive Replacement: adım 4, 3 resimden 3.
    • Use a iFixit opening tool to remove the back panel.

  5. Dell Vostro 3560 Hard Drive Replacement: adım 5, 1 resimden 1.
    • From here you can access:

    • The hard drive

    • The RAM.

    • The CD Drive.

  6. Dell Vostro 3560 Hard Drive Replacement, Hard Drive Removal: adım 6, 1 resimden 1.
    • We will work on the hard drive.

  7. Dell Vostro 3560 Hard Drive Replacement: adım 7, 3 resimden 1. Dell Vostro 3560 Hard Drive Replacement: adım 7, 3 resimden 2. Dell Vostro 3560 Hard Drive Replacement: adım 7, 3 resimden 3.
    • Remove the three 2.8-mm M2 Phillips screws.

    • Once you have removed the screws, gently pull the tab up to disconnect the hard drive.

    • Remove the hard drive assembly from the frame by pulling it straight up.

  8. Dell Vostro 3560 Hard Drive Replacement: adım 8, 3 resimden 1. Dell Vostro 3560 Hard Drive Replacement: adım 8, 3 resimden 2. Dell Vostro 3560 Hard Drive Replacement: adım 8, 3 resimden 3.
    • After removing the hard drive assembly from the frame, remove the four 3-mm M3 Phillips screws.

    • Once the screws are removed, remove the hard drive from the hard drive frame.

    • When re-mounting the hard drive into the hard drive frame, be sure to install the hard drive so that the underside of the hard drive is on the side of the frame with the tab. Also, make sure to put the Sata ports on the side opposite the tab so that they are not covered.

Sonuç

To reassemble your device, follow these instructions in reverse order.

2 farklı kişi bu kılavuzu tamamladı.

Max Bareilles

Üyelik tarihi: 02/24/20

664 İtibar

5 adet Kılavuz yazıldı

0 Yorum

Yorum Ekle

İstatistikleri Görüntüle:

Son 24 Saat: 0

Son 7 gün: 6

Son 30 gün: 14

Her zaman: 1,548