Giriş
If you are evaluating a hard drive, this guide will show you how to do basic tests to detect common problems. While these tests are not perfect, they will detect MOST issues.
Common drive problems include:
- High hours (Wear and tear, increased failure risk)
- Reallocated sectors
- Pending reallocated sectors
- Hidden problems
Why should used hard drives be checked?
Most failures are sudden and without warning, if not known in advance due to lack of symptoms. If the machine has problems and the issue is caught early, it will give you time to move everything and replace the drive before it fails. While SMART can only do so much, it plays a significant role since the data can be used to catch a failure before it occurs.
IMPORTANT NOTE: Some hard drives have known problems (E.g., Seagate 7.01/7200.11). In other cases (such as the WD Blue/Green drives), these aren't problematic BUT are more at risk of failure after ~5 years due to them being binned lower than say, a WD Black drive. While you can often reuse lower end drives such as the WD Blue series, they are not the best for reliability after accumulating thousands of hours over 3-5 years.
Guide notes
- While Parted Magic can be legally redistributed under the GPL, I will not point to these downloads as I cannot verify their authenticity. The ONLY source I trust is the Parted Magic website.
- ($15 single download w/o updates, $13 monthly/$49 yearly for subscriptions).
- These tests are not 100% accurate. Some problems can (and do) slip past these tests.
A word about bad sector remapping:
- While WD and Seagate offer diagnostic tools, they WILL NOT CORRECT MAJOR FAILURES ON THE HARD DRIVE. If the issue is minor, it may be patchable, but if the drive has a lot of bad sectors, the problem will likely be unfixable, and the drive will have to be replaced. Most drives cap the spare sectors at ~100 before you lose capacity and fail SMART.
- IMPORTANT: If you can do so before testing, back up your system's data, as it can fail during testing if something is too far gone to correct. DO NOT FIX THE DRIVE IF THERE ARE EXCESSIVELY HIGH SMART ERRORS. Back up the data, transfer the data, wipe the old drive, and replace it!
Neye ihtiyacın var
-
-
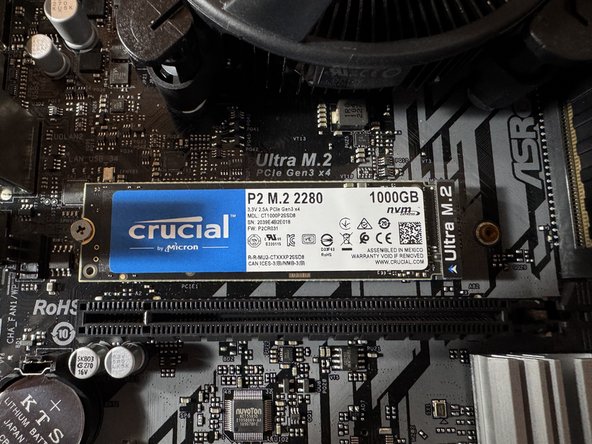
Connect the drive internally to your PC (SATA port or secondary M.2 slot), or to a USB drive adapter.
-
If the hard drive is not installed and you do not have a USB adapter, it can be plugged into a motherboard.
-
-
-
Boot your system into a live Ubuntu session. Locate the Disks application and select the suspicious hard drive.
-
From the drop-down menu, select SMART Data and Self Tests. This will pull up the SMART data.
-
Locate the following SMART attributes: Power On Hours and Power Cycle Count.
-
-
-
Locate the following SMART attributes: Reallocated sector count; Current pending sector count.
-
To run a SMART Extended Self-Test, left click Start Self-Test. Select Extended from the drop-down menu.
-
-
-
-
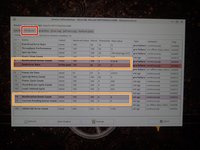
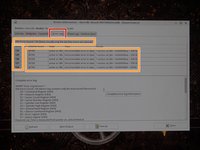
Select Disks from the desktop to open GSmartControl.
-
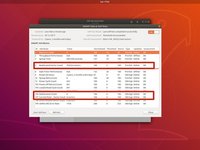
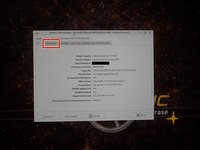
Select the hard disk you want to test. Click Attributes to read the SMART data.
-
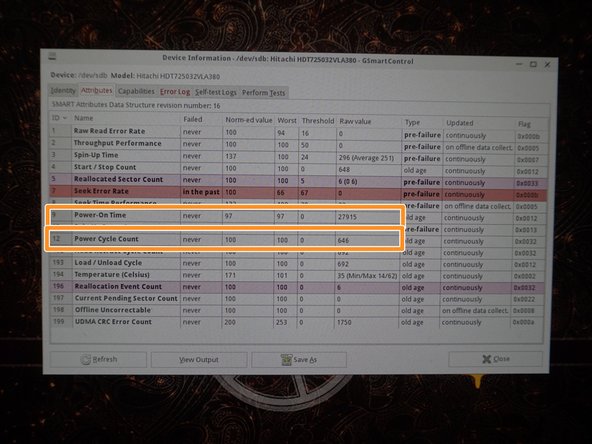
Locate the following attributes: Power On Time and Power Cycle Count.
-
-
-
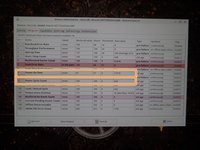
In the Attributes tab, locate the following SMART attributes: Reallocated Sector Count; Reallocation Event Count; Current Pending Sector Count.
-
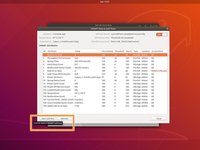
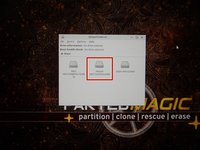
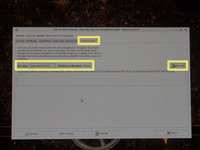
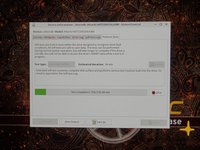
To test the drive, select Perform Tests. Click Test type: and select Extended Self-Test.
-
-
-
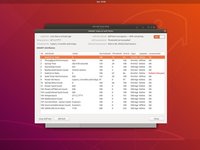
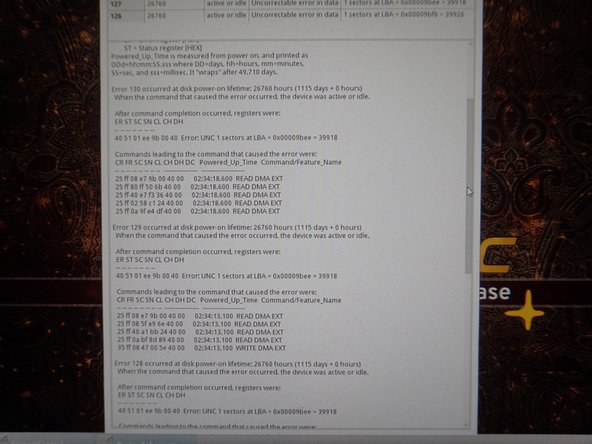
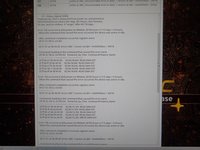
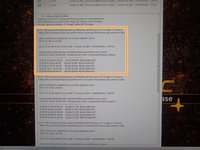
Check the error log for drive errors. Click the Error log tab, and review the logs.
-
In the Error log, review the available errors. Read these logs if any are found.
-
-
-
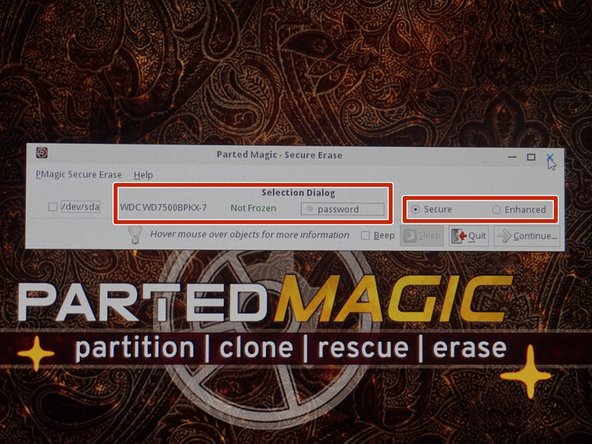
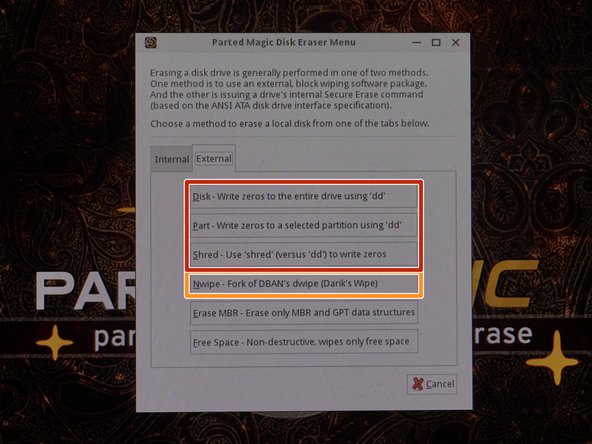
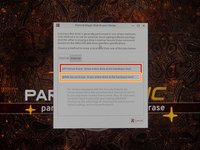
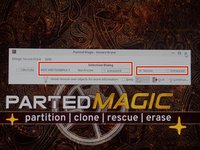
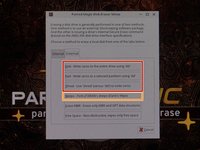
AHCI drives (M.2 SATA/2.5" drives/3.5" drives) When possible for security (and in the case of SSDs, reduced or mitigated drive wear), try to use the ATA Secure Erase option when possible, unless the drive has known bugs (see warning above).
-
NVMe SSD Recomendation: When possible, use NVMe secure erase. This is instant because it destroys the encryption key on these drives so the data can no longer be read and does not need to zero out the entire drive.
-


İptal et: Bu kılavuzu tamamlamadım.
Bir başkası bu kılavuzu tamamladı.

Ekip
