Ana içeriğe geç

DigiLand DL1010Q Front and Rear Cameras Replacement

Neye ihtiyacın var

  1. DigiLand DL1010Q Front and Rear Cameras Replacement, Rear Case: adım 1, 1 resimden 1.
    • With a J00 Philips head screwdriver, unscrew the two 4mm black screws located at the bottom of the device.

    • Before disassembling your device, be sure it is powered off.

  2. DigiLand DL1010Q Front and Rear Cameras Replacement: adım 2, 2 resimden 1. DigiLand DL1010Q Front and Rear Cameras Replacement: adım 2, 2 resimden 2.
    • Using a plastic opening tool, begin softly prying open device by first inserting it in between the front and back panels.

    • Continue prying the edges while moving around the device's perimeter until the back can be easily removed.

  3. DigiLand DL1010Q Front and Rear Cameras Replacement: adım 3, 1 resimden 1.
    • Carefully lift back panel away from the body of the device.

    • Speaker wires are connected to both the front and back panel.

  4. DigiLand DL1010Q Front and Rear Cameras Replacement, Front and Rear Cameras: adım 4, 1 resimden 1.
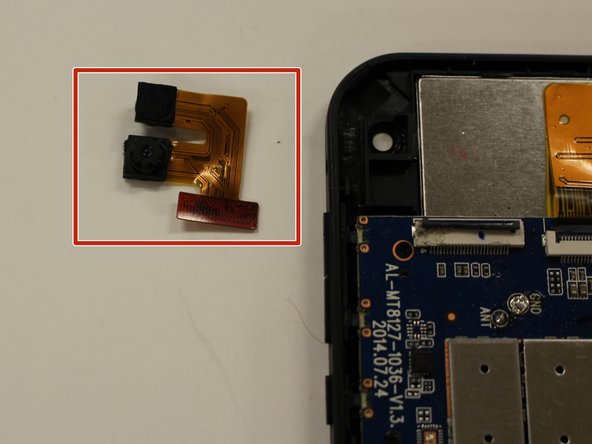
    • Begin by grabbing the tweezers and locating the ZIF ( zero Insertion Force) connector.

  5. DigiLand DL1010Q Front and Rear Cameras Replacement: adım 5, 1 resimden 1.
    • Insert the tweezers into the black part of the ZIF connector and lift it in an upwards motion. By lifting the connection, you will see it will free the circuit strip.

  6. DigiLand DL1010Q Front and Rear Cameras Replacement: adım 6, 2 resimden 1. DigiLand DL1010Q Front and Rear Cameras Replacement: adım 6, 2 resimden 2.
    • Take the tweezers and carefully grab the camera closest to the logic board and then pulling in an upwards motion will release both cameras from the device.

    • Set the cameras aside.

Sonuç

To reassemble your device, follow these instructions in reverse order.

Bir başkası bu kılavuzu tamamladı.

0 Yorum

Yorum Ekle

İstatistikleri Görüntüle:

Son 24 Saat: 1

Son 7 gün: 1

Son 30 gün: 5

Her zaman: 305