Ana içeriğe geç

Bu kılavuzda güncel değişiklikler var. En son onaylanmamış sürüme geçin.

Dirt Devil UD20005 Suction Path Replacement

Neye ihtiyacın var

  1. Dirt Devil UD20005 Suction Path Replacement, Removing the Dust Cup: adım 1, 2 resimden 1. Dirt Devil UD20005 Suction Path Replacement, Removing the Dust Cup: adım 1, 2 resimden 2.
    • Locate the dust cup latch and press down.

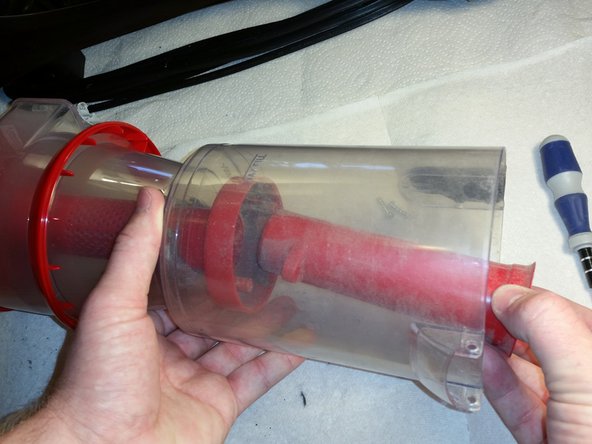
    • Pull outwards and up with the handle to remove the cup.

  2. Dirt Devil UD20005 Suction Path Replacement, Removing the Filter Assembly: adım 2, 3 resimden 1. Dirt Devil UD20005 Suction Path Replacement, Removing the Filter Assembly: adım 2, 3 resimden 2. Dirt Devil UD20005 Suction Path Replacement, Removing the Filter Assembly: adım 2, 3 resimden 3.
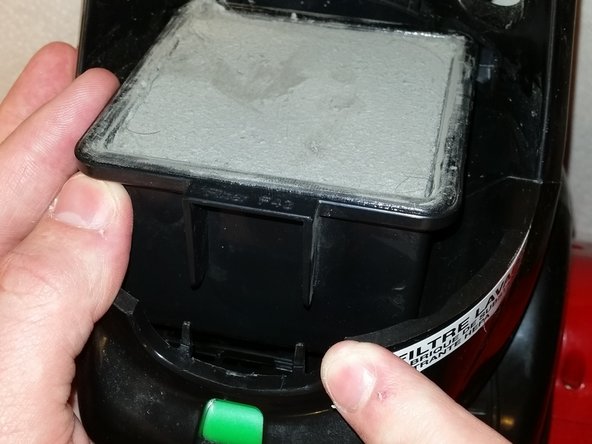
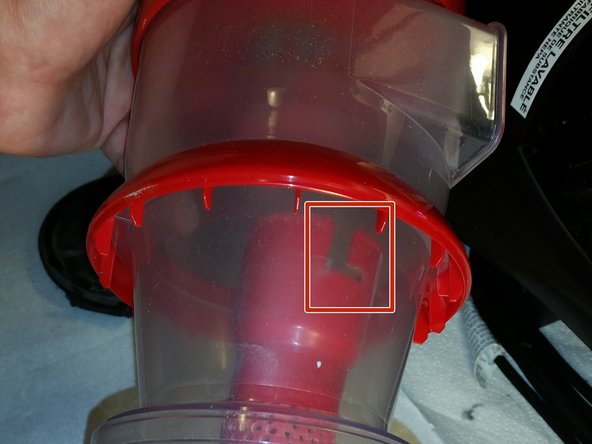
    • At the bottom of the now vacant dust cup holder, locate the filter assembly and shroud. It is located just above the "Performance Indicator"

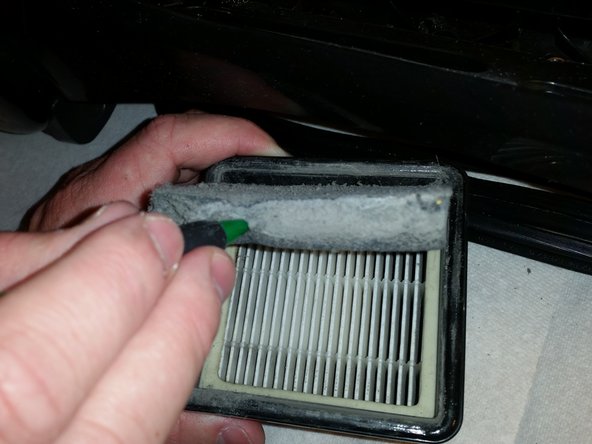
    • Pull up on the latch indicated and remove the shroud.

    • Be aware of any dust that may come off of the HEPA filter.

  3. Dirt Devil UD20005 Suction Path Replacement: adım 3, 2 resimden 1. Dirt Devil UD20005 Suction Path Replacement: adım 3, 2 resimden 2.
    • Putting the shroud aside, use two fingers on the edges of the filter assembly to lift the rest of it out of its housing.

    • Note the slot that must line up with the filter during reassembly.

  4. Dirt Devil UD20005 Suction Path Replacement: adım 4, 2 resimden 1. Dirt Devil UD20005 Suction Path Replacement: adım 4, 2 resimden 2.
    • Use a prying tool, such as a spudger, to separate the foam filter from the larger HEPA filter.

    • As mentioned previously, a lot of fine dust can kick up during this step, especially if your vacuum is extremely dirty. Consider using a mask if necessary.

    • The picture shows a pencil being used, which works fine, but take care to not puncture or otherwise damage the foam filter.

    • Set both of these aside with the rest of the filter assembly for cleaning later.

  5. Dirt Devil UD20005 Suction Path Replacement, Dust Cup: adım 5, 2 resimden 1. Dirt Devil UD20005 Suction Path Replacement, Dust Cup: adım 5, 2 resimden 2.
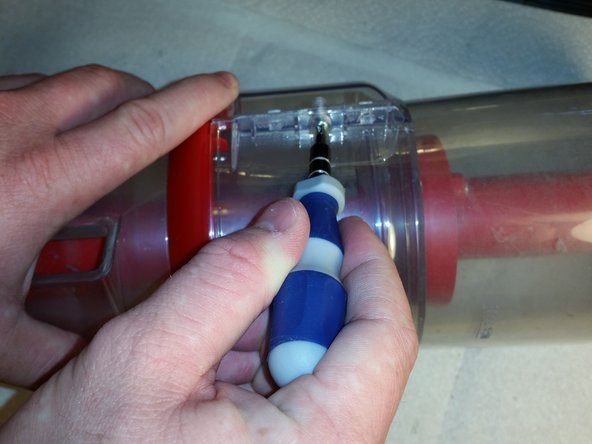
    • Use a Phillips #2 Screwdriver to remove the dust cup shroud.

    • The shroud is cosmetic, but this will make future steps easier.

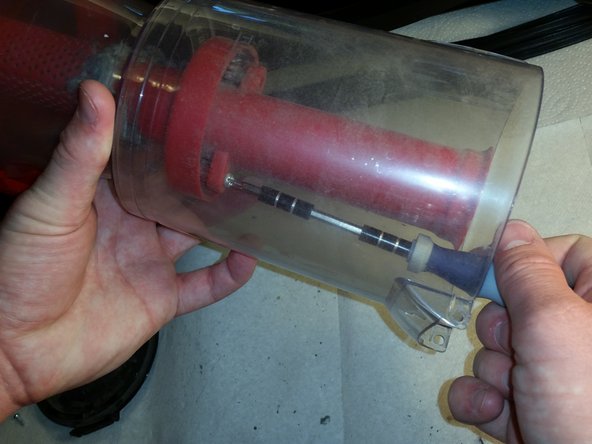
    • Remove the shroud by sliding it downwards over the dust cup slowly, working it off, being careful not to let it over-extend.

  6. Dirt Devil UD20005 Suction Path Replacement: adım 6, 1 resimden 1.
    • On the bottom of the dust cup, locate the hinged door. Use the screwdriver to push the two hinge pins in to remove the door.

    • Set the door aside for cleaning.

  7. Dirt Devil UD20005 Suction Path Replacement: adım 7, 3 resimden 1. Dirt Devil UD20005 Suction Path Replacement: adım 7, 3 resimden 2. Dirt Devil UD20005 Suction Path Replacement: adım 7, 3 resimden 3.
    • With the hinged door removed, look into the dust cup and locate the two screws holding the cyclonic funnel in place.

    • Use a #2 Phillips Screwdriver to remove them. The funnel will remove easily, place it aside for cleaning when finished.

  8. Dirt Devil UD20005 Suction Path Replacement: adım 8, 2 resimden 1. Dirt Devil UD20005 Suction Path Replacement: adım 8, 2 resimden 2.
    • Grip the dust collector with your hand firmly, looking for the twist-lock that attaches it to the top of the dust cup.

    • Twist it clockwise and remove, setting it aside for cleaning.

  9. Dirt Devil UD20005 Suction Path Replacement, Cleaning the Filter Assembly: adım 9, 3 resimden 1. Dirt Devil UD20005 Suction Path Replacement, Cleaning the Filter Assembly: adım 9, 3 resimden 2. Dirt Devil UD20005 Suction Path Replacement, Cleaning the Filter Assembly: adım 9, 3 resimden 3.
    • Rinse the filter shroud off in water. Particulates should come off fairly easy, as they should be small. If not, scrub lightly.

    • Rinse the foam filter off, working the particulates out with water, being careful not to damage the filter.

    • Run water through the HEPA filter in the opposite direction of the airflow. The water should be hitting the side that the foam filter usually is mounted on.

    • Place all three items somewhere to dry.

  10. Dirt Devil UD20005 Suction Path Replacement, Cleaning the Dust Cup: adım 10, 1 resimden 1.
    • Run water through all the dust cup components, especially the dust collector, removing any lodged particulates or hair.

    • Make sure all components are completely dry before reassembly. Especially for the filter assembly, this can take up to a day.

Sonuç

To reassemble your device, follow these instructions in reverse order.

2 farklı kişi bu kılavuzu tamamladı.

Kyle Libby

Üyelik tarihi: 04/07/14

1.006 İtibar

7 adet Kılavuz yazıldı

Ekip

Cal Poly, Team 7-23, Regan Spring 2014 Cal Poly, Team 7-23, Regan Spring 2014 üyesi

CPSU-REGAN-S14S7G23

4 Üyeler

19 adet Kılavuz yazıldı

0 Yorum

Yorum Ekle

İstatistikleri Görüntüle:

Son 24 Saat: 0

Son 7 gün: 0

Son 30 gün: 7

Her zaman: 1,263