Bu sürüm, hatalı düzenlemeler içerebilir. En son doğrulanmış bellek kopyası dönün.
Neye ihtiyacın var
-
Bu adım çevrilmemiş. Çevrilmesine yardım edin
-
Remove 2 screws on rear of device. Slide top cover up and back from main case.
-
-
-
Bu adım çevrilmemiş. Çevrilmesine yardım edin
-
Remove 3 screws on bottom of case.
-
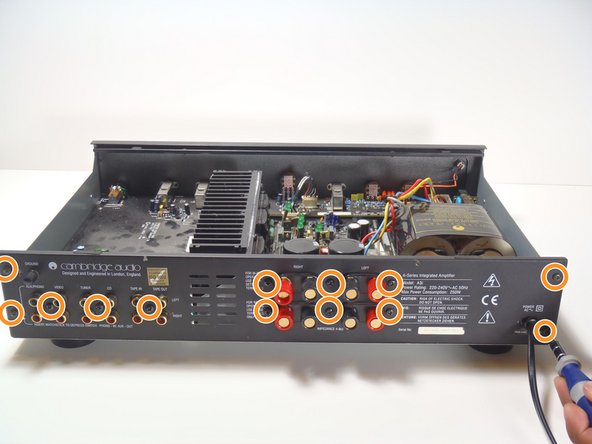
Remove 13 screws on rear panel.
-
-
Bu adım çevrilmemiş. Çevrilmesine yardım edin
-
Using a pair of pliers, squeeze the retainer for the power cord as shown and pull it toward the external side the panel.
-
It may require some wiggling, but it should slip out of the hole and then off of the cord.
-


İptal et: Bu kılavuzu tamamlamadım.
3 farklı kişi bu kılavuzu tamamladı.

Ekip

Cal Poly, Team 28-36, Regan Spring 2010 Cal Poly, Team 28-36, Regan Spring 2010 üyesi
CPSU-REGAN-S10S28G36
4 Üyeler
3 adet Kılavuz yazıldı