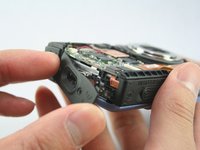
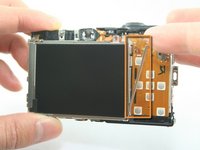
Ana içeriğe geç

Disassembling Canon PowerShot SD1100 IS LCD screen

Neye ihtiyacın var

  1. Disassembling Canon PowerShot SD1100 IS LCD screen, Front and Rear Cover: adım 1, 2 resimden 1. Disassembling Canon PowerShot SD1100 IS LCD screen, Front and Rear Cover: adım 1, 2 resimden 2.
    • Remove wrist strap and battery.

  2. Disassembling Canon PowerShot SD1100 IS LCD screen: adım 2, 3 resimden 1. Disassembling Canon PowerShot SD1100 IS LCD screen: adım 2, 3 resimden 2. Disassembling Canon PowerShot SD1100 IS LCD screen: adım 2, 3 resimden 3.
    • Remove 2 screws from each side of the camera (4 total, 0.102 in).

    • Remove 2 screws from the bottom on the camera (0.138 in).

    • Do not mix the 4 side screws with the 2 bottoms ones; they are different sizes.

  3. Disassembling Canon PowerShot SD1100 IS LCD screen: adım 3, 3 resimden 1. Disassembling Canon PowerShot SD1100 IS LCD screen: adım 3, 3 resimden 2. Disassembling Canon PowerShot SD1100 IS LCD screen: adım 3, 3 resimden 3.
    • Gently pull off the front cover.

    • The plate on the side should come off.

    • Gently pull off the back cover.

  4. Disassembling Canon PowerShot SD1100 IS LCD screen: adım 4, 1 resimden 1.
    • The cases should now be removed.

  5. Disassembling Canon PowerShot SD1100 IS LCD screen, LCD screen: adım 5, 2 resimden 1. Disassembling Canon PowerShot SD1100 IS LCD screen, LCD screen: adım 5, 2 resimden 2.
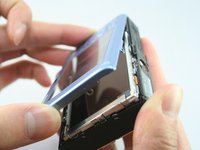
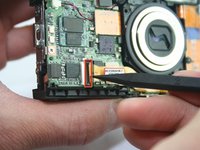
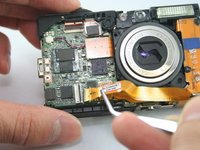
    • Remove the top-left screw above the LCD screen (0.100 in).

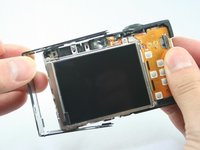
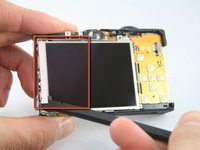
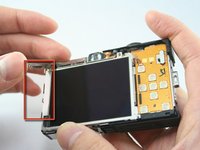
    • Remove the C-shaped plate from the side of the LCD screen.

  6. Disassembling Canon PowerShot SD1100 IS LCD screen: adım 6, 2 resimden 1. Disassembling Canon PowerShot SD1100 IS LCD screen: adım 6, 2 resimden 2.
    • Remove the screw from the top-right of the LCD screen (0.098 in).

    • Remove the L-shaped bar from the right of the LCD screen.

  7. Disassembling Canon PowerShot SD1100 IS LCD screen: adım 7, 2 resimden 1. Disassembling Canon PowerShot SD1100 IS LCD screen: adım 7, 2 resimden 2.
    • Use the spudger to remove the L-shaped bar from the left-side of the LCD screen.

  8. Disassembling Canon PowerShot SD1100 IS LCD screen: adım 8, 1 resimden 1.
    • Use tweezers to remove the connector ribbon from the top-left corner above the LCD screen.

    • Be gentle. This ribbon should stay attached to the screen.

  9. Disassembling Canon PowerShot SD1100 IS LCD screen: adım 9, 3 resimden 1. Disassembling Canon PowerShot SD1100 IS LCD screen: adım 9, 3 resimden 2. Disassembling Canon PowerShot SD1100 IS LCD screen: adım 9, 3 resimden 3.
    • Use a spudger to lift the connector lock (black flap) at the end of the larger LCD connector ribbon on the front side of the camera.

    • Use the tweezers to lift this ribbon.

    • Use the tweezers to gently peel this ribbon from the one underneath it.

  10. Disassembling Canon PowerShot SD1100 IS LCD screen: adım 10, 1 resimden 1.
    • The LCD screen should now be removed.

Sonuç

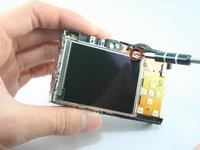
To reassemble your device, follow these instructions in reverse order.

3 farklı kişi bu kılavuzu tamamladı.

Tyler Grossheim

Üyelik tarihi: 01/25/11

1.470 İtibar

6 adet Kılavuz yazıldı

Ekip

Cal Poly, Team 3-32, Regan Winter 2011 Cal Poly, Team 3-32, Regan Winter 2011 üyesi

CPSU-REGAN-W11S3G32

3 Üyeler

8 adet Kılavuz yazıldı

0 Yorum

Yorum Ekle

İstatistikleri Görüntüle:

Son 24 Saat: 0

Son 7 gün: 3

Son 30 gün: 8

Her zaman: 3,588