Giriş
A faulty LCD screen is easy to replace. If you have a stuck lens, complete lens assemblies have been seen on eBay for around £25 and can be fitted quite easily, though it has been reported that some replacement lenses on eBay are factory rejects and not worth the money. If you have unreliable buttons, you may be able to cannibalise the parts from another camera of the same model with a different fault.
Disassembly of the lens is a more advanced operation which may be undertaken if you have a flair for understanding intricate mechanisms and can devote as much time as it takes. This is covered in detail by a companion guide.
The only essential tool is a small cross-head precision screwdriver. It's very important to remember which screws came from where. You can use a couple of 7-day pill boxes, noting which compartments contain the screws from which steps, or stick the screws to a piece of paper with Blu-tack, noting the step number against each.
This camera contains many ribbon cables which need to be disconnected and reconnected. The connectors are of 3 types:
- In most, the end of the ribbon simply pushes into a socket. Usually, there are rigid tabs on either side of the ribbon which you can pull or push on with a small flat screwdriver, and/or a hole in the centre of the ribbon which you can get some purchase on with a tiny flat screwdriver, or better still, a round toothpick. (Don't use a pin or other sharp object as you might scratch and sever a trace on a circuit board underneath.)
- Just one ribbon is like the previous type but there's a black clamping bar which must be lifted with your fingernail in order to release the cable. Make sure it's up before trying to reinsert the ribbon.
- Several ribbons (on the main logic board) use snap-on connectors. Pull them off with a fingernail under a corner. When you reconnect them, ensure they are correctly aligned and press firmly. They should snap home quite positively.
"Left" and "right" in this guide are as viewed from behind the camera.
Neye ihtiyacın var
-
-
Remove the battery and SDCard.
-
Remove the wrist strap from the anchor on the right hand side.
-
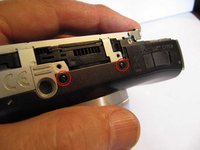
Remove 2 silver screws from left hand side and 2 black screws from bottom case rear section.
 FixBot'a Sor
-
-
-
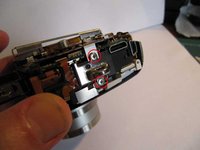
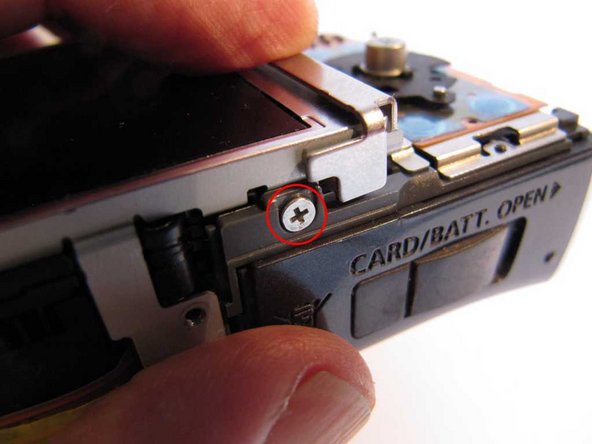
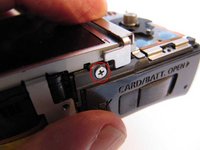
Remove a black screw from under that battery compartment cover.
-
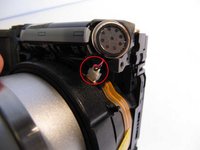
Remove two silver screws from under the A/V connector cover.
-
Remove the silver right hand end.
-
Remove the case back.
-
(On reassembly, just before replacing the rear cover is a great time to clean the fingermarks off the LCD and the inside of the rear cover window.)
-
-
-
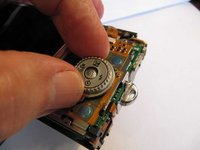
Lift off the control dial.
-
Remove 2 screws securing the wrist strap anchor on the right hand side, and remove the anchor.
-
-
-
Remove the 2 screws in the bottom case front section.
-
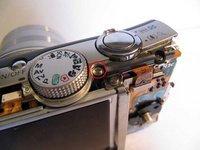
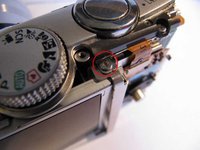
Remove a screw from the top, adjacent to the mode wheel.
-
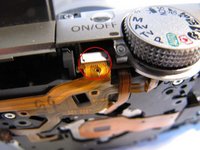
Remove the front cover. This requires a fair amount of wiggling in order to release it at the top. There is a hidden clip just to the left of the on/off button which requires a little force to release, especially on a first disassembly. Easy does it.
-
If necessary, insert a small flat bladed screwdriver at the end of the silver trim to the left of the on/off button. Lift it by just half a millimetre or so whilst pulling the front cover. This should release the clip. Take care not to bend or otherwise damage the trim.
-
-
-
-
On the front of the camera you will now be able to see two accelerometers mounted at right angles, and beneath them the backup battery. It is not necessary to dismantle any of these unless they are suspect.
-
Removal of a single screw securing a right angle metal bracket releases the two accelerometers.
-
Touch the probes of a test meter (set to the 20V range) on the two silvery dots to test the battery. It should read between 2.4 and 3.1V, depending on its state of charge. In normal use it is charged from the main battery and maintains the settings and the date and time when the main battery is removed or discharged.
-
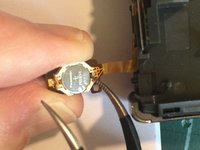
A plastic clip holds the battery assembly in place on two plastic pegs. Take great care not to tear its delicate ribbon.
-
To remove the battery from its holder, lift it on the ribbon side with a pointed tool. It's retained by two tiny tabs on the other side.
-
-
-
Remove one remaining screw from the tripod mount and remove the mount. (This scew is adjacent to the speaker - note the position for reassembly).
-
-
-
Disconnect a ribbon from the buttons board.
-
Remove a long screw from the top of the buttons board, and a shorter one from the bottom.
-
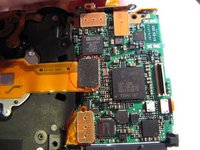
Remove the buttons board, revealing the main logic board.
-
-
-
Remove a screw from the top right hand end of the LCD frame and remove the LCD clamp.
-
-
-
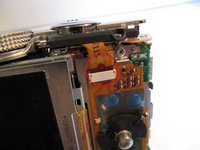
Disconnect two ribbon cables from the main logic board, which connect to the LCD. The socket of the wider one has a clamping bar (black) which you have to gently lift.
-
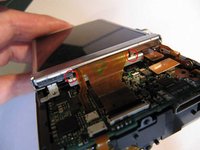
Lift off the LCD. Note that this is secured on the left hand side by double-sided tape. Gently lifting the LCD right hand side, the double sided tape will slowly unstick. Don’t rush it - it'll come in its own good time.
-
-
-
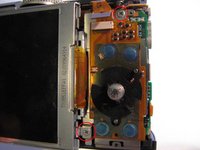
Remove a screw from the bottom of the LCD frame.
-
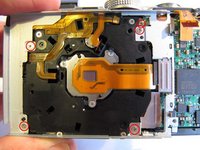
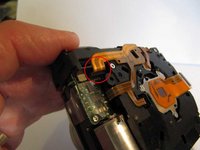
Remove 5 screws retaining the LCD frame. Note that one is recessed at the top right hand corner. This is a very slightly different size - keep it separate from the other 4.
-
Remove the LCD frame, and a supplementary piece of metal (3rd photo) on the bottom right hand side of the frame, which covers a pair of snap-on connectors and prevents them working loose. Note that on reassembly, it’s easy to forget this additional piece of metal.
-
If you simply need to access the sensor or the infrared filter, you only need remove the supplementary piece of metal. Then, follow instructions in the companion guide Canon PowerShot SX200 IS Lens Disassembly.
-
-
-
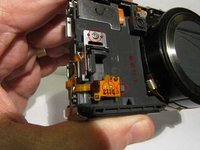
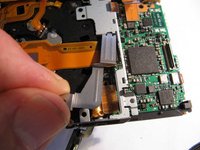
Disconnect a ribbon from a connector behind the on/off button.
-
Gently lift off 2 snap-on connectors on the left hand side next to the lens assembly. (Two more at the top of the board can be left in place.)
-
You can now separate the logic assembly, battery compartment and top control panel as a unit from the lens and flash assembly. You will need to gently ease the red-eye LED out of its slot in the lens assembly.
-
-
-
If you don't need to inspect the top panel controls you can skip this step.
-
Remove a screw from the top panel to the right and the rear of the shutter release, and another in front of the mode wheel.
-
Lift off the top panel.
-
-
-
On the bottom left hand side of the lens assembly there is a connector with a red and a black wire going to the speaker. Disconnect this, taking great care not to strain the wires or especially the ribbon that the socket is mounted on.
-
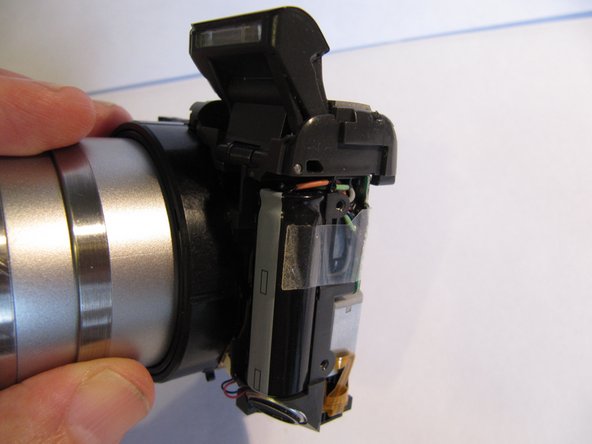
At the rear top left hand side of the lens assembly is a ribbon cable connecting it to the flash module. Disconnect this.
-
(Note the transparent protective insulation covering the flash board just below this connector. Do not remove this as the board may still have a dangerous high voltage on it from the flash capacitor behind.)
-
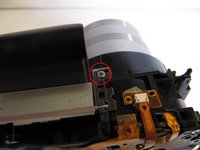
Remove a screw from the top right hand side of the flash module, and separate the flash module from the lens assembly.
-
(On reassembly, hold the flash head closed while refitting it to the lens assembly.)
-
-
-
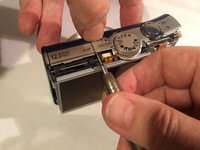
Test the operation of the lens mechanism as follows.
-
Gently lift the ribbon cable connections off the two tags on the back of the motor.
-
Apply power to the motor from a 3v battery pack by connecting it to the two tags on the motor. Apply positive to the terminal to the front of the lens to extend it, or to the back of the lens to retract. (Keep all ribbons out of the way - applying power inadvertently to the wrong place could damage something.)
-
Disassembly of the lens is covered in the companion guide "Canon PowerShot SX200 IS Lens Disassembly". This should allow most cases of stuck lenses and the dreaded "Lens Error" to be diagnosed, and hopefully fixed.
-


To reassemble your device, follow these instructions in reverse order.
İptal et: Bu kılavuzu tamamlamadım.
11 farklı kişi bu kılavuzu tamamladı.

7Kılavuz Yorumları
Nice guide for a beginner to start with No ambiguity
Awesome guide (this one and the lens disassembly guide), with it I was able to fix the infamous 'Lens Error' .
Thanks a lot!
So what did the fault turn out to be in the end?
sabes de algun sitio donde pueda conseguir la pantalla lcd de esta camara canon powershot sx200is?