Ana içeriğe geç

Bu kılavuzda güncel değişiklikler var. En son onaylanmamış sürüme geçin.

Disassembling IBM ThinkPad A30 CPU Fan

Neye ihtiyacın var

  1. Disassembling IBM ThinkPad A30 CPU Fan, Battery: adım 1, 2 resimden 1. Disassembling IBM ThinkPad A30 CPU Fan, Battery: adım 1, 2 resimden 2.
    • Flip the ThinkPad over so that it is upside down.

    • Slide the highlighted tab to the left.

    • With your finger on the tab, remove the battery by lifting it upwards away from the laptop.

  2. Disassembling IBM ThinkPad A30 CPU Fan, Upper Case: adım 2, 1 resimden 1.
    • Make sure the laptop is upside down and oriented in the direction shown.

    • Remove the six 16.7mm screws inside the circled holes.

  3. Disassembling IBM ThinkPad A30 CPU Fan: adım 3, 1 resimden 1.
    • Rotate the ThinkPad so that the hard drive bay is facing you.

    • Remove the black cover to reveal a 14.8mm screw.

    • Remove the uncovered screw with a Phillips #0 screwdriver.

  4. Disassembling IBM ThinkPad A30 CPU Fan: adım 4, 2 resimden 1. Disassembling IBM ThinkPad A30 CPU Fan: adım 4, 2 resimden 2.
    • Flip the ThinkPad over and open the LCD panel.

    • Pry apart the keyboard with a plastic opening tool or with your fingers.

  5. Disassembling IBM ThinkPad A30 CPU Fan: adım 5, 3 resimden 1. Disassembling IBM ThinkPad A30 CPU Fan: adım 5, 3 resimden 2. Disassembling IBM ThinkPad A30 CPU Fan: adım 5, 3 resimden 3.
    • Be careful not to pull out the keyboard carelessly; there is a connector underneath it!

    • Lift the front end of the keyboard as shown.

    • Using your fingers, remove the black film cover.

  6. Disassembling IBM ThinkPad A30 CPU Fan: adım 6, 3 resimden 1. Disassembling IBM ThinkPad A30 CPU Fan: adım 6, 3 resimden 2. Disassembling IBM ThinkPad A30 CPU Fan: adım 6, 3 resimden 3.
    • Locate the connector attached to the motherboard.

    • Disconnect the ribbon cable by removing the connector.

  7. Disassembling IBM ThinkPad A30 CPU Fan: adım 7, 2 resimden 1. Disassembling IBM ThinkPad A30 CPU Fan: adım 7, 2 resimden 2.
    • Lift and remove the keyboard.

    • Remove the two 5.6mm screws.

    • Remove the 16.7mm screw.

  8. Disassembling IBM ThinkPad A30 CPU Fan: adım 8, 3 resimden 1. Disassembling IBM ThinkPad A30 CPU Fan: adım 8, 3 resimden 2. Disassembling IBM ThinkPad A30 CPU Fan: adım 8, 3 resimden 3.
    • You will need to use a little force. Be wary of the tabs.

    • Pry off the upper case with your hands.

  9. Disassembling IBM ThinkPad A30 CPU Fan, Display Assembly: adım 9, 1 resimden 1.
    • Remove the 5.6mm screw that holds the LCD to the upper case.

  10. Disassembling IBM ThinkPad A30 CPU Fan: adım 10, 3 resimden 1. Disassembling IBM ThinkPad A30 CPU Fan: adım 10, 3 resimden 2. Disassembling IBM ThinkPad A30 CPU Fan: adım 10, 3 resimden 3.
    • Remove the 5.6mm screw on the left side of the three-pronged connector.

    • Remove the other two 16.7mm screws.

    • Lift and remove connector.

  11. Disassembling IBM ThinkPad A30 CPU Fan: adım 11, 2 resimden 1. Disassembling IBM ThinkPad A30 CPU Fan: adım 11, 2 resimden 2.
    • Pull out the white tab connecting the LCD to the motherboard.

  12. Disassembling IBM ThinkPad A30 CPU Fan: adım 12, 2 resimden 1. Disassembling IBM ThinkPad A30 CPU Fan: adım 12, 2 resimden 2.
    • Turn the laptop so that the back is facing you.

    • Remove the four 5.6mm long screws.

  13. Disassembling IBM ThinkPad A30 CPU Fan: adım 13, 3 resimden 1. Disassembling IBM ThinkPad A30 CPU Fan: adım 13, 3 resimden 2. Disassembling IBM ThinkPad A30 CPU Fan: adım 13, 3 resimden 3.
    • Place the laptop so that the LCD is facing you again.

    • Gently lift the LCD monitor up and out.

    • Remove the black plastic tab.

  14. Disassembling IBM ThinkPad A30 CPU Fan, CPU Fan: adım 14, 1 resimden 1.
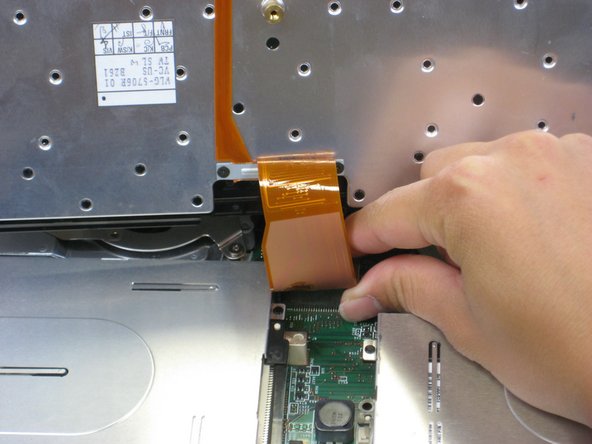
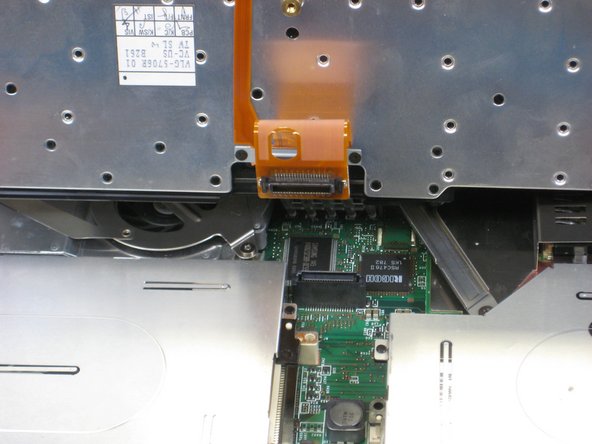
    • Locate the 4 screws that will need to be removed.

    • One screw (yellow) is observable. The three other screws (red) are below the heatsink bracket.

    • Remove the 5.6mm (yellow) and three 16.1mm (red) screws.

  15. Disassembling IBM ThinkPad A30 CPU Fan: adım 15, 1 resimden 1.
    • Lift the heatsink bracket up.

  16. Disassembling IBM ThinkPad A30 CPU Fan: adım 16, 3 resimden 1. Disassembling IBM ThinkPad A30 CPU Fan: adım 16, 3 resimden 2. Disassembling IBM ThinkPad A30 CPU Fan: adım 16, 3 resimden 3.
    • Be careful not to pull too hard! There is a cable attached to the fan!

    • Lift the fan/heatsink assembly up.

    • Locate the fan power cable and pull upwards near the connector.

    • Remove the fan/heatsink assembly.

Sonuç

To reassemble your device, follow these instructions in reverse order.

Jessica

Üyelik tarihi: 10/06/10

162 İtibar

7 adet Kılavuz yazıldı

Ekip

Cal Poly, Team 4-44, Amido Fall 2010 Cal Poly, Team 4-44, Amido Fall 2010 üyesi

CPSU-AMIDO-F10S4G44

4 Üyeler

26 adet Kılavuz yazıldı

0 Yorum

Yorum Ekle

İstatistikleri Görüntüle:

Son 24 Saat: 0

Son 7 gün: 2

Son 30 gün: 2

Her zaman: 2,596