Ana içeriğe geç

Bu kılavuzda güncel değişiklikler var. En son onaylanmamış sürüme geçin.

Disassembling Jazz HDV178 Camcorder Pulling camcorder apart

Salt Önkoşul
Bu kılavuz yalnızca diğer kılavuzlar için bir ön koşul olarak kullanılmak üzere tasarlanmıştır. Tek başına eksiktir.

Neye ihtiyacın var

  1. Disassembling Jazz HDV178 Camcorder Pulling camcorder apart, Back Cover: adım 1, 1 resimden 1.
    • On the back of the camcorder, the side opposite of the flip-out screen, there is a section of grooved plastic with a small arrow.

    • Press down on the grooved plastic with your thumbs.

    • Push the back cover in the direction indicated by the small arrow on the grooved plastic. The back cover should slide right off.

  2. Disassembling Jazz HDV178 Camcorder Pulling camcorder apart, Battery: adım 2, 1 resimden 1.
    • Once you have the back cover off, the camcorder should look like this.

    • Look on the battery for a model number to assure that you acquire the correct replacement part.

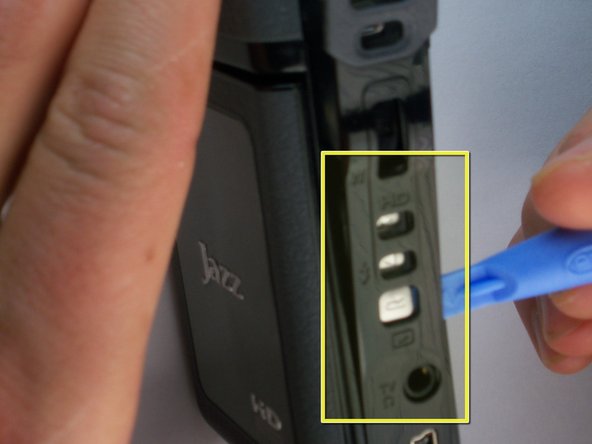
    • The camcorder model number is located in the red box. Verify that you have a Jazz HDV178.

  3. Disassembling Jazz HDV178 Camcorder Pulling camcorder apart: adım 3, 1 resimden 1.
    • Take the battery out by pulling up on the bottom of the battery. You should be pulling from the side of the camera where the wrist strap is attached.

  4. Disassembling Jazz HDV178 Camcorder Pulling camcorder apart, Disassembling Jazz HDV178 Camcorder Pulling camcorder apart: adım 4, 1 resimden 1.
    • Take off camera mount by unscrewing the 4.5 mm screw in the hole.

    • This is the bottom of the camcorder near where the wrist strap connects.

  5. Disassembling Jazz HDV178 Camcorder Pulling camcorder apart: adım 5, 1 resimden 1.
    • Remove the 4.5 mm screw located near the battery slot.

  6. Disassembling Jazz HDV178 Camcorder Pulling camcorder apart: adım 6, 1 resimden 1.
    • Break the glue that attaches the lens cover to the camcorder by sliding the plastic prying tool underneath the circumference of the part.

    • After the glue is broken, you can remove the lens cover.

  7. Disassembling Jazz HDV178 Camcorder Pulling camcorder apart: adım 7, 1 resimden 1.
    • Use a small plastic pry tool to gently pry off the silver strip on the top of the camera.

    • Make sure to run the tool under the outline of the strip as you pry it off so the plastic does not snap.

  8. Disassembling Jazz HDV178 Camcorder Pulling camcorder apart: adım 8, 3 resimden 1. Disassembling Jazz HDV178 Camcorder Pulling camcorder apart: adım 8, 3 resimden 2. Disassembling Jazz HDV178 Camcorder Pulling camcorder apart: adım 8, 3 resimden 3.
    • Locate the side of the camcorder that is underneath the lens and on the opposite side of the wrist strap. Remove the silver strip using the same process as in the previous step.

    • Remove the two 4 mm screws that were hidden under the cover.

  9. Disassembling Jazz HDV178 Camcorder Pulling camcorder apart: adım 9, 3 resimden 1. Disassembling Jazz HDV178 Camcorder Pulling camcorder apart: adım 9, 3 resimden 2. Disassembling Jazz HDV178 Camcorder Pulling camcorder apart: adım 9, 3 resimden 3.
    • Pry off the rubbery cap that covers the buttons using the same process as the previous two steps.

    • You should slide your prying tool underneath the entire cover to ensure that the glue breaks cleanly so the cover will not snap.

  10. Disassembling Jazz HDV178 Camcorder Pulling camcorder apart: adım 10, 1 resimden 1.
    • Remove the three combined buttons so they do not become misplaced.

  11. Disassembling Jazz HDV178 Camcorder Pulling camcorder apart: adım 11, 2 resimden 1. Disassembling Jazz HDV178 Camcorder Pulling camcorder apart: adım 11, 2 resimden 2.
    • Using a firm hold on both sides of the camcorder, gently pull apart the two halves. Pressure should be evenly distributed across entire device.

    • If the camcorder does not come apart easily, double check that all of the screws are removed. Return to the previous steps for screw removal if you find a screw that is still attached.

Sonuç

To reassemble your device, follow these instructions in reverse order.

Chris

Üyelik tarihi: 01/28/11

243 İtibar

1 Kılavuz yazıldı

Ekip

Cal Poly, Team 7-34, Regan Winter 2011 Cal Poly, Team 7-34, Regan Winter 2011 üyesi

CPSU-REGAN-W11S7G34

4 Üyeler

7 adet Kılavuz yazıldı

0 Yorum

Yorum Ekle

İstatistikleri Görüntüle:

Son 24 Saat: 0

Son 7 gün: 0

Son 30 gün: 0

Her zaman: 294