Ana içeriğe geç

Bu kılavuzda güncel değişiklikler var. En son onaylanmamış sürüme geçin.

Disassembling KDDI Kyocera A5521K Logic Board

Neye ihtiyacın var

  1. Disassembling KDDI Kyocera A5521K Logic Board, Disassembling KDDI Kyocera A5521K Battery: adım 1, 3 resimden 1. Disassembling KDDI Kyocera A5521K Logic Board, Disassembling KDDI Kyocera A5521K Battery: adım 1, 3 resimden 2. Disassembling KDDI Kyocera A5521K Logic Board, Disassembling KDDI Kyocera A5521K Battery: adım 1, 3 resimden 3.
    • Turn the phone over to expose the battery cover.

    • Apply pressure to the back of the battery cover to slide it down.

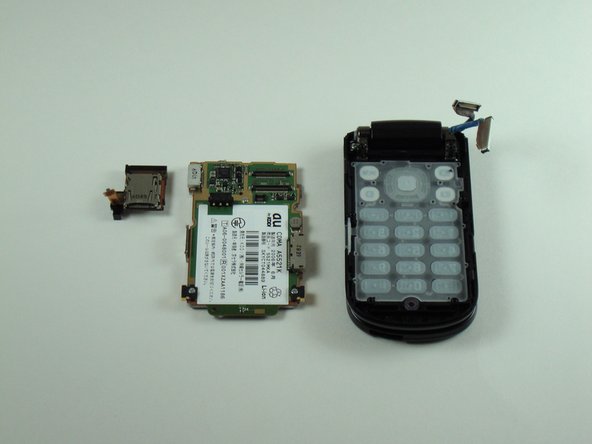
    • The battery cover is now separate from the phone.

  2. Disassembling KDDI Kyocera A5521K Logic Board: adım 2, 3 resimden 1. Disassembling KDDI Kyocera A5521K Logic Board: adım 2, 3 resimden 2. Disassembling KDDI Kyocera A5521K Logic Board: adım 2, 3 resimden 3.
    • Remove the battery by pushing it up and out from the bottom.

    • The battery, cover, and phone should now be separated.

  3. Disassembling KDDI Kyocera A5521K Logic Board, Back Plate: adım 3, 2 resimden 1. Disassembling KDDI Kyocera A5521K Logic Board, Back Plate: adım 3, 2 resimden 2.
    • Remove the four screws with the Y0 screwdriver.

  4. Disassembling KDDI Kyocera A5521K Logic Board: adım 4, 2 resimden 1. Disassembling KDDI Kyocera A5521K Logic Board: adım 4, 2 resimden 2.
    • Remove the black, rubber screw caps towards the top of the back of the phone to reveal two additional screws.

    • Remove the two screws with a Y0 screwdriver.

  5. Disassembling KDDI Kyocera A5521K Logic Board: adım 5, 3 resimden 1. Disassembling KDDI Kyocera A5521K Logic Board: adım 5, 3 resimden 2. Disassembling KDDI Kyocera A5521K Logic Board: adım 5, 3 resimden 3.
    • Rotate the phone 180 degrees.

    • Carefully separate the back plate from the remainder of the phone.

    • The back plate should now be detached from the rest of the phone.

  6. Disassembling KDDI Kyocera A5521K Logic Board, SD Card Slot: adım 6, 3 resimden 1. Disassembling KDDI Kyocera A5521K Logic Board, SD Card Slot: adım 6, 3 resimden 2. Disassembling KDDI Kyocera A5521K Logic Board, SD Card Slot: adım 6, 3 resimden 3.
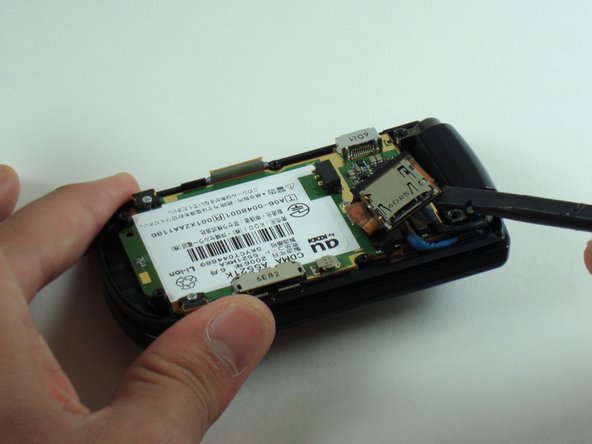
    • Rotate the phone approximately 45 degrees to the right.

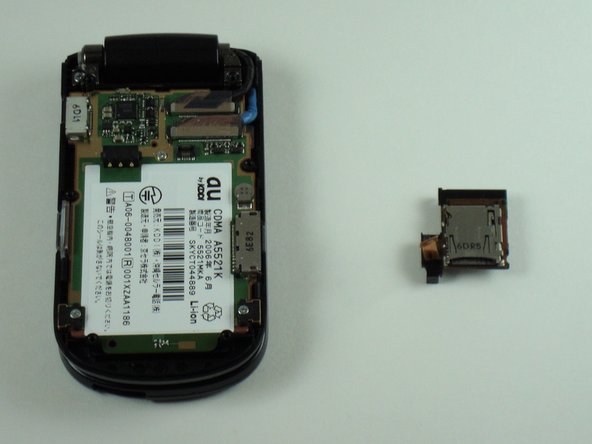
    • Gently pry up the SD card slot with a spudger.

  7. Disassembling KDDI Kyocera A5521K Logic Board, Logic Board: adım 7, 3 resimden 1. Disassembling KDDI Kyocera A5521K Logic Board, Logic Board: adım 7, 3 resimden 2. Disassembling KDDI Kyocera A5521K Logic Board, Logic Board: adım 7, 3 resimden 3.
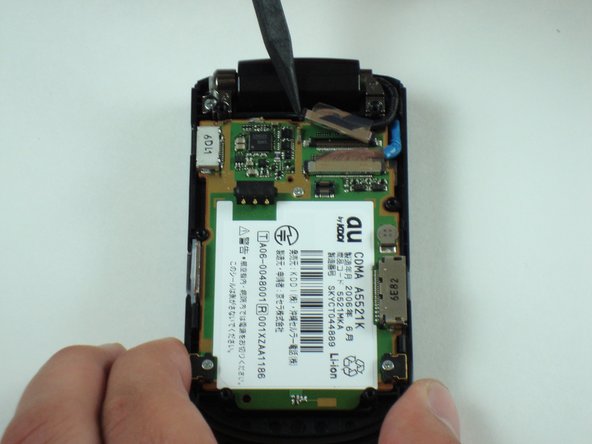
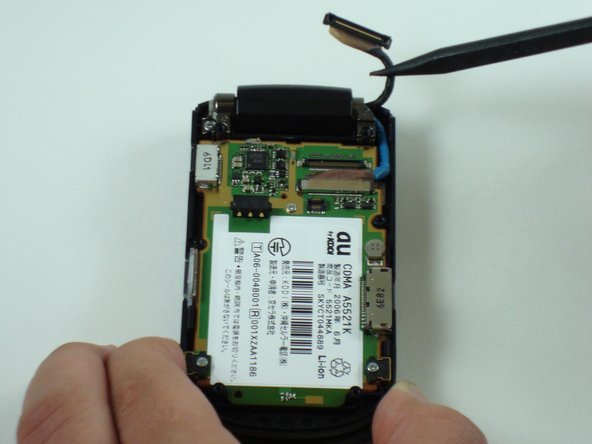
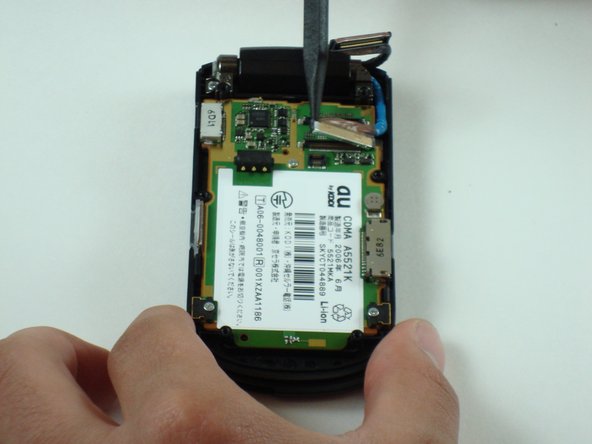
    • Lift up on the first connection shown using a pair of pliers.

    • Disconnect the first connection between the logic board and the wire using the pair of pliers.

  8. Disassembling KDDI Kyocera A5521K Logic Board: adım 8, 3 resimden 1. Disassembling KDDI Kyocera A5521K Logic Board: adım 8, 3 resimden 2. Disassembling KDDI Kyocera A5521K Logic Board: adım 8, 3 resimden 3.
    • Repeat the above steps for the second connection.

    • Use the pliers to pry up the connection.

    • Use the pliers to disconnect the connection between the logic board and the wire.

  9. Disassembling KDDI Kyocera A5521K Logic Board: adım 9, 1 resimden 1.
    • Lift up on the bottom of the logic board with a spudger.

    • Gently remove the rest of the logic board from the phone.

  10. Disassembling KDDI Kyocera A5521K Logic Board: adım 10, 2 resimden 1. Disassembling KDDI Kyocera A5521K Logic Board: adım 10, 2 resimden 2.
    • The logic board should now be completely disconnected from the phone.

Sonuç

To reassemble your device, follow these instructions in reverse order.

Dominic Grisafe

Üyelik tarihi: 04/15/10

157 İtibar

10 adet Kılavuz yazıldı

Ekip

Cal Poly, Team 28-25, Regan Spring 2010 Cal Poly, Team 28-25, Regan Spring 2010 üyesi

CPSU-REGAN-S10S28G25

4 Üyeler

20 adet Kılavuz yazıldı

0 Yorum

Yorum Ekle

İstatistikleri Görüntüle:

Son 24 Saat: 0

Son 7 gün: 1

Son 30 gün: 1

Her zaman: 1,775