Ana içeriğe geç

Bu sürüm, hatalı düzenlemeler içerebilir. En son doğrulanmış bellek kopyası dönün.

Neye ihtiyacın var

  1. Bu adım çevrilmemiş. Çevrilmesine yardım edin

    : adım 1, 3 resimden 1. : adım 1, 3 resimden 2. : adım 1, 3 resimden 3.
    • Pry, with a metal probe, the black covers that are located by the pivoting joints of the phone.

    • Beneath the covers are screws.

  2. Bu adım çevrilmemiş. Çevrilmesine yardım edin

    : adım 2, 1 resimden 1.
    • Remove the screws using a Y0 screwdriver.

  3. Bu adım çevrilmemiş. Çevrilmesine yardım edin

    : adım 3, 3 resimden 1. : adım 3, 3 resimden 2. : adım 3, 3 resimden 3.
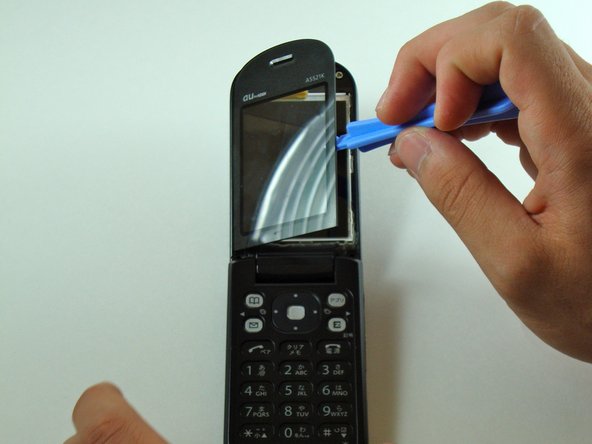
    • Use the iPod pry tool to remove the outer screen.

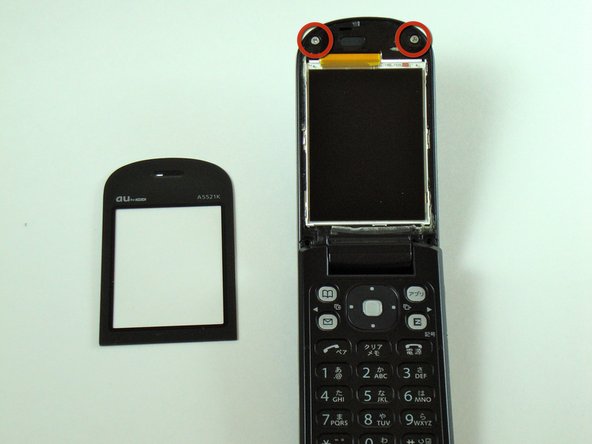
    • Two screws are now visible.

    • Be careful not to crack the screen upon removal. It is adhered strongly to the phone.

  4. Bu adım çevrilmemiş. Çevrilmesine yardım edin

    : adım 4, 1 resimden 1.
    • Use the Y0 screwdriver to remove the screws.

  5. Bu adım çevrilmemiş. Çevrilmesine yardım edin

    : adım 5, 2 resimden 1. : adım 5, 2 resimden 2.
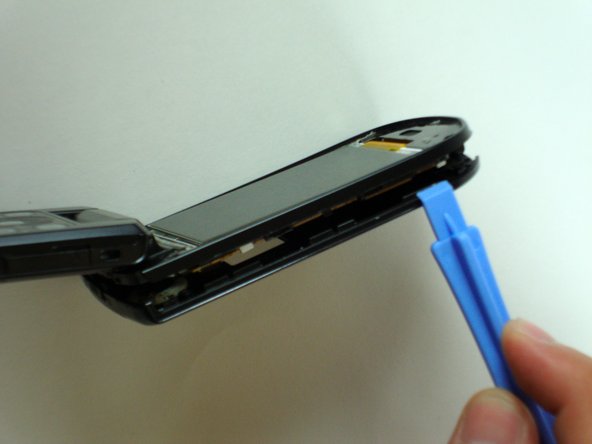
    • Use the iPod pry tool to loosen the faceplate from the phone.

    • Slide the pry tool along the entire crease of the faceplate to completely detach it.

  6. Bu adım çevrilmemiş. Çevrilmesine yardım edin

    : adım 6, 3 resimden 1. : adım 6, 3 resimden 2. : adım 6, 3 resimden 3.
    • Separate the faceplate from the phone.

  7. Bu adım çevrilmemiş. Çevrilmesine yardım edin

    : adım 7, 2 resimden 1. : adım 7, 2 resimden 2.
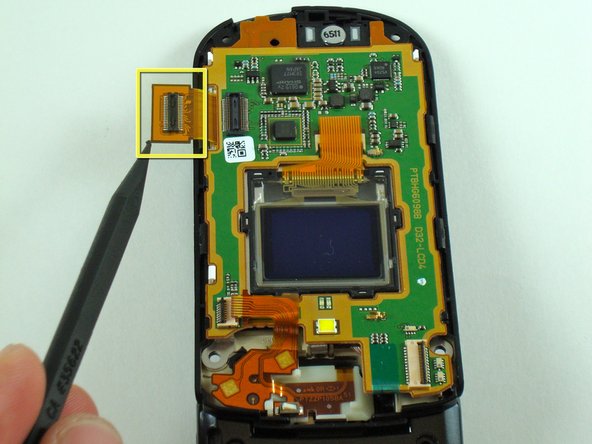
    • Firmly grab the flexible circuit with tweezers to detach (or use your fingers if you can manage a firm grip).

  8. Bu adım çevrilmemiş. Çevrilmesine yardım edin

    : adım 8, 3 resimden 1. : adım 8, 3 resimden 2. : adım 8, 3 resimden 3.
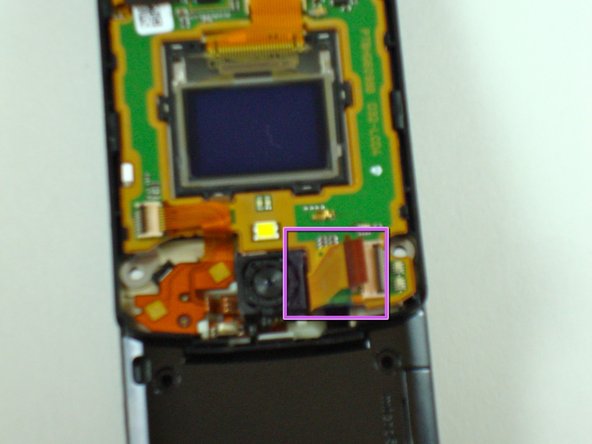
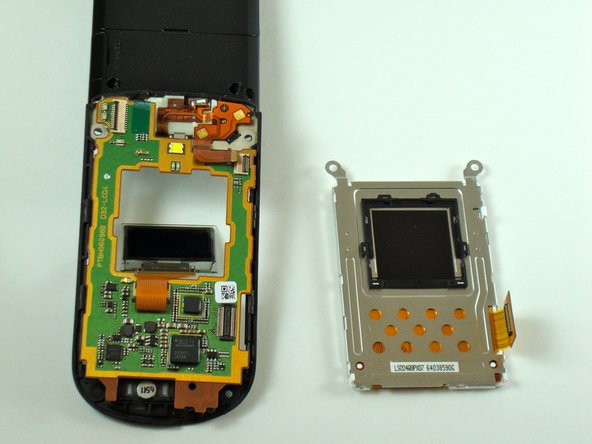
    • Carefully pry up the camera unit with a spudger.

    • Be careful not to damage the camera unit.

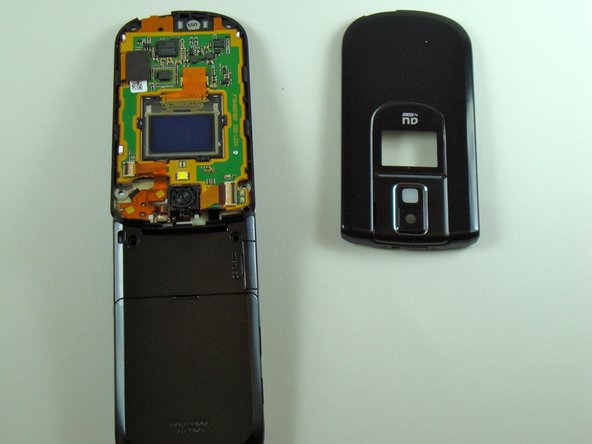
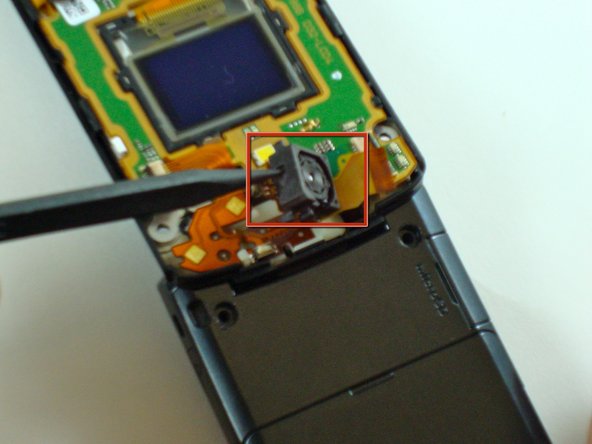
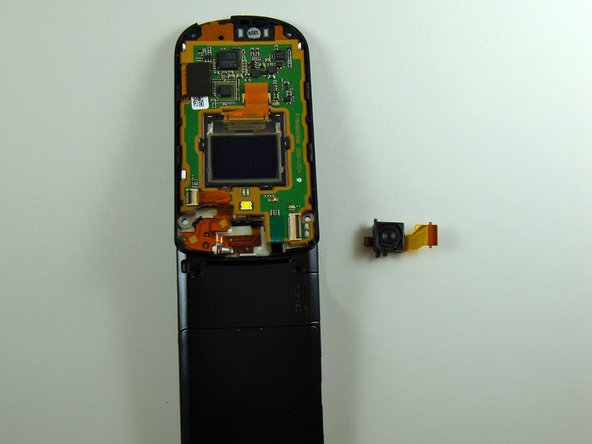
    • The camera should now be separated from the phone.

  9. Bu adım çevrilmemiş. Çevrilmesine yardım edin

    : adım 9, 2 resimden 1. : adım 9, 2 resimden 2.
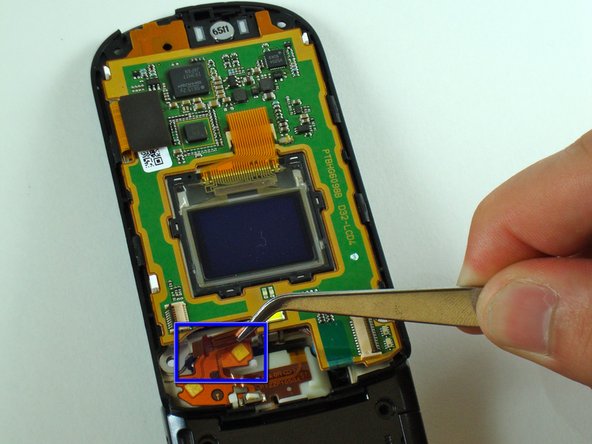
    • Remove the flexible circuit shown using tweezers (or use your fingers if you can manage a firm grip).

  10. Bu adım çevrilmemiş. Çevrilmesine yardım edin

    : adım 10, 2 resimden 1. : adım 10, 2 resimden 2.
    • Unplug the circuit connector.

  11. Bu adım çevrilmemiş. Çevrilmesine yardım edin

    : adım 11, 3 resimden 1. : adım 11, 3 resimden 2. : adım 11, 3 resimden 3.
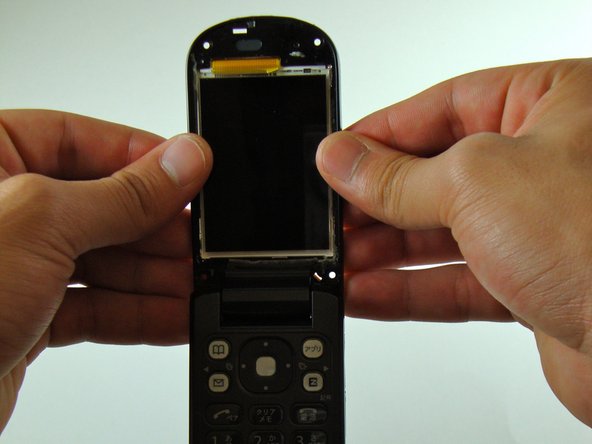
    • Grab the phone with both hands.

    • Turnover the phone so that the main screen faces you.

    • Firmly grasp the edges between your thumbs and fingers.

    • Carefully push in the LCD screen from the remainder of the phone.

    • Be careful not to break the LCD screen.

  12. Bu adım çevrilmemiş. Çevrilmesine yardım edin

    : adım 12, 2 resimden 1. : adım 12, 2 resimden 2.
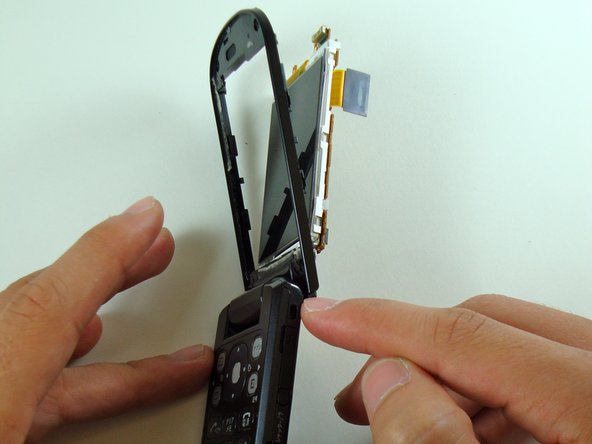
    • The LCD screen and circuit board should now be partly detached from the frame.

  13. Bu adım çevrilmemiş. Çevrilmesine yardım edin

    : adım 13, 2 resimden 1. : adım 13, 2 resimden 2.
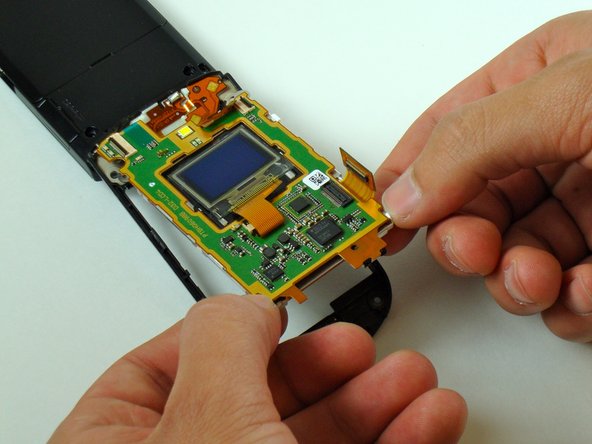
    • Turn over the phone.

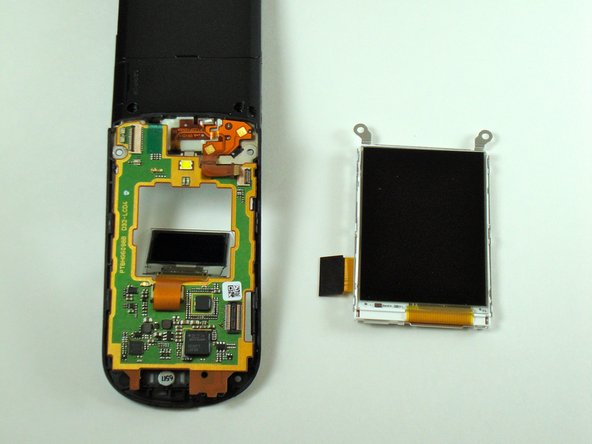
    • Separate the circuit board from the back of the LCD screen.

  14. Bu adım çevrilmemiş. Çevrilmesine yardım edin

    : adım 14, 3 resimden 1. : adım 14, 3 resimden 2. : adım 14, 3 resimden 3.
    • Remove the LCD screen from the phone.

Bitiş Çizgisi

Dominic Grisafe

Üyelik tarihi: 04/15/10

157 İtibar

10 adet Kılavuz yazıldı

Ekip

Cal Poly, Team 28-25, Regan Spring 2010 Cal Poly, Team 28-25, Regan Spring 2010 üyesi

CPSU-REGAN-S10S28G25

4 Üyeler

20 adet Kılavuz yazıldı

0 Yorum

Yorum Ekle

İstatistikleri Görüntüle:

Son 24 Saat: 3

Son 7 gün: 9

Son 30 gün: 26

Her zaman: 1,808