Ana içeriğe geç

Olympus Stylus 725 SW LCD Screen Replacement

Neye ihtiyacın var

  1. Olympus Stylus 725 SW LCD Screen Replacement, Disassembling Olympus Stylus 725 SW Battery: adım 1, 2 resimden 1. Olympus Stylus 725 SW LCD Screen Replacement, Disassembling Olympus Stylus 725 SW Battery: adım 1, 2 resimden 2.
    • The battery is located on the bottom of the camera.

    • Remove the battery by placing your thumb on the bottom flap and sliding the release button away from the side the lens is on. (The screwdriver is simply used as a reference point, no screws need to be removed)

    • If the battery is dead, charge it for 60-90 minutes.

    • When installing a charged battery, align the battery appropriately. The positive signs and negative should line up.

  2. Olympus Stylus 725 SW LCD Screen Replacement, Disassembling Olympus Stylus 725 SW Back Panel: adım 2, 3 resimden 1. Olympus Stylus 725 SW LCD Screen Replacement, Disassembling Olympus Stylus 725 SW Back Panel: adım 2, 3 resimden 2. Olympus Stylus 725 SW LCD Screen Replacement, Disassembling Olympus Stylus 725 SW Back Panel: adım 2, 3 resimden 3.
    • Remove the four 3 mm long cover screws at the corners of the camera using a Phillips #00 screwdriver.

    • Remove the 2 mm long screws securing the sides of the camera which holds the back panel using a Phillips #00 screwdriver.

  3. Olympus Stylus 725 SW LCD Screen Replacement: adım 3, 2 resimden 1. Olympus Stylus 725 SW LCD Screen Replacement: adım 3, 2 resimden 2.
    • Be careful when removing the back cover; you will need to detach the connecting ribbons. Use tweezers if necessary.

    • Detach the ribbons using your thumb, sliding them out of their slots.

    • Set the back panel face up to keep the ribbons from touching anything.

  4. Olympus Stylus 725 SW LCD Screen Replacement, LCD Screen: adım 4, 3 resimden 1. Olympus Stylus 725 SW LCD Screen Replacement, LCD Screen: adım 4, 3 resimden 2. Olympus Stylus 725 SW LCD Screen Replacement, LCD Screen: adım 4, 3 resimden 3.
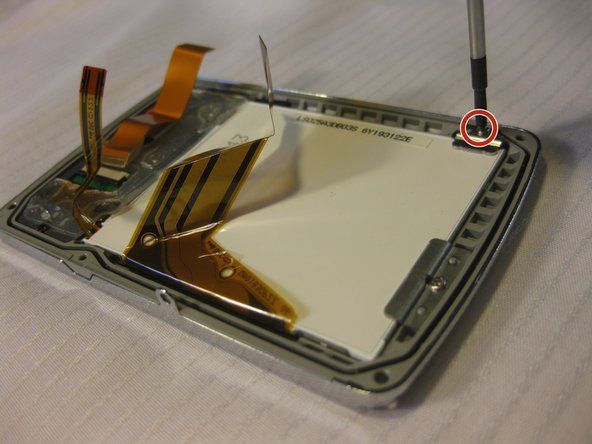
    • Remove the screws in the back panel using a Phillips #00 screwdriver.

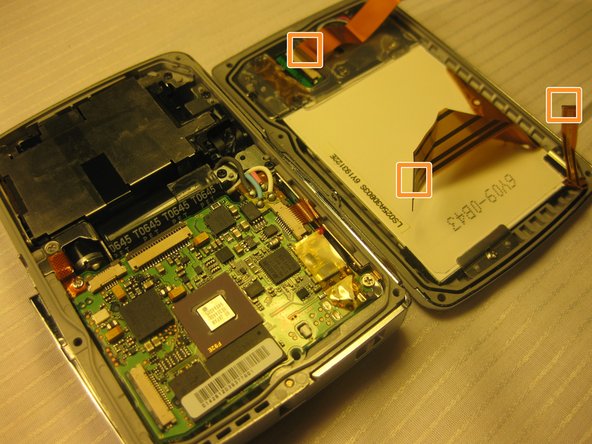
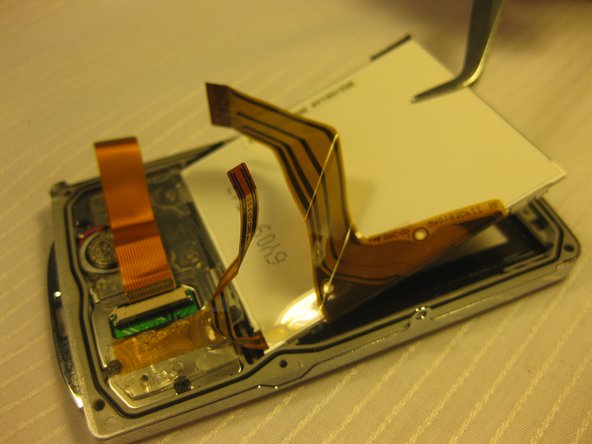
    • Detach the ribbon cables that connect the LCD to the back panel of the camera.

  5. Olympus Stylus 725 SW LCD Screen Replacement: adım 5, 2 resimden 1. Olympus Stylus 725 SW LCD Screen Replacement: adım 5, 2 resimden 2.
    • Use tweezers to remove the loosened LCD screen.

    • Be careful to not scratch the new LCD screen when replacing it.

    • Carefully place the new screen in place of the old, making sure the label faces up.

Sonuç

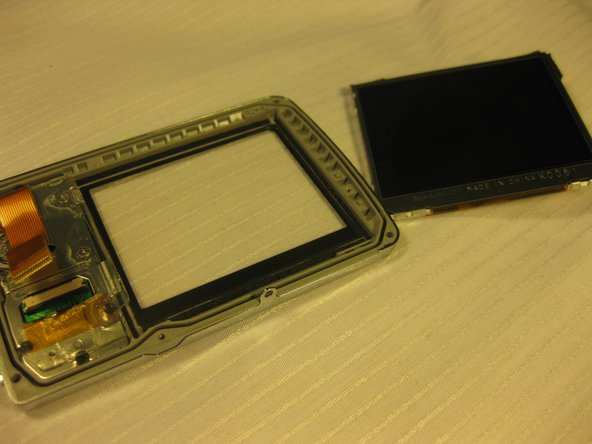
To reassemble your device, follow these instructions in reverse order.

Bir başkası bu kılavuzu tamamladı.

Bobby Hodges

Üyelik tarihi: 04/18/10

49 İtibar

6 adet Kılavuz yazıldı

Ekip

Cal Poly, Team 33-71, Johann Spring 2010 Cal Poly, Team 33-71, Johann Spring 2010 üyesi

CPSU-JOHANN-S10S33G71

4 Üyeler

6 adet Kılavuz yazıldı

0 Yorum

Yorum Ekle

İstatistikleri Görüntüle:

Son 24 Saat: 0

Son 7 gün: 4

Son 30 gün: 9

Her zaman: 7,992