Bu kılavuzda güncel değişiklikler var. En son onaylanmamış sürüme geçin.
Giriş
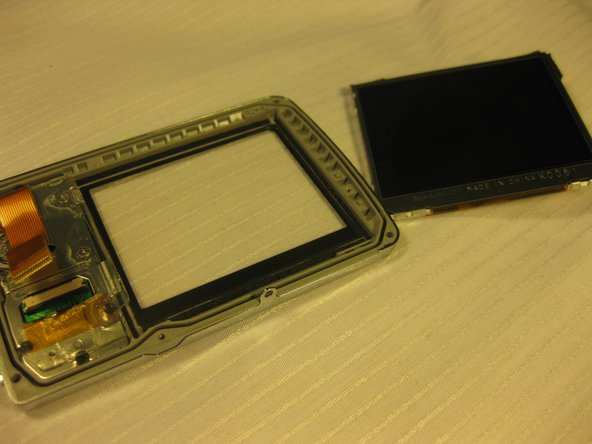
This guide provides instructions for disassembling a broken LCD screen on the Olympus Stylus 725.
Neye ihtiyacın var
-
-
Remove the battery by placing your thumb on the bottom flap and sliding the release button away from the side the lens is on. (The screwdriver is simply used as a reference point, no screws need to be removed)
-
If the battery is dead, charge it for 60-90 minutes.
-
-
-
Remove the four 3 mm long cover screws at the corners of the camera using a Phillips #00 screwdriver.
-
Remove the 2 mm long screws securing the sides of the camera which holds the back panel using a Phillips #00 screwdriver.
-
-
-
-
Use a #00 Phillips head screwdriver to remove the screws in the back panel.
-
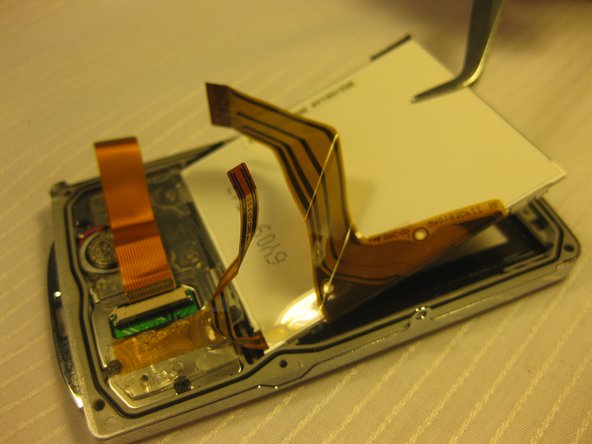
After removing the back panel, slide the ribbons off the computer chip to detach them.
-


Be sure to test the device by turning it on once the screen has been replaced. Make sure that the new screen works properly.
Be sure to test the device by turning it on once the screen has been replaced. Make sure that the new screen works properly.
İptal et: Bu kılavuzu tamamlamadım.
Bir başkası bu kılavuzu tamamladı.
Ekip

Cal Poly, Team 33-71, Johann Spring 2010 Cal Poly, Team 33-71, Johann Spring 2010 üyesi
CPSU-JOHANN-S10S33G71
4 Üyeler
6 adet Kılavuz yazıldı