Ana içeriğe geç
Onarım Topluluğuna Katılın - Hesap Oluşturun

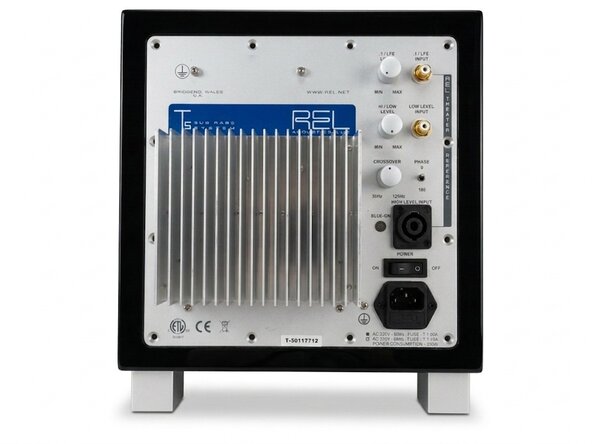
Disassembling REL T5 Main Amplifier

Neye ihtiyacın var

  1. Disassembling REL T5 Main Amplifier, Remove screws: adım 1, 3 resimden 1. Disassembling REL T5 Main Amplifier, Remove screws: adım 1, 3 resimden 2. Disassembling REL T5 Main Amplifier, Remove screws: adım 1, 3 resimden 3.
    • Place the subwoofer on it legs to protect the driver. Be careful not to touch the driver/speaker on the bottom when you handle the case.

    • Using the 3mm hex tool, remove only the outer rim of screws, starting from the bottom.

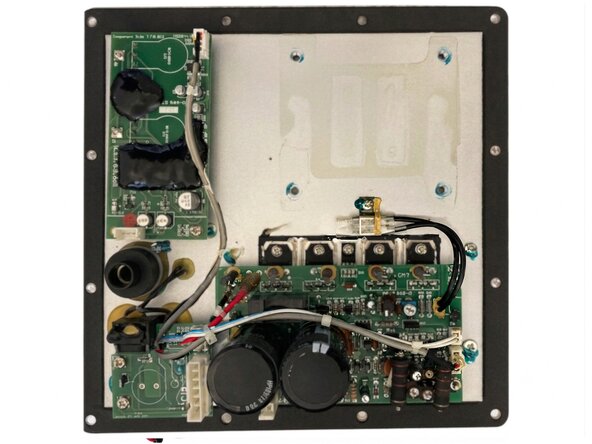
    • Make sure to support the plate amp by gripping the heat sink.

    • Remove the top screws. Be aware: the heavy transformer is located at the top. Removing the top screws will probably make the plate amp tilt out of the case.

    • Using the heatsink, carefully lift the plate amp out of the case. Again: it's heavier than you might expect!

    FixBot'a Sor

    Yorum Ekle

  2. Disassembling REL T5 Main Amplifier, Disconnect the driver: adım 2, 2 resimden 1. Disassembling REL T5 Main Amplifier, Disconnect the driver: adım 2, 2 resimden 2.
    • The plate amp is still connected to the driver via faston connectors. I found it easiest to disconnect the driver connectors, but removing them from the amplifier side works equally well.

    FixBot'a Sor

    Yorum Ekle

  3. Disassembling REL T5 Main Amplifier, Remove plate amp: adım 3, 1 resimden 1.
    • You've now removed the plate amp. Set it aside on the heatsink side. The height of the heatsink will make sure that the controls are not damaged.

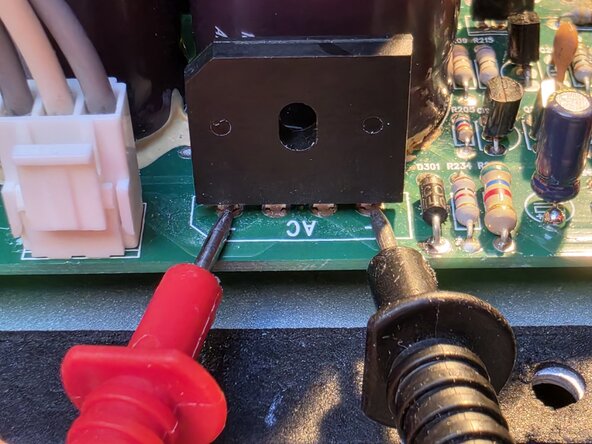
    • Now is a good time to check the voltage rails for residual voltage. Everything after the rectifier bridge should be <45V, but always take appropriate precautions when it comes to mains powered devices.

    FixBot'a Sor

    Yorum Ekle

  4. Disassembling REL T5 Main Amplifier, Snip all connecting trywraps: adım 4, 2 resimden 1. Disassembling REL T5 Main Amplifier, Snip all connecting trywraps: adım 4, 2 resimden 2.
    • Snip all tywraps, such that all cables can be manipulated freely.

    FixBot'a Sor

    Yorum Ekle

  5. Disassembling REL T5 Main Amplifier, Disconnect connectors: adım 5, 2 resimden 1. Disassembling REL T5 Main Amplifier, Disconnect connectors: adım 5, 2 resimden 2.
    • Disconnect all connectors that tie to the transformer

    • Make sure that all leads can be manipulated freely.

    FixBot'a Sor

    Yorum Ekle

  6. Disassembling REL T5 Main Amplifier, Loosen screws: adım 6, 2 resimden 1. Disassembling REL T5 Main Amplifier, Loosen screws: adım 6, 2 resimden 2.
    • Start loosening the screws on the back using the m3 hex tool

    • Don't remove them fully, yet though.

    FixBot'a Sor

    Yorum Ekle

  7. Disassembling REL T5 Main Amplifier, Remove screws: adım 7, 2 resimden 1. Disassembling REL T5 Main Amplifier, Remove screws: adım 7, 2 resimden 2.
    • Turn the amp on it's back.

    • Remove the nuts from the screws that where loosened on the back.

    • Remove the philips screws using a #2.

    FixBot'a Sor

    Yorum Ekle

  8. Disassembling REL T5 Main Amplifier, Loosen dampening rubber: adım 8, 1 resimden 1.
    • Loosen the dampening rubber by running a Halberd Spudger underneath it.

    • The rubber is not adhered to the aluminium and is pretty tough, so a moderate amount of force is allowed.

    FixBot'a Sor

    Yorum Ekle

  9. Disassembling REL T5 Main Amplifier, Remove transformer: adım 9, 2 resimden 1. Disassembling REL T5 Main Amplifier, Remove transformer: adım 9, 2 resimden 2.
    • You can now remove the transformer from the plate. Be careful not to damage the controls on the plate now that the assembly is a lot lighter.

    FixBot'a Sor

    Yorum Ekle

  10. Disassembling REL T5 Main Amplifier, Remove connectors: adım 10, 2 resimden 1. Disassembling REL T5 Main Amplifier, Remove connectors: adım 10, 2 resimden 2.
    • Remove the connectors to the amp board.

    FixBot'a Sor

    Yorum Ekle

  11. Disassembling REL T5 Main Amplifier: adım 11, 2 resimden 1. Disassembling REL T5 Main Amplifier: adım 11, 2 resimden 2.
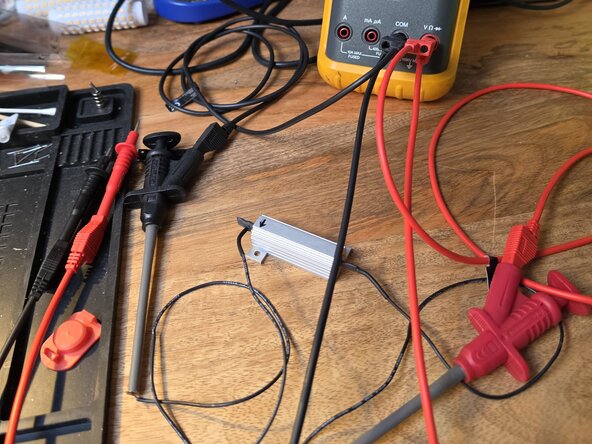
    • Discharge the capacitor e.g. using a replacement 1k3 power resistor.

    • Carefully bridge the resistor across the + and - legs of the recifier, but don't touch anything else.
    FixBot'a Sor

    Yorum Ekle

    • Verify that the voltage is near zero. 0.2V or so is fine.

    • The voltage starts at around 100V, so be careful.

    FixBot'a Sor

    Yorum Ekle

  12. Disassembling REL T5 Main Amplifier, Remove component screws: adım 13, 2 resimden 1. Disassembling REL T5 Main Amplifier, Remove component screws: adım 13, 2 resimden 2.
    • Remove the screws to the thermistor.

    • Remove the screws to the transistors.

    • Store them in a separate baggy.

    FixBot'a Sor

    Yorum Ekle

  13. Disassembling REL T5 Main Amplifier, Remove PCB screws: adım 14, 3 resimden 1. Disassembling REL T5 Main Amplifier, Remove PCB screws: adım 14, 3 resimden 2. Disassembling REL T5 Main Amplifier, Remove PCB screws: adım 14, 3 resimden 3.
    • Remove screws for four corners.

    • Store them in or on their posts.

    FixBot'a Sor

    Yorum Ekle

  14. Disassembling REL T5 Main Amplifier, Lift the PCB: adım 15, 1 resimden 1.
    • Gently lift up the PCB. The transistors might be held down by thermal paste, so use a spudger to release them.

    FixBot'a Sor

    Yorum Ekle

Sonuç

To reassemble your device, follow these instructions in reverse order.

İptal et: Bu kılavuzu tamamlamadım.

Jasper van Zuijlen

Üyelik tarihi: 04/21/25

1.044 İtibar

6 adet Kılavuz yazıldı

0Kılavuz Yorumları

Yorum Ekle

İstatistikleri Görüntüle:

Son 24 Saat: 6

Son 7 gün: 19

Son 30 gün: 36

Her zaman: 43