Giriş
You want to take your Dreame L10s Ultra base station apart, but don't know where to start? Don't worry, with this step-by-step guide, I'll help you open your station without getting tangled up in the process.
Be careful – disassembly can be challenging, and of course I can't take any responsibility for your repair. But you can do it!
Neye ihtiyacın var
-
-
Remove the four screws from the cover. Use a Phillips screwdriver to loosen them. Be careful not to lose the screws – they are small and can easily disappear!
-
Then fold in the hinges of the cover
-
-
Bu adımda kullanılan alet:Jimmy$7.95
-
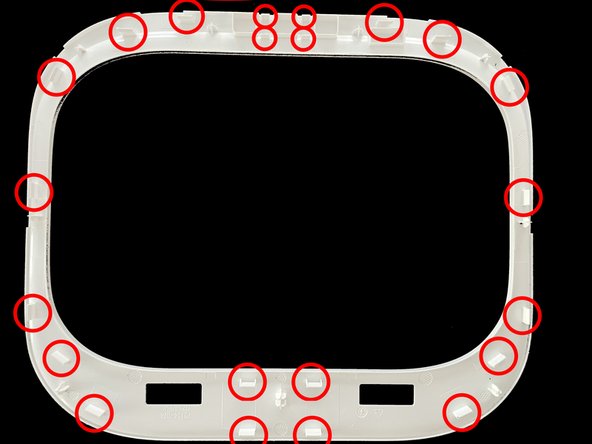
The top cover is held on with clips.
-
Carefully move the Jimmy underneath. Place the tool on an edge and slowly work your way around the casing to avoid damage.
-
You have to be especially careful around the area of the three buttons (see picture 3).
-
-
-
-
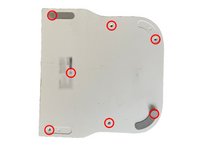
Remove the seven screws on the bottom of the base station with a PH2 screwdriver
-
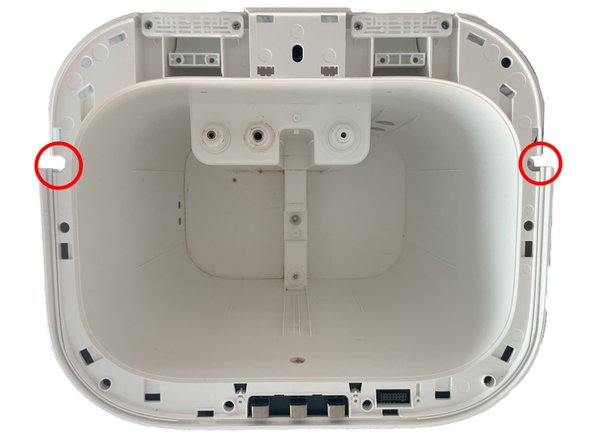
Detach the plate on the underside. To do this, take care of the clips in Fig. 2 above the label with the type designation.
-
-
Bu adımda kullanılan alet:Tweezers$4.99
-
Now you need to remove the cover for the seven marked screws. You can do this either with tweezers or, if you want to be sure that nothing gets damaged, with a Halberd Spudger.
-
Remove the seven marked screws with a PH2 screwdriver.
-
-
Bu adımda kullanılan alet:iFixit Opening Picks (Set of 6)$4.99
-
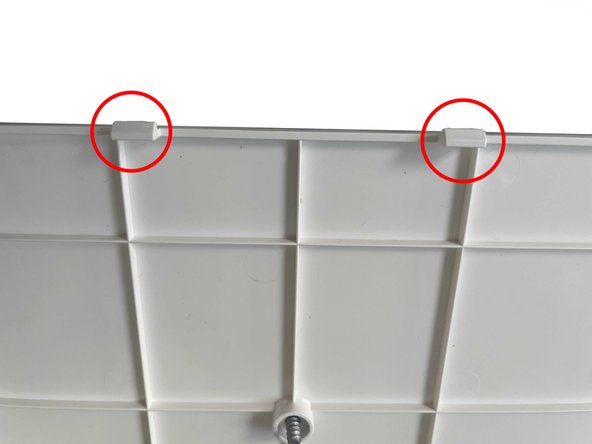
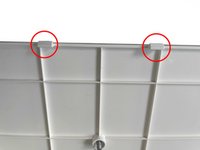
On both sides of the cover, the plastic hooks on my model are located at approximately the following positions, measured from the bottom:
-
125 mm
-
215 mm
-
280 mm
-
395 mm
-
455 mm
-
The hooks are each about 10 mm wide and can be relatively easily removed with the help of the jimmy and prevented from snapping back in with opening picks.
-
The process is repeated on both sides.
-
-
-
Now the desired maintenance/repairs can be carried out.
-
In any case, it makes sense to at least remove the dust and dirt while the device is open. You can do this with compressed air or a brush so that you do not damage any sensitive parts.
-


To reassemble your device, follow the steps in reverse order. When reassembling, be careful not to overtighten the screws, which could damage the case.
To reassemble your device, follow the steps in reverse order. When reassembling, be careful not to overtighten the screws, which could damage the case.
İptal et: Bu kılavuzu tamamlamadım.
2 farklı kişi bu kılavuzu tamamladı.
Bu çevirmenlere özel teşekkürler:
100%


Bu çevirmenler dünyayı onarmamıza yardım ediyor! Katkıda bulunmak ister misiniz?
Çeviriye Başlayın ›
1Rehber Yorum
Has anybody found reliable sources for repair parts? The contacts for charging the robot have arc buildup. I tried contact cleaner and am planning on filing down, but would rather just replace.