Ana içeriğe geç

DualSense Controller V2 Stick Drift Fix

Neye ihtiyacın var

  1. DualSense Controller V2 Stick Drift Fix, DualSense Controller V2 Stick Drift Fix: adım 1, 1 resimden 1.
    • This controller is the black version, but this guide applies to every CFI-ZCT1W model.

    • Here is a video demonstrating how bad the controller stick drift was before the fix.

  2. DualSense Controller V2 Stick Drift Fix: adım 3, 3 resimden 1. DualSense Controller V2 Stick Drift Fix: adım 3, 3 resimden 2. DualSense Controller V2 Stick Drift Fix: adım 3, 3 resimden 3.
    • Disconnect and power down your controller before you begin.

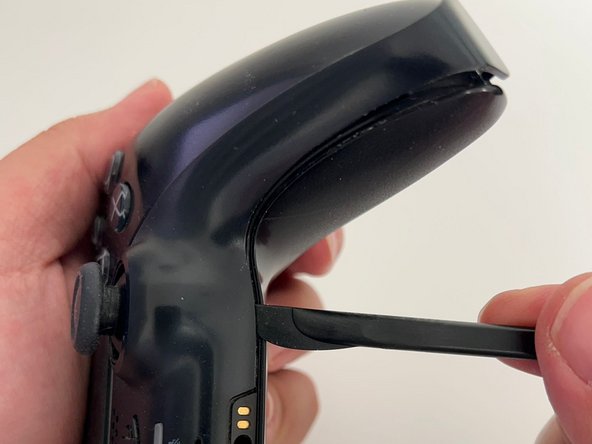
    • Insert an opening pick underneath the middle trim at the right bottom of the controller and pry it up to release the clips that secure it.

  3. DualSense Controller V2 Stick Drift Fix: adım 4, 2 resimden 1. DualSense Controller V2 Stick Drift Fix: adım 4, 2 resimden 2.
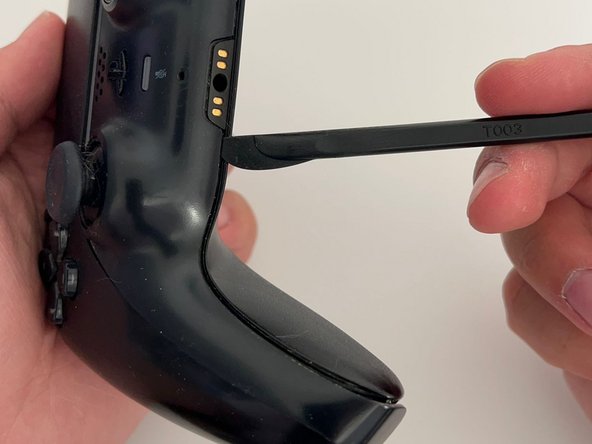
    • Slide a pick along the edge to release the clips securing it to the case.

  4. DualSense Controller V2 Stick Drift Fix: adım 5, 2 resimden 1. DualSense Controller V2 Stick Drift Fix: adım 5, 2 resimden 2.
    • Slide the pick along the lower-left edge release the clips.

  5. DualSense Controller V2 Stick Drift Fix: adım 6, 1 resimden 1.
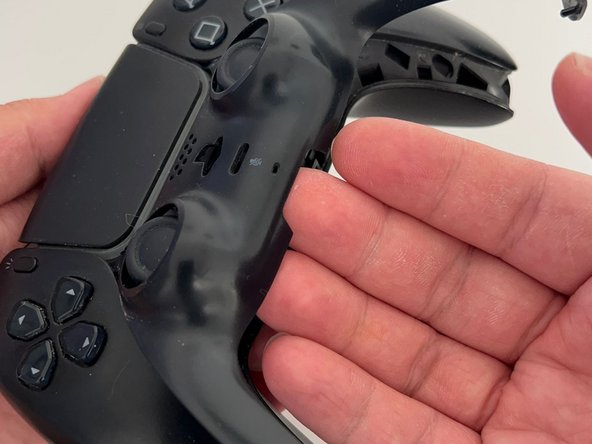
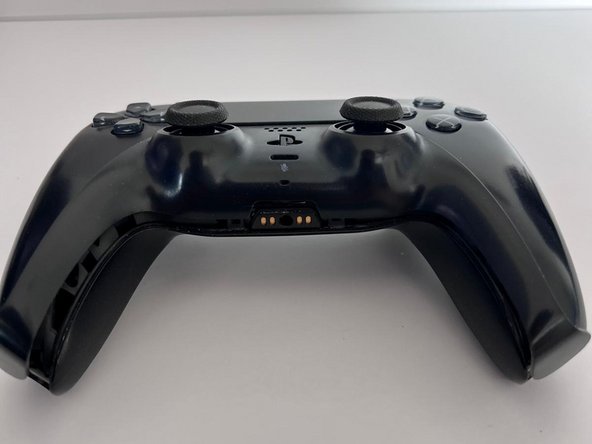
    • This is how the controller looks when all the clips are released.

  6. DualSense Controller V2 Stick Drift Fix: adım 7, 3 resimden 1. DualSense Controller V2 Stick Drift Fix: adım 7, 3 resimden 2. DualSense Controller V2 Stick Drift Fix: adım 7, 3 resimden 3.
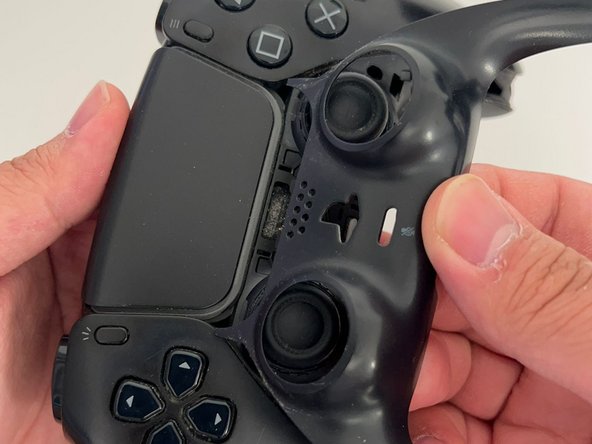
    • Use your fingers to lift up the bottom edge of the middle trim.

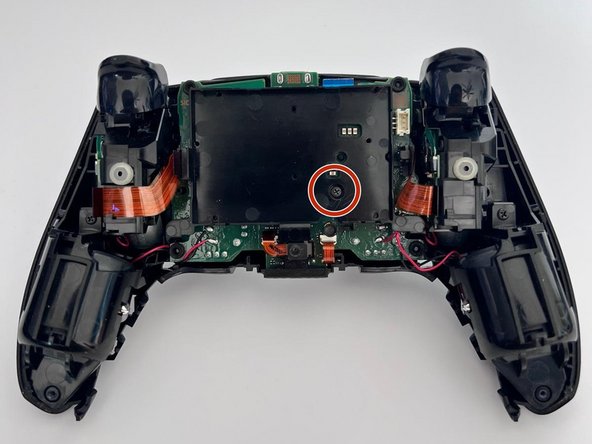
    • Watch out for the two pieces that are hidden underneath the touchpad.

  7. DualSense Controller V2 Stick Drift Fix: adım 8, 3 resimden 1. DualSense Controller V2 Stick Drift Fix: adım 8, 3 resimden 2. DualSense Controller V2 Stick Drift Fix: adım 8, 3 resimden 3.
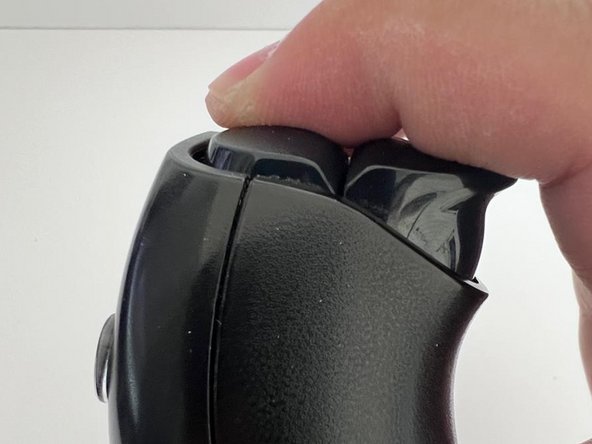
    • Insert the flat end of a spudger into the gap between L1 and L2.

    • Pry upward against L1 to remove the L1 button.

  8. DualSense Controller V2 Stick Drift Fix: adım 9, 2 resimden 1. DualSense Controller V2 Stick Drift Fix: adım 9, 2 resimden 2.
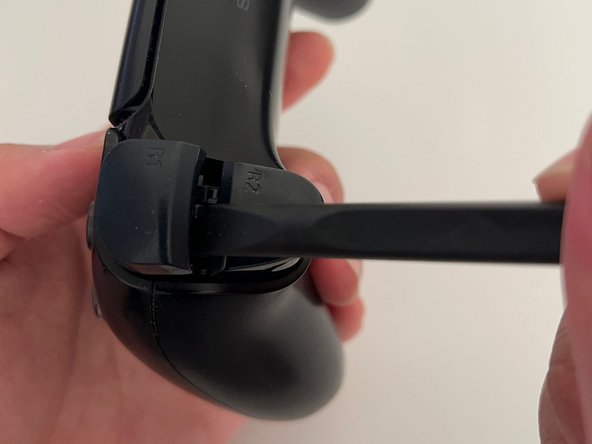
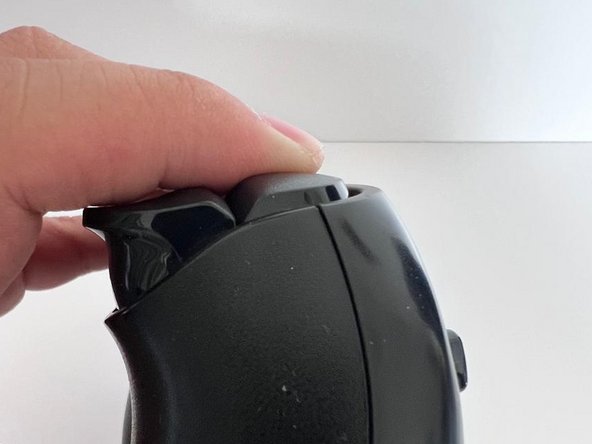
    • Insert the flat end of a spudger into the gap between R1 and R2.

    • Pry upward against the R1 to remove the R1 button.

  9. DualSense Controller V2 Stick Drift Fix: adım 10, 2 resimden 1. DualSense Controller V2 Stick Drift Fix: adım 10, 2 resimden 2.
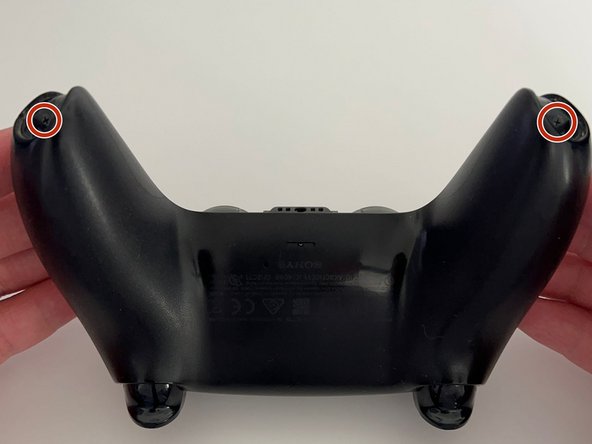
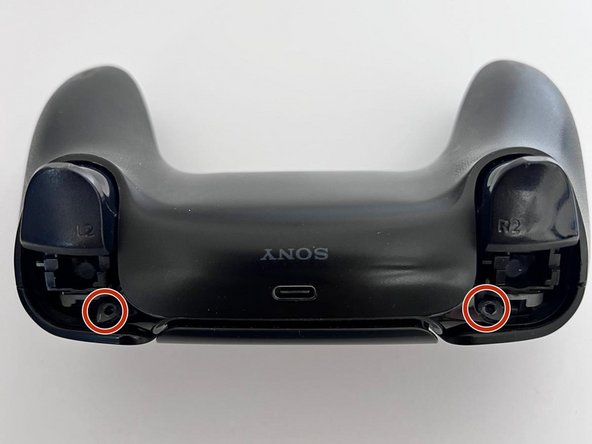
    • Use a Phillips screwdriver to remove the two 6.4 mm screws behind the L1 and R1 buttons, as well as the two 6.4 mm screws that secure the bottom corners of the lower case.

    • You will have a total of four 6.4 mm Phillips screws. Make sure not to lose any of them.

  10. DualSense Controller V2 Stick Drift Fix: adım 11, 3 resimden 1. DualSense Controller V2 Stick Drift Fix: adım 11, 3 resimden 2. DualSense Controller V2 Stick Drift Fix: adım 11, 3 resimden 3.
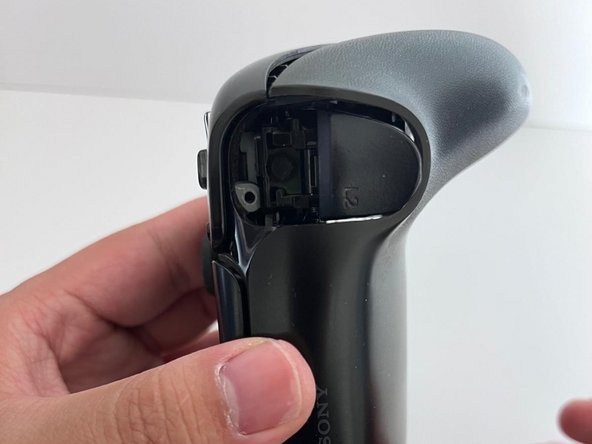
    • Use the pointed edge of a spudger to unclip the two clips on either side of the headset jack.

  11. DualSense Controller V2 Stick Drift Fix: adım 12, 2 resimden 1. DualSense Controller V2 Stick Drift Fix: adım 12, 2 resimden 2.
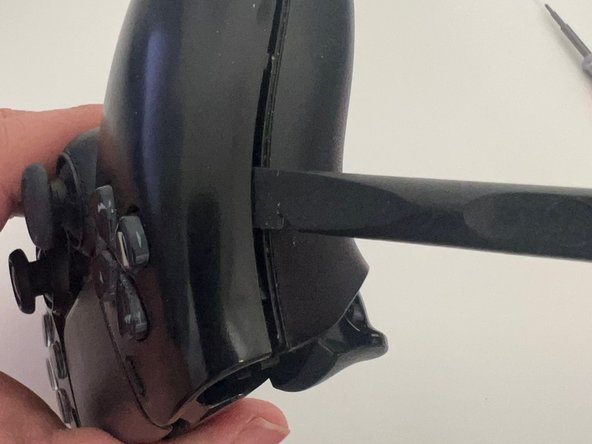
    • Slide the spudger along the edge to release the clips that secure the rear case.

  12. DualSense Controller V2 Stick Drift Fix: adım 13, 2 resimden 1. DualSense Controller V2 Stick Drift Fix: adım 13, 2 resimden 2.
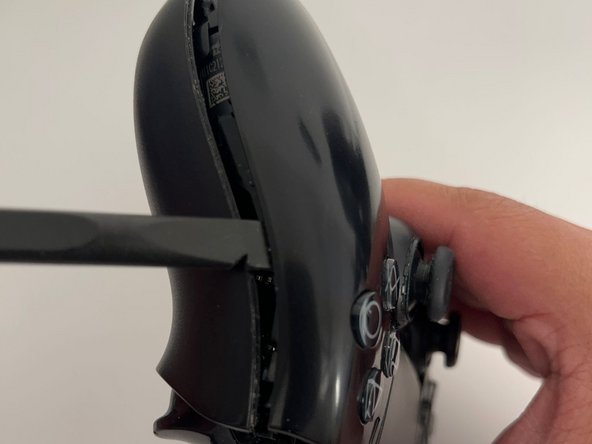
    • Same as the other side, slide the spudger along the edge to release the clips that secure the rear case.

  13. DualSense Controller V2 Stick Drift Fix: adım 14, 1 resimden 1.
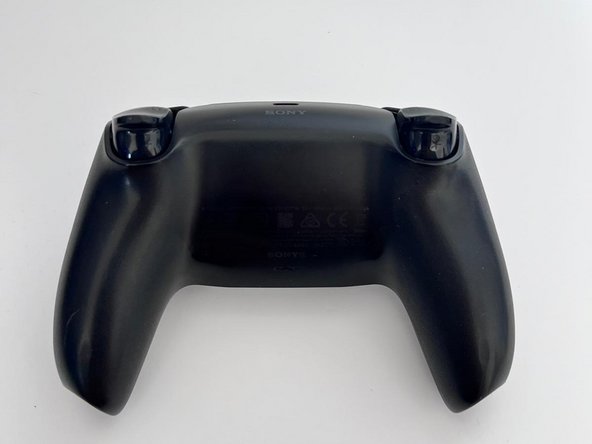
    • Remove the rear case.

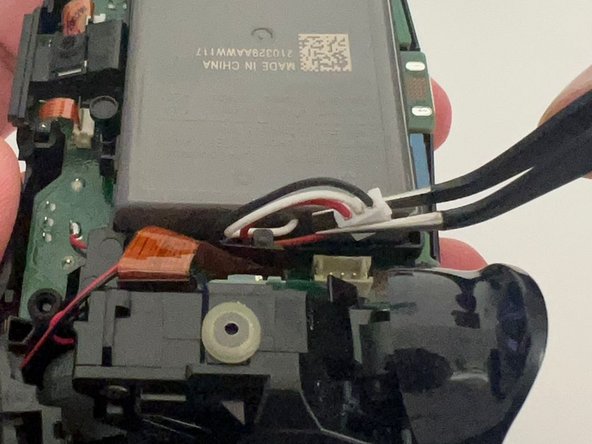
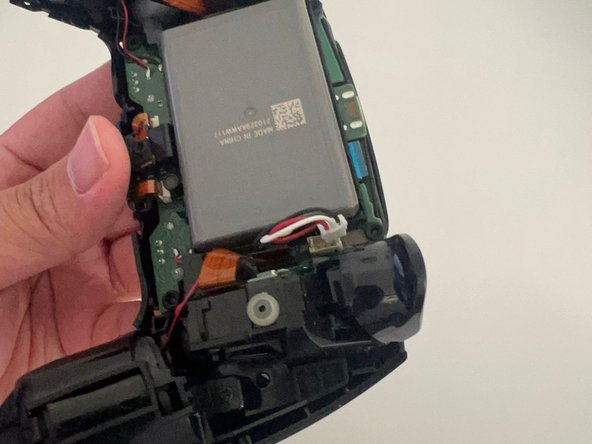
  14. DualSense Controller V2 Stick Drift Fix: adım 15, 3 resimden 1. DualSense Controller V2 Stick Drift Fix: adım 15, 3 resimden 2. DualSense Controller V2 Stick Drift Fix: adım 15, 3 resimden 3.
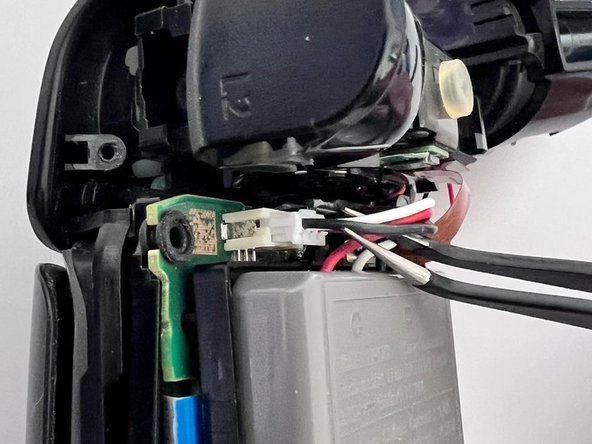
    • Use tweezers or your fingers to disconnect the battery from the motherboard.

    • To prevent damaging the wire, grip the white connector, not the wires.

  15. DualSense Controller V2 Stick Drift Fix: adım 16, 1 resimden 1.
    • Use tweezers to disconnect the upper and lower microphone cables.

    • Use the pull tabs to disconnect the cables. Don't pull on the cables themselves.

  16. DualSense Controller V2 Stick Drift Fix: adım 17, 3 resimden 1. DualSense Controller V2 Stick Drift Fix: adım 17, 3 resimden 2. DualSense Controller V2 Stick Drift Fix: adım 17, 3 resimden 3.
    • Use a Phillips screwdriver to remove the single 6.4 mm screw that secures the battery bracket.

    • Remove the battery bracket.

    • At this point, you will have a total of five 6.4 mm Phillips screws.

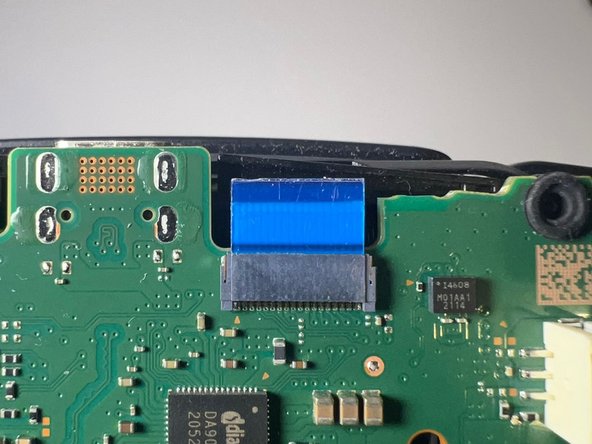
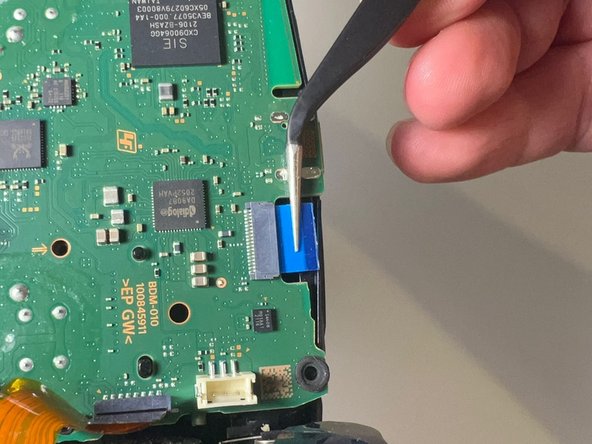
  17. DualSense Controller V2 Stick Drift Fix: adım 18, 3 resimden 1. DualSense Controller V2 Stick Drift Fix: adım 18, 3 resimden 2. DualSense Controller V2 Stick Drift Fix: adım 18, 3 resimden 3.
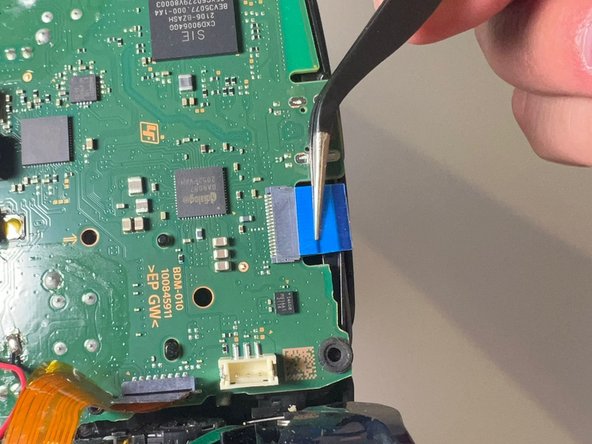
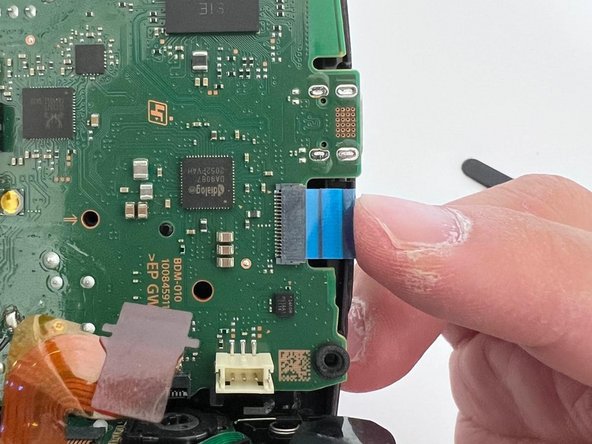
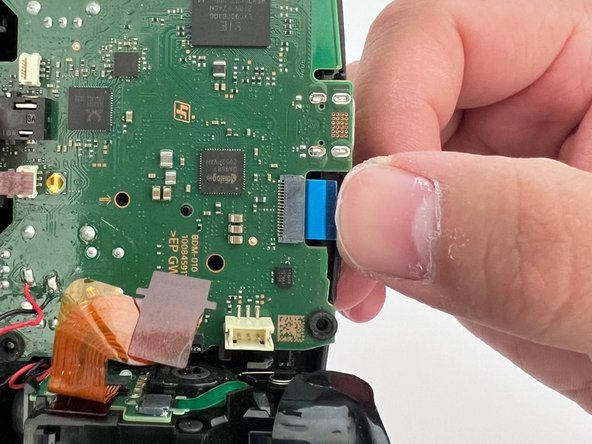
    • Use a pair of tweezers to grip the touchpad ribbon cable, and pull it out of the motherboard.

    • Use the pull tabs to disconnect the cables. Don't pull on the cables themselves.

  18. DualSense Controller V2 Stick Drift Fix: adım 19, 3 resimden 1. DualSense Controller V2 Stick Drift Fix: adım 19, 3 resimden 2. DualSense Controller V2 Stick Drift Fix: adım 19, 3 resimden 3.
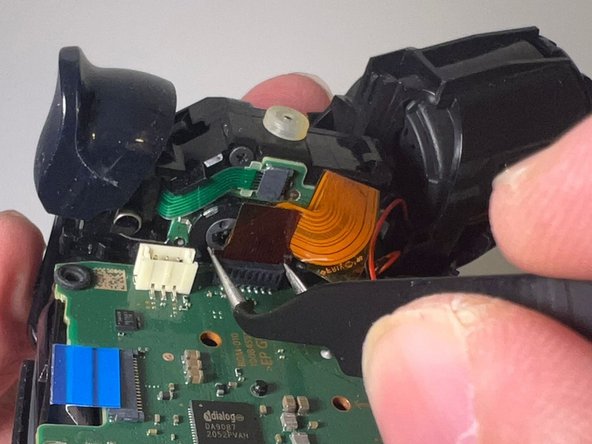
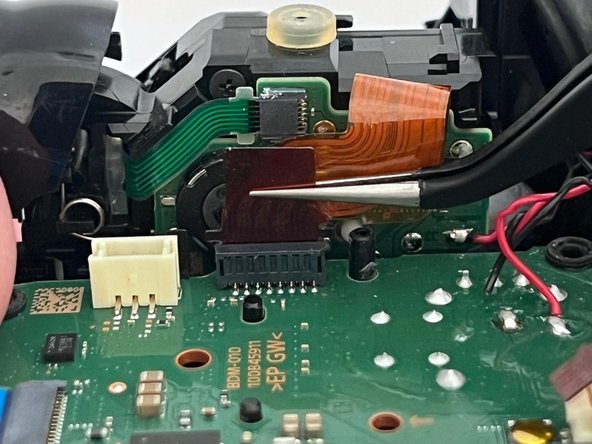
    • Use a pair of tweezers to disconnect the right trigger ribbon cable.

    • Use the pull tab to disconnect the cable. Don't pull on the cable itself.

  19. DualSense Controller V2 Stick Drift Fix: adım 20, 3 resimden 1. DualSense Controller V2 Stick Drift Fix: adım 20, 3 resimden 2. DualSense Controller V2 Stick Drift Fix: adım 20, 3 resimden 3.
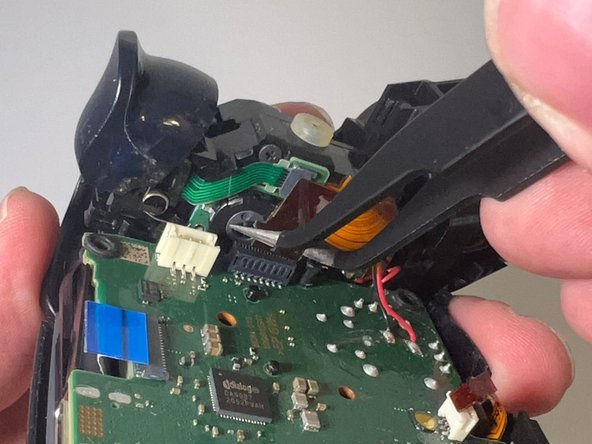
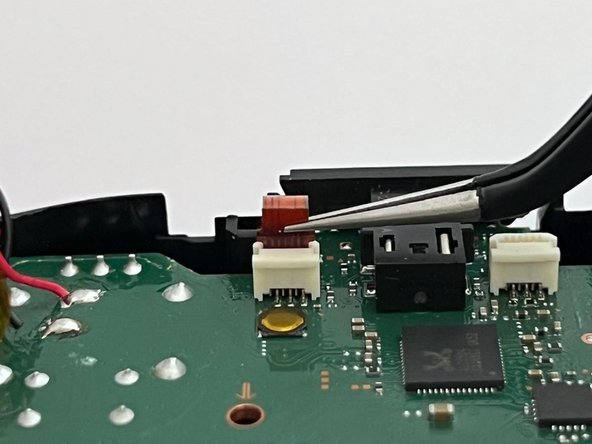
    • Use a pair of tweezers to disconnect the left trigger ribbon cable from the motherboard.

    • Use the pull tab to disconnect the cable. Don't pull on the cable itself.

  20. DualSense Controller V2 Stick Drift Fix: adım 21, 1 resimden 1.
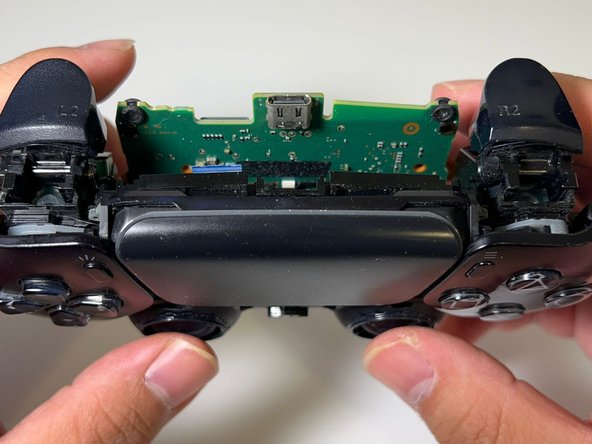
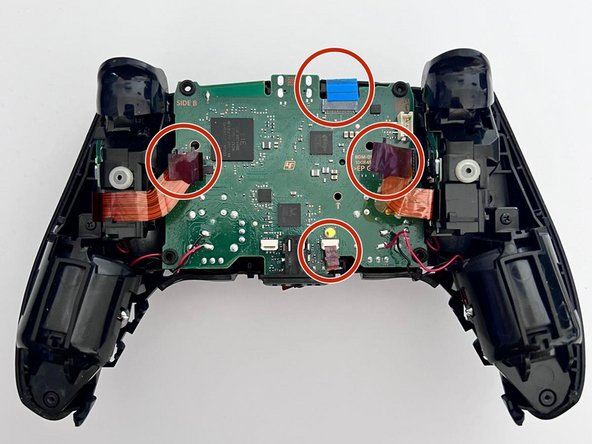
    • Make sure you have disconnected the four ribbon cables from the motherboard before moving on to the next step.

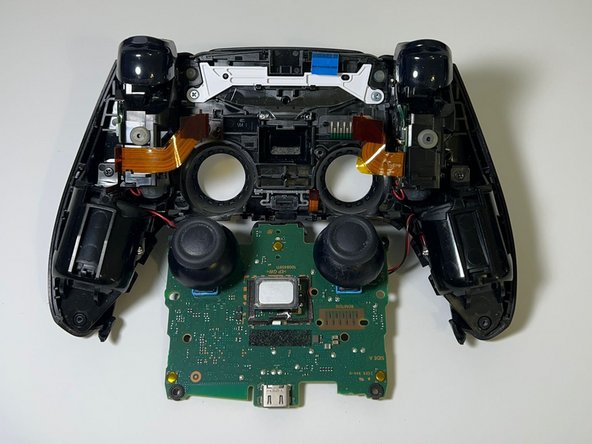
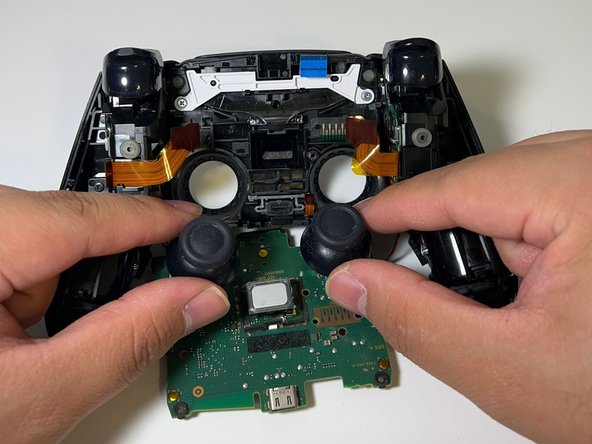
  21. DualSense Controller V2 Stick Drift Fix: adım 22, 3 resimden 1. DualSense Controller V2 Stick Drift Fix: adım 22, 3 resimden 2. DualSense Controller V2 Stick Drift Fix: adım 22, 3 resimden 3.
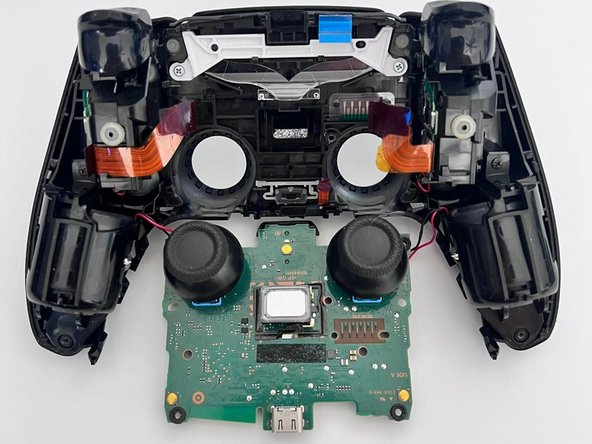
    • Gently push the joysticks to separate the motherboard from the case.

    • The motherboard and the case are still connected through 4 soldered wires. Take care not to strain them.

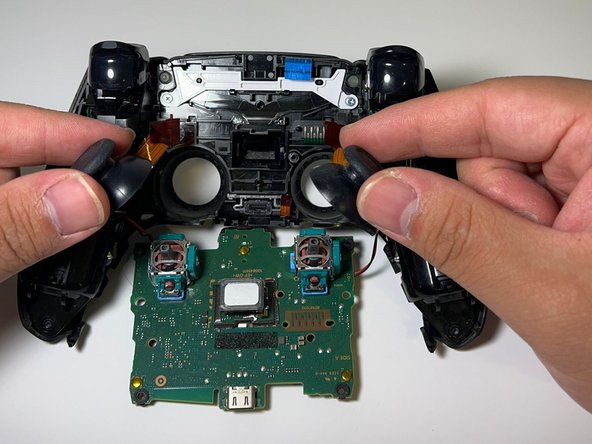
  22. DualSense Controller V2 Stick Drift Fix: adım 23, 2 resimden 1. DualSense Controller V2 Stick Drift Fix: adım 23, 2 resimden 2.
    • Use your fingers to pull the joystick covers straight up and off.

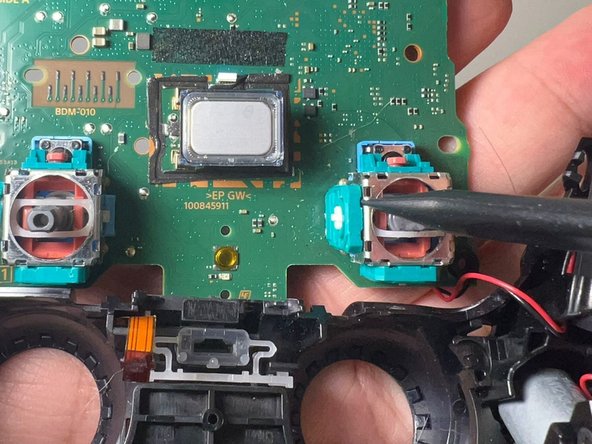
  23. DualSense Controller V2 Stick Drift Fix: adım 24, 2 resimden 1. DualSense Controller V2 Stick Drift Fix: adım 24, 2 resimden 2.
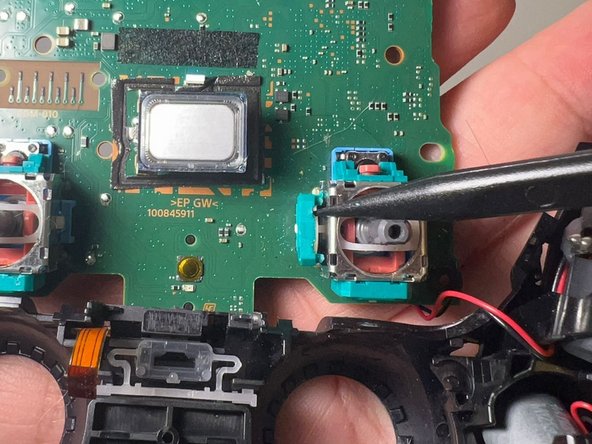
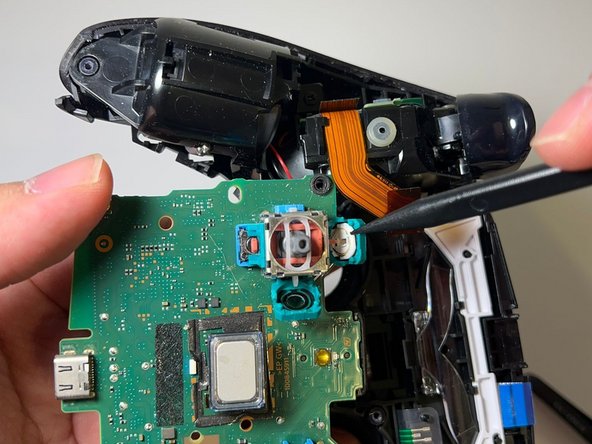
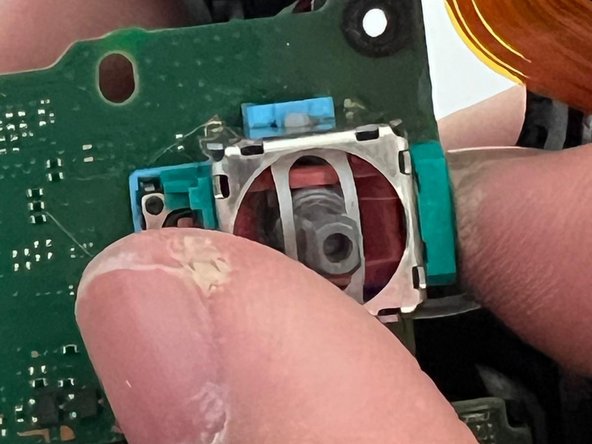
    • Use a spudger to pry the drifting joystick potentiometer slots open.

    • Pry open the potentiometer slot gently or you will damage the slot.

  24. DualSense Controller V2 Stick Drift Fix: adım 25, 2 resimden 1. DualSense Controller V2 Stick Drift Fix: adım 25, 2 resimden 2.
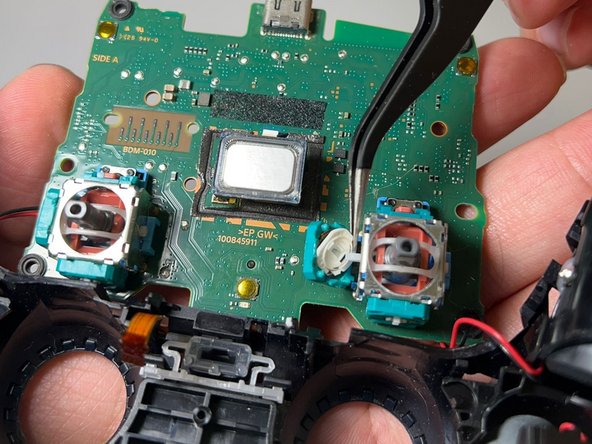
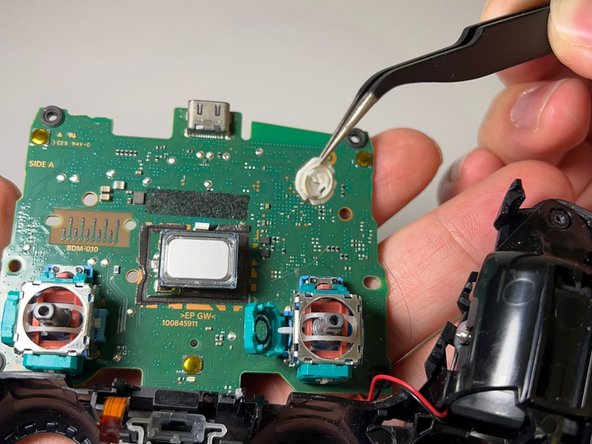
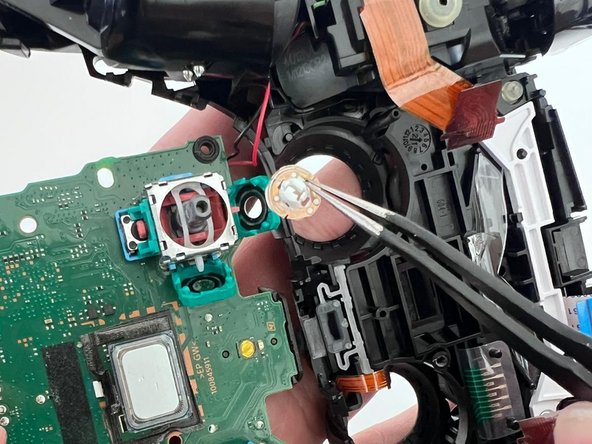
    • Use tweezers to remove the wiper.

    • Try to keep the slots down to about only 60o, completely prying it open will damage the slots and they will not be able to close.

  25. DualSense Controller V2 Stick Drift Fix: adım 26, 3 resimden 1. DualSense Controller V2 Stick Drift Fix: adım 26, 3 resimden 2. DualSense Controller V2 Stick Drift Fix: adım 26, 3 resimden 3.
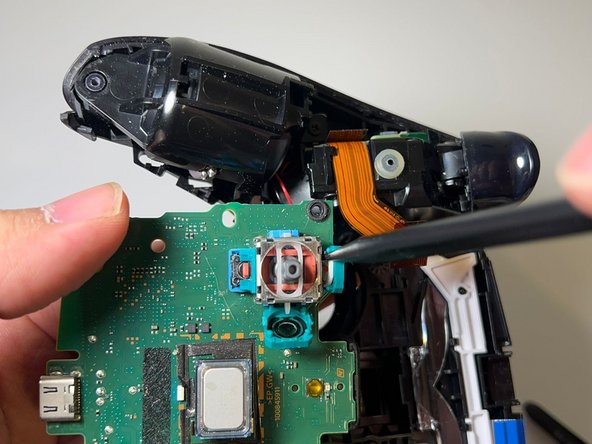
    • Repeat the previous step for the other potentiometer.

    • Try to keep the slots down to about only 60o, completely prying it open will damage the slots and they will not be able to close.

  26. DualSense Controller V2 Stick Drift Fix: adım 27, 2 resimden 1. DualSense Controller V2 Stick Drift Fix: adım 27, 2 resimden 2.
    • Use a pair of tweezers to remove the wiper.

  27. DualSense Controller V2 Stick Drift Fix: adım 28, 2 resimden 1. DualSense Controller V2 Stick Drift Fix: adım 28, 2 resimden 2.
    • Dampen a cotton swab with high-concentration isopropyl alcohol.

    • Flip the wiper to the other side and use the damp cotton swab to rub off any gunk or grease.

    • Repeat this step for the other wiper.

  28. DualSense Controller V2 Stick Drift Fix: adım 29, 2 resimden 1. DualSense Controller V2 Stick Drift Fix: adım 29, 2 resimden 2.
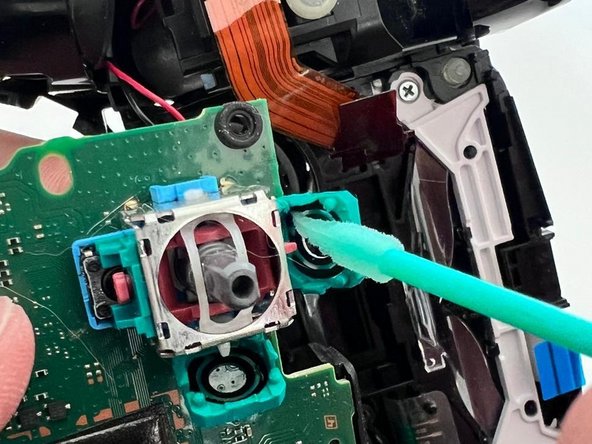
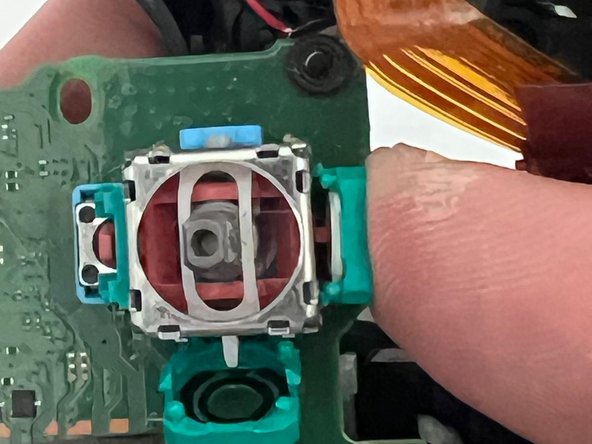
    • Use a cotton swab damp with high-concentration isopropyl alcohol clean the inside of both of the potentiometer slots.

  29. DualSense Controller V2 Stick Drift Fix: adım 30, 3 resimden 1. DualSense Controller V2 Stick Drift Fix: adım 30, 3 resimden 2. DualSense Controller V2 Stick Drift Fix: adım 30, 3 resimden 3.
    • Put the cleaned wipers back into their respective potentiometer slots.

    • When reinstalling the wiper, make sure the curved prongs is at the top.

  30. DualSense Controller V2 Stick Drift Fix: adım 31, 3 resimden 1. DualSense Controller V2 Stick Drift Fix: adım 31, 3 resimden 2. DualSense Controller V2 Stick Drift Fix: adım 31, 3 resimden 3.
    • The remainder of the guide details reassembly.

    • Use your finger to push and close each slot.

    • Make sure you hear a "click" when you close it.

  31. DualSense Controller V2 Stick Drift Fix: adım 32, 2 resimden 1. DualSense Controller V2 Stick Drift Fix: adım 32, 2 resimden 2.
    • Reinstall the joystick covers.

  32. DualSense Controller V2 Stick Drift Fix: adım 33, 3 resimden 1. DualSense Controller V2 Stick Drift Fix: adım 33, 3 resimden 2. DualSense Controller V2 Stick Drift Fix: adım 33, 3 resimden 3.
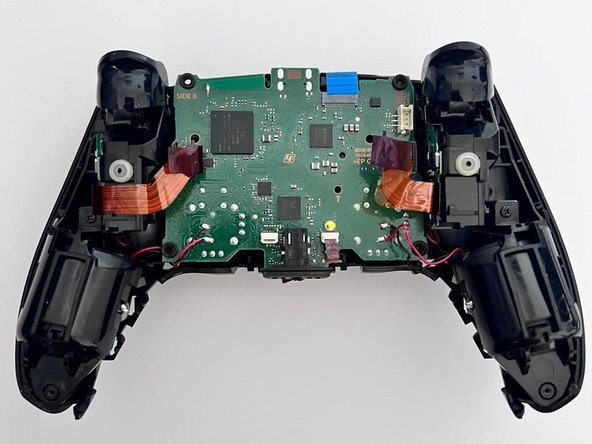
    • Put the motherboard back into the case.

    • Make sure these 4 cable are on top of the motherboard.

  33. DualSense Controller V2 Stick Drift Fix: adım 34, 3 resimden 1. DualSense Controller V2 Stick Drift Fix: adım 34, 3 resimden 2. DualSense Controller V2 Stick Drift Fix: adım 34, 3 resimden 3.
    • Use tweezers to set the touchpad cable in the slot.

    • Use your finger to push it back in.

    • Push gently to prevent breaking the ribbon cable.

  34. DualSense Controller V2 Stick Drift Fix: adım 35, 2 resimden 1. DualSense Controller V2 Stick Drift Fix: adım 35, 2 resimden 2.
    • Use tweezers to put the trigger cable in the slot, then place the tweezer on top of the side of the cable and push it down.

  35. DualSense Controller V2 Stick Drift Fix: adım 36, 2 resimden 1. DualSense Controller V2 Stick Drift Fix: adım 36, 2 resimden 2.
    • Use tweezers to put the other trigger cable in the slot, then place the tweezer on top of the cable and push it down

  36. DualSense Controller V2 Stick Drift Fix: adım 37, 2 resimden 1. DualSense Controller V2 Stick Drift Fix: adım 37, 2 resimden 2.
    • Use a pair of tweezer to insert the lower microphone cable the cable into its slot.

    • Push the cable down.

  37. DualSense Controller V2 Stick Drift Fix: adım 38, 2 resimden 1. DualSense Controller V2 Stick Drift Fix: adım 38, 2 resimden 2.
    • Use a Phillips screwdriver to reinstall the 6.4 mm screw that secures the battery bracket.

  38. DualSense Controller V2 Stick Drift Fix: adım 39, 1 resimden 1.
    • Insert the upper microphone cable.

  39. DualSense Controller V2 Stick Drift Fix: adım 40, 2 resimden 1. DualSense Controller V2 Stick Drift Fix: adım 40, 2 resimden 2.
    • Plug in the battery cable.

  40. DualSense Controller V2 Stick Drift Fix: adım 41, 3 resimden 1. DualSense Controller V2 Stick Drift Fix: adım 41, 3 resimden 2. DualSense Controller V2 Stick Drift Fix: adım 41, 3 resimden 3.
    • Assemble the rear case.

  41. DualSense Controller V2 Stick Drift Fix: adım 42, 2 resimden 1. DualSense Controller V2 Stick Drift Fix: adım 42, 2 resimden 2.
    • Use a Phillips screwdriver to install the two 6.4 mm screws behind the L1 and R1 buttons, as well as the two 6.4 mm screws that secure the bottom corners of the lower case.

  42. DualSense Controller V2 Stick Drift Fix: adım 43, 2 resimden 1. DualSense Controller V2 Stick Drift Fix: adım 43, 2 resimden 2.
    • Put the L1 button cover back in.

    • Press it down and until you hear a *click*.

  43. DualSense Controller V2 Stick Drift Fix: adım 44, 2 resimden 1. DualSense Controller V2 Stick Drift Fix: adım 44, 2 resimden 2.
    • Put the R1 button cover back in.

    • Press it down and until you hear a *click*.

  44. DualSense Controller V2 Stick Drift Fix: adım 45, 2 resimden 1. DualSense Controller V2 Stick Drift Fix: adım 45, 2 resimden 2.
    • Reinstall the middle trim.

    • These two highlighted piecse need to go under the touchpad.

    • Here's the testing again; see the difference?

Sonuç

If you are still having problems after following all the steps in this guide, your controller probably has another issue.

Please check out other iFixit repair guides, such as replacing the entire Joystick.

Hope you find this guide helpful and may your controllers last forever!

Alvin2325

Üyelik tarihi: 03/20/24

613 İtibar

1 Kılavuz yazıldı

Ekip

Engl2030AS Engl2030AS üyesi

Community

1 Üye

1 Kılavuz yazıldı

0 Yorum

Yorum Ekle

İstatistikleri Görüntüle:

Son 24 Saat: 54

Son 7 gün: 176

Son 30 gün: 189

Her zaman: 257