Bu sürüm, hatalı düzenlemeler içerebilir. En son doğrulanmış bellek kopyası dönün.
Neye ihtiyacın var
-
Bu adım çevrilmemiş. Çevrilmesine yardım edin
-
Remove the five 7.2 mm Phillips screws securing the rear cover to the controller.
-
-
Bu adım çevrilmemiş. Çevrilmesine yardım edin
-
Press on the rear cover between the analog sticks and slightly lift the lower edge of it away from the rest of the controller.
-
-
Bu adım çevrilmemiş. Çevrilmesine yardım edin
-
Push the rear cover slightly toward the top edge of the controller to clear the front edge of the #2 triggers.
-
Pull the rear cover away from the rest of the controller, being careful not to pop off the #2 triggers.
-
-
Bu adım çevrilmemiş. Çevrilmesine yardım edin
-
Lift the battery off the motherboard for enough clearance to access the battery connector.
-
-
-
Bu adım çevrilmemiş. Çevrilmesine yardım edin
-
Carefully pull the battery connector away from its socket on the motherboard.
-
-
Bu adım çevrilmemiş. Çevrilmesine yardım edin
-
Remove the single 7.2 mm Phillips screw securing the motherboard to the front cover.
-
-
Bu adım çevrilmemiş. Çevrilmesine yardım edin
-
Slide the trigger button retainers slightly away from the front cover.
-
Remove the #1 button on both sides.
-
-
Bu adım çevrilmemiş. Çevrilmesine yardım edin
-
Pull the vibration motor retainers away from the front cover to dislodge the motherboard assembly.
-
-
Bu adım çevrilmemiş. Çevrilmesine yardım edin
-
Lift the rubber button contacts off the front controller cover to access the plastic button covers.
-
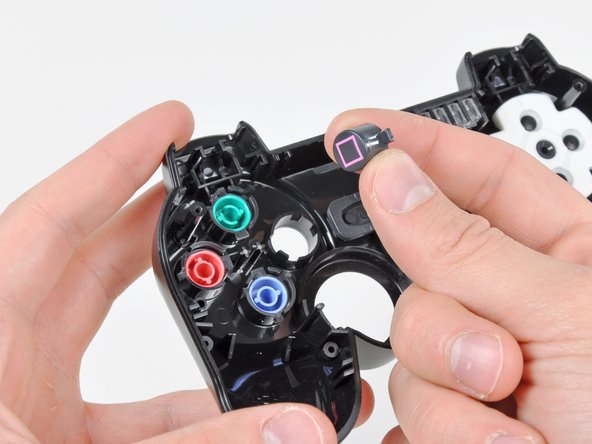
Lift any damaged plastic button covers out of the controller cover.
-


İptal et: Bu kılavuzu tamamlamadım.
95 farklı kişi bu kılavuzu tamamladı.

6 Yorum
My Dualshock 3 didn't have the three armed plastic piece on the D-pad. Mine's a red one, relatively recent. My controller also had the problem where it would randomly send button press events when using the L-stick. I traced the problem to the ribbon connector between the board and the contacts, which was very dirty. I cleaned the contacts and put the controller back together with an additional rubber shim between the back cover and the battery, which got rid of the creakiness of the somewhat loose-fitting case. Works great now.
How do you clean the contacts? Is there a special way?
Are these instructions the same for the dual-shock 2?
TNX-could not really figure out where the 3-armed plastic should fit in but tnx to step 11 i know-now im going to dismantle my controller again.