Giriş
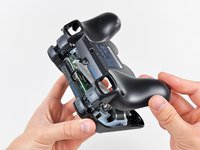
Use this guide to replace the thin plastic input board and its plastic frame. A new input board will provide new electrical contacts for every button except for the analog sticks.
Neye ihtiyacın var
-
-
Remove the five 7.2 mm Phillips screws securing the rear cover to the controller.
-
-
-
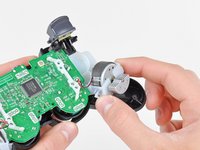
Lift the battery off the motherboard for enough clearance to access the battery connector.
-
-
-
-
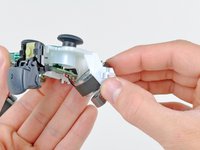
Remove the single 7.2 mm Phillips screw securing the motherboard to the front cover.
-


To reassemble your device, follow these instructions in reverse order.
İptal et: Bu kılavuzu tamamlamadım.
26 farklı kişi bu kılavuzu tamamladı.

2Kılavuz Yorumları
Will a repair guide be available for the newer Dualshock 3 controllers? Because they are vastly different and look to be cheaply made. The CECHZC2U A2 is the one I'm thinking of. I ask becase it's near impossible to find the older better made controllers like the one featured here.
I took my controller apart, which is the same model as the one in the pictures, to clean it because my shoulder buttons would go haywire.
When I separated the input board from the mobo, a little piece of gray foam fell from the input board, specifically from where all the contacts meet the mobo. I thought nothing of it so I cleaned the contacts and put it back together. When I went to use it, none of the buttons did anything, not even the PS button.
This is because the function that black piece of foam, which had disintegrated thus making all the insides of the controller really nasty, is to push the contacts of the input board against the ones on the mobo. So the controller wont work without it.
What I did was I cut a piece of tape and wedged it on the part of the input board that is behind the contacts of the input board. This pushed up against the input board’s contacts and made sure it was always making contact with the mobo. Then it worked just fine!
Sharing this in case someone else runs into this problem.