Ana içeriğe geç

Dyson Ball Multi Floor Upright Electrical Cord Replacement

Neye ihtiyacın var

  1. Dyson Ball Multi Floor Upright Electrical Cord Replacement, Electrical Cord: adım 1, 2 resimden 1. Dyson Ball Multi Floor Upright Electrical Cord Replacement, Electrical Cord: adım 1, 2 resimden 2.
    • Press the red button on the back to release the hose and allow for easy access to the back

  2. Dyson Ball Multi Floor Upright Electrical Cord Replacement: adım 2, 1 resimden 1.
    • Remove the four 15 mm T-10 black screws now showing in the back of the vacuum hose track, using the Phillips 0 screwdriver found in the iFixit tool kit.

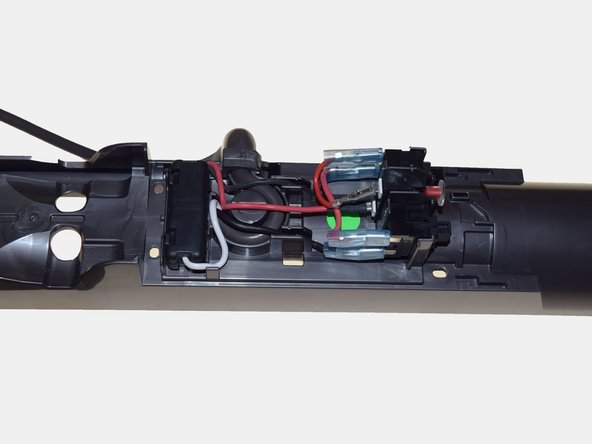
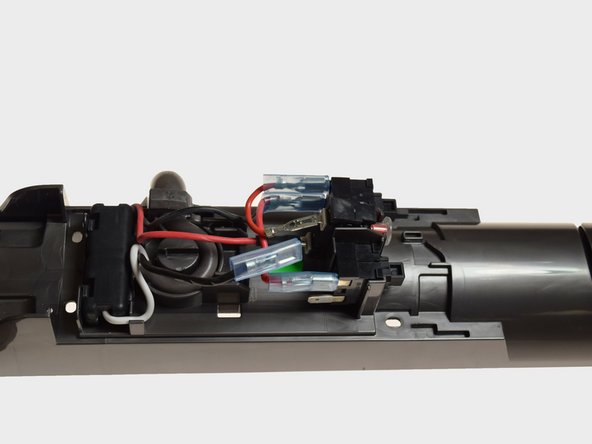
  3. Dyson Ball Multi Floor Upright Electrical Cord Replacement: adım 3, 2 resimden 1. Dyson Ball Multi Floor Upright Electrical Cord Replacement: adım 3, 2 resimden 2.
    • Use a pair of needle nosed pliers to press both tabs simultaneously.

    • Hold onto the front hatch while doing this or it will fall off and a spring and lever will fall out with it.

    • Remove the hatch carefully exposing the wiring underneath

  4. Dyson Ball Multi Floor Upright Electrical Cord Replacement: adım 4, 2 resimden 1. Dyson Ball Multi Floor Upright Electrical Cord Replacement: adım 4, 2 resimden 2.
    • Remove the black wire from its connection near the top of the hatch

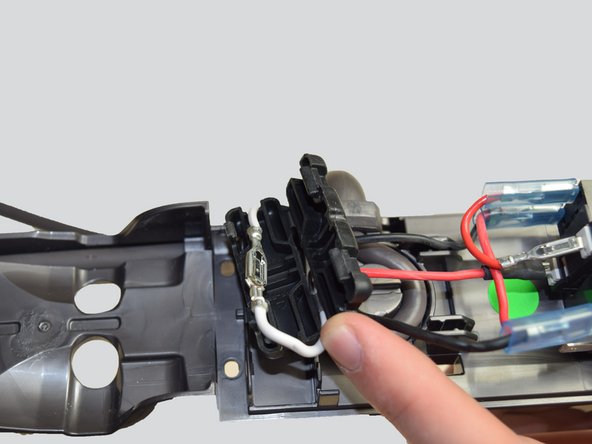
  5. Dyson Ball Multi Floor Upright Electrical Cord Replacement: adım 5, 2 resimden 1. Dyson Ball Multi Floor Upright Electrical Cord Replacement: adım 5, 2 resimden 2.
    • Open the black box near the bottom of the hatch area using the two push tabs

    • This exposes the white wire's connection

  6. Dyson Ball Multi Floor Upright Electrical Cord Replacement: adım 6, 1 resimden 1.
    • Disconnect the white wire using the small metal tab.

    • Do not damage the wire during the process.

  7. Dyson Ball Multi Floor Upright Electrical Cord Replacement: adım 7, 1 resimden 1.
    • Pull vertically on the grey cord now and it should separate from the rest of the vacuum

    • To replace the cord, slide the new grey cord into place and connect the two wires again then complete the steps in reverse

Sonuç

To reassemble your device, follow these instructions in reverse order.

Bir başkası bu kılavuzu tamamladı.

Nicole Abraham

Üyelik tarihi: 01/26/17

839 İtibar

5 adet Kılavuz yazıldı

Ekip

Cal Poly, Team 21-2, Maness Winter 2017 Cal Poly, Team 21-2, Maness Winter 2017 üyesi

CPSU-MANESS-W17S21G2

4 Üyeler

10 adet Kılavuz yazıldı

Bir Yorum

Supposing that one doesn't hold onto the front part, and the spring and lever fall out, how does one replace said spring and lever?

Jordan Adams - Yanıt

Yorum Ekle

İstatistikleri Görüntüle:

Son 24 Saat: 1

Son 7 gün: 9

Son 30 gün: 49

Her zaman: 3,636