Ana içeriğe geç

Dyson DC19 Allergy Vacuum Cleaner disassembly

Neye ihtiyacın var

  1. Dyson DC19 Allergy Vacuum Cleaner disassembly, Dyson DC19 Allergy Vacuum Cleaner disassembly: adım 1, 2 resimden 1. Dyson DC19 Allergy Vacuum Cleaner disassembly, Dyson DC19 Allergy Vacuum Cleaner disassembly: adım 1, 2 resimden 2.
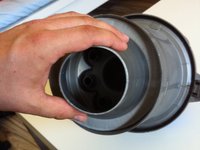
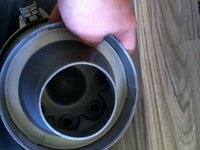
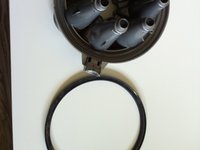
    • Detatch the cyclone assembly from the main unit.

  2. Dyson DC19 Allergy Vacuum Cleaner disassembly: adım 2, 2 resimden 1. Dyson DC19 Allergy Vacuum Cleaner disassembly: adım 2, 2 resimden 2.
    • Take the waste bin and cyclone assembly apart.

  3. Dyson DC19 Allergy Vacuum Cleaner disassembly: adım 3, 3 resimden 1. Dyson DC19 Allergy Vacuum Cleaner disassembly: adım 3, 3 resimden 2. Dyson DC19 Allergy Vacuum Cleaner disassembly: adım 3, 3 resimden 3.
    • Pull the bottom cone out of the assembly.

    • When re-assembling: there are three slots on the outer edge of the assembly that the cone matches. This is shown in picture 2. You might have to press the cone down with your thumb as in picture 3. When re-assembling, remember to fit the rubber gasket on the cone before inserting the cone in the body.

  4. Dyson DC19 Allergy Vacuum Cleaner disassembly: adım 4, 2 resimden 1. Dyson DC19 Allergy Vacuum Cleaner disassembly: adım 4, 2 resimden 2.
    • Remove the gasket surrounding the bottom cone.

  5. Dyson DC19 Allergy Vacuum Cleaner disassembly: adım 5, 1 resimden 1.
    • Remove the seven torx screws which hold the top cover in place (one is located in the middle of the handle). You need a torx T15 driver for this.

  6. Dyson DC19 Allergy Vacuum Cleaner disassembly: adım 6, 1 resimden 1.
    • Remove the seven torx screws which hold the cyclone manifold in place. You need a torx T15 driver for this.

  7. Dyson DC19 Allergy Vacuum Cleaner disassembly: adım 7, 2 resimden 1. Dyson DC19 Allergy Vacuum Cleaner disassembly: adım 7, 2 resimden 2.
    • Remove the manifold and the gasket underneath it.

  8. Dyson DC19 Allergy Vacuum Cleaner disassembly: adım 8, 3 resimden 1. Dyson DC19 Allergy Vacuum Cleaner disassembly: adım 8, 3 resimden 2. Dyson DC19 Allergy Vacuum Cleaner disassembly: adım 8, 3 resimden 3.
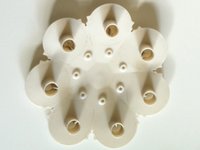
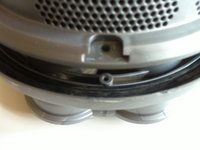
    • Flip the assembly over and remove the three plastic tabs covering the screws, then remove the screws. When re-assembling note that the screw holes align only in one way.

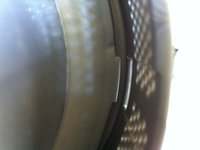
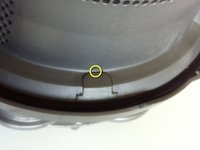
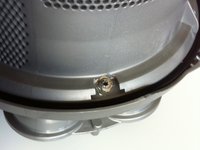
    • A good way to remove the tabs is to insert a small flat-head driver between the the tab and turn. (In the place marked in picture.)

  9. Dyson DC19 Allergy Vacuum Cleaner disassembly: adım 9, 3 resimden 1. Dyson DC19 Allergy Vacuum Cleaner disassembly: adım 9, 3 resimden 2. Dyson DC19 Allergy Vacuum Cleaner disassembly: adım 9, 3 resimden 3.
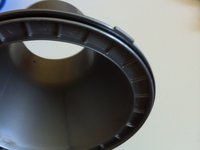
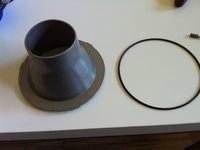
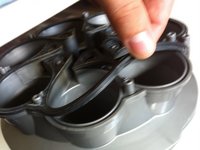
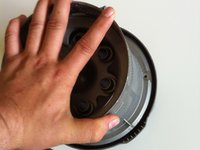
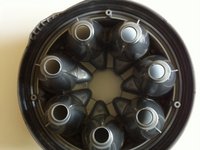
    • Take the the cyclone assembly apart by pulling the two pieces away from each other. Note that these parts may be stuck together so you might have to use some amount of force. You can now remove the gasket between the parts.

    • When re-assembling note that you have to press the two pieces together really hard until you hear/feel a click.

  10. Dyson DC19 Allergy Vacuum Cleaner disassembly: adım 10, 1 resimden 1.
    • Everything is washable, do not use too hot water.

Sonuç

To reassemble your device, follow these instructions in reverse order.

17 farklı kişi bu kılavuzu tamamladı.

Sami

Üyelik tarihi: 07/04/11

628 İtibar

1 Kılavuz yazıldı

0 Yorum

Yorum Ekle

İstatistikleri Görüntüle:

Son 24 Saat: 1

Son 7 gün: 18

Son 30 gün: 77

Her zaman: 22,747