Bu çeviri bir makine tarafından oluşturulmuştur ve henüz bir kişi tarafından incelenmemiştir. Bu dili konuşuyor musunuz? İnceleme için.

Dyson V11 Tetik Değişimi

Beicheng Zhu ve 6 diğer katkıda bulunanlar
En son 15 Ağu 2026 tarihinde güncellendi
Görüntüleme: 130 B
İstatistikleri görüntüle:
- Son 24 Saat:
- 129
- Son 7 Gün:
- 682
- Son 30 Gün:
- 3.200
- Her zaman:
- 130.079
Yorumlar: 71
45 comments on steps, 26 guide comments.
Go to guide commentsTamamlandı: 62 63
62 kişi bu kılavuzu "tamamlandı" olarak işaretledi. Sıradaki sen olacak mısın?
63 kişi bu kılavuzu "tamamlandı" olarak işaretledi. Siz de dahil - harika iş!
Sık Kullanılanlar: 9 10
9 kişi bu kılavuzu favorilerine ekledi (ve abone oldu). Sıradaki sen olacak mısın?
Siz de dahil olmak üzere 10 kişi bu kılavuzu favorilerine ekledi (ve abone oldu)!
Topluluk-Katkılı Kılavuz
Topluluğumuzdan muhteşem birisi bu kılavuzu hazırladı. Bu kılavuz iFixit elemanları tarafından oluşturulmamıştır.
Daha İyi Resimler Gerekli
Daha iyi fotoğraflar bu kılavuzu geliştirecektir. Yeni fotoğraflar çekerek, düzenleyerek ya da yükleyerek katkıda bulunun!
Daha Fazla Görsel Gerekli
Biraz daha fazla görsel sayesinde bu kılavuzdaki prosedürler apaçık olacaktır.
Giriş
1. adıma git ↓Bu kılavuz, Dyson V11 Torque Drive elektrikli süpürgedeki tetiği nasıl değiştireceğinizi gösterecektir. Tetik plastikten yapıldığı için kolayca kırılabilir. Dyson V11 Torque Drive süpürgenizin tetiği kırılmışsa, süpürmeye başlamayacaktır. Pil tam şarjlı olsa bile, Dyson V11 Torque Drive süpürmeye başlamaz. Tetiği değiştirdiğinizde, Dyson V11 Torque Drive süpürge tekrar çalışır hale gelecek ve süpürmeye başlayacaktır.
Dyson V11 Torque Drive süpürgenin tetiğini değiştirmek için ihtiyacınız olacak araçlar; Phillips #1 tornavida, Phillips #0 tornavida ve plastik kanırtma aparatıdır.
Neye ihtiyacın var
Parçalar
-
Dyson V11 Torque Drive Replacement Trigger (Trigger)Ortaklık bağlantısıAmazon tedarikçisinden satışta
Aletler
-
Spudger4.9
-


-
-
-
Kulpun arkasındaki bir adet #1 Yıldız vidayı çıkarın
 FixBot'a Sor
-
-
-
Bataryanın alt tarafındaki iki adet Phillips #1 yıldız vidayı çıkarın.
-
-
-
Bataryayı tutamağından dışarı kaydırmak için aşağı doğru çekin.
-
-
-
-
-
Filtreyi döndürün ve ardından kaydırarak yerinden çıkarın.
-
-
-
-
-
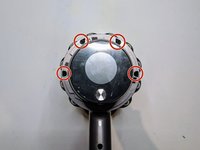
Batarya göstergesinin yanındaki dört vidayı bir Yıldız tornavida ile çıkarın.
-
-
-
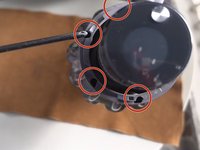
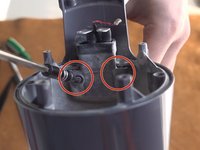
Devre kartını örten koruyucu kılıftaki iki vidayı çıkarın.
-
Bazı modellerde bu vidalar Phillips #0, bazılarında ise Torx #8 standardındadır.
-
-
-
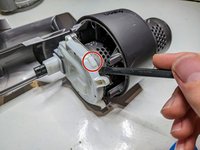
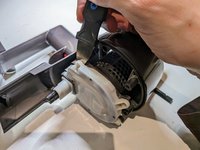
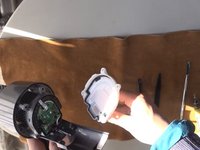
Devre kartı muhafazası çok serttir ve çıkarılması zor olabilir. Buradaki kilit nokta, plastik klipsleri kapattıkları için dikdörtgen çıkıntıların yakınını ayırmak üzere bir plastik kanırtma aparatı kullanmaktır.
-
Ayrıca, az önce vidaları çıkardığınız noktadan muhafazanın altına bir jimmy kaydırmak ve o tarafı gevşetmek için oradan kanırtarak ayırmak da yardımcı olabilir.
-
-
-
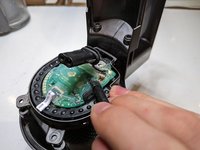
Devre kartı, oldukça fazla miktarda şeffaf yapıştırıcıyla kaplanmış olabilir. Bu kaplamanın altında bulunan üç şeye erişmemiz gerekiyor: iki güç bağlantısı ve anahtar kablosu.
-
Vida başları ve güç kabloları üzerindeki yapıştırıcıyı dikkatlice kazıyın veya kesin.
-
Aynı şekilde, anahtar kablosunu ve fişini serbest bırakın.
-
-
-
-
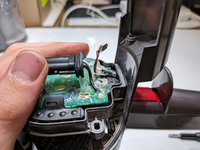
Anahtar kablosunun fişini nazikçe ayırın ve siyah ve beyaz kablolara dolanmaması için kabloyu devre kartından yukarı doğru kaldırın.
-
-
-
Güç kablolarının uçlarını, alt devre kartı muhafazasındaki yuvadan daha kolay geçecek şekilde çevirin.
-
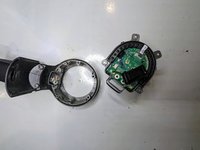
Orta kısmı dış kabuktan çıkarın. İdeal olan, kabloları yuvadan yavaşça iterek çıkarmaktır ancak bu zor olabilir; orta kısmı ayırmak için biraz kuvvet uygulamanız gerekebilir.
-
-
-
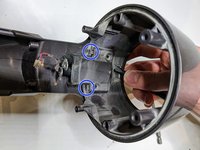
Şarj bölmesinin içindeki tek vidayı, modelinizde takılı olan vidaya bağlı olarak bir Yıldız tornavida veya Torx tornavida ile çıkarın.
-
-
Bu adımda kullanılan alet:Tweezers$4.99
-
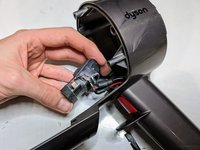
Kablo muhafazasındaki iki vidayı çıkarın.
-
Klipsleri serbest bırakmak için kablo muhafazasını yukarı doğru kaldırarak ayırın. Klipsleri bir tornavida veya cımbız ile itmeniz gerekebilir.
-
Muhafazayı kablolardan kaydırarak çıkarın.
-
-
-
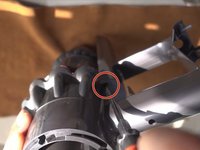
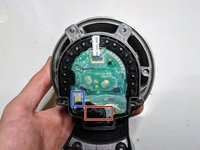
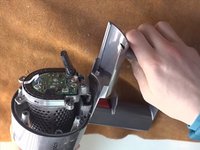
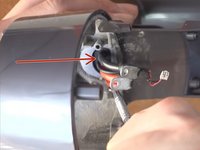
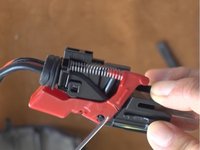
Tetiği şarj bölmesinden çıkarmak için görselde işaretlenen parçayı plastik kanırtma aparatı ile itin.
-
-




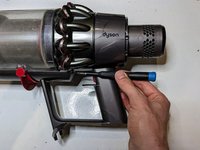


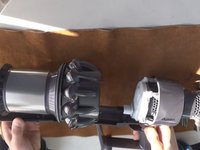
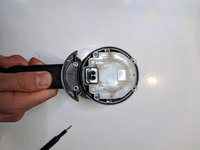


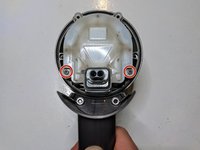
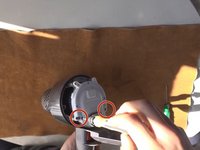




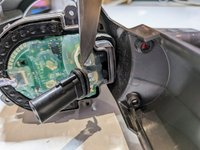


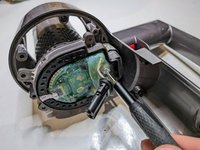
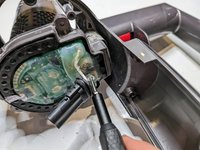
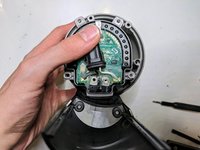








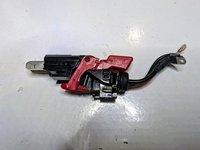
Cihazınızı yeniden toplamak için bu talimatları ters sırayla uygulayın.
İptal et: Bu kılavuzu tamamlamadım.
62 farklı kişi bu kılavuzu tamamladı.

Ekip

York University, Team 1-29, O'Regan Winter 2022 York University, Team 1-29, O'Regan Winter 2022 üyesi
YORK-O'REGAN-W22S1G29
1 Üye
12 adet Kılavuz yazıldı
26Kılavuz Yorumları
Some of the screws in this repair (step 8 and 9) require a T8 Torx bit instead of a Phillips. The Torx screwdriver should be at least 10 cm long and relatively thin to be able to fit into the base of the vacuum. The screwdriver I used from my iFixit essentials kit was too short and too wide to fit into the compartment. That should be added to the guide.
L'assemblage de cet appareil le rend assez compliqué à démonter... surtout la partie avec les câbles de puissance qui vont à la batterie.
Par expérience, en ce qui concerne la gâchette c'est faisable. La gâchette peut se trouver facilement sur internet, ça permet de réparer à pas cher et souvent certaines pièces génériques sont renforcées.
Also applicable to the v10. Some philips are T8 and as one comment already said, they need to be long and thin for some screws - but otherwise a good guide. Step 1 should be remove battery. My dust cover over the circuit board had little retaining clips which made it feel stuck. The small connector attaching the red/white wires lifts out vertically, with a little retaining clip. The final step, I needed a large screw driver to push the trigger part out. I couldn't get the leverage with the shorter spudger.
I chose to buy the full body and replace it after 6 years of use. I hadn't realized how the performance had degraded over time. My early release V11 animal with a screw on battery works better than new and now I have the upgraded display. I am going to deep clean the old body and replace the trigger as a backup but I didn't have a T8 long enough and skinny enough to remove all the screws.
Missing the punch line! This is a good review all until the last step, which is INCOMPLETE and incorrect. The switch assembly must be removed from the arm, and this is much easier to do with a pliers than by pushing on the top. Once the assembly is removed, you must be careful to note the orientation of the broken switch trigger, remove the old, and replace the new trigger, not forgetting to attach the spring.
