Giriş
If the heating system of your Eibos Easdry is not working correctly anymore, you can get a full replacement kit from their support desk. This guide shows you how to replace all components that are part of this replacement kit.
Neye ihtiyacın var
-
-
Put the Easdry flat on a table with its removable faceplate facing downwards, so that the fan intake is facing upwards.
-
-
-
The backplate of the Easdry is not held in place with any screws, so removing it is easy.
-
Put a metal spudger between the backplate and the casing, next to one of the plastic protrusions keeping the lid in place.
-
There are in total eight positions where the backplate is held in place.
-
Tilt the spudger away from the backplate, slowly lifting it up. Repeat this multiple times for each side until the backplate is more or less on top of the casing.
-
-
-
Grab the backplate and gently pull it loose from the casing. It may need a bit of force, as there are also a few clips in the center of the backplate that keep it in place.
-
-
-
Pull the motherboard out of the bottom left corner of the casing. It is not kept in place by anything.
-
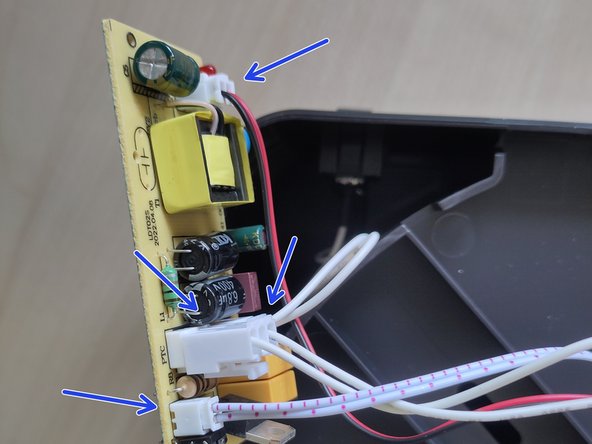
Disconnect all connectors on the motherboard. In total, there are four connectors.
-
Put the old motherboard away.
-
-
-
-
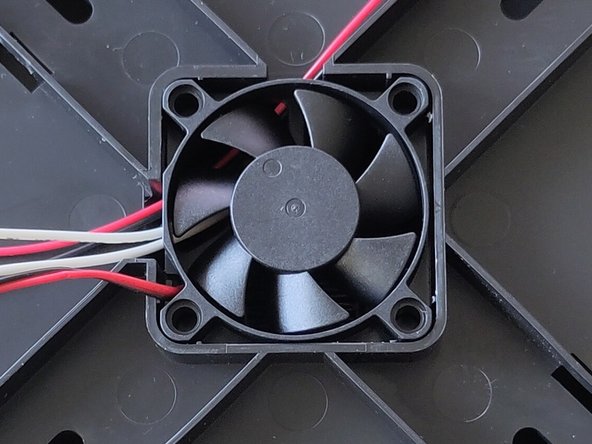
Put a metal spudger between the fan and the casing, and slowly wedge the fan upwards.
-
Do this for all four sides of the fan.
-
Once the fan is lifted sufficiently, grab it with your fingers and pull it out.
-
Put the old fan away.
-
-
-
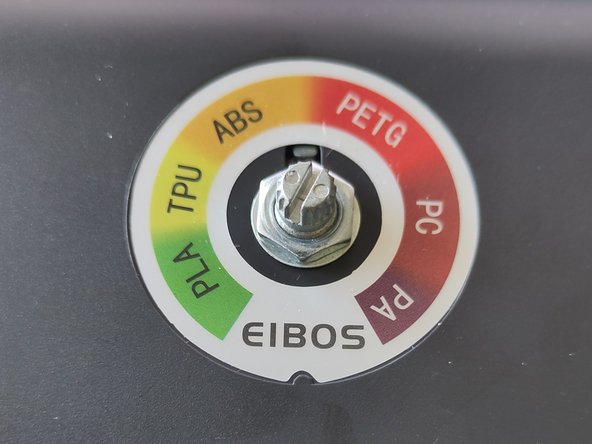
Pull off the black cap that's on top of the potentiometer. It has quite a snug fit, so some force is needed to pull it off.
-
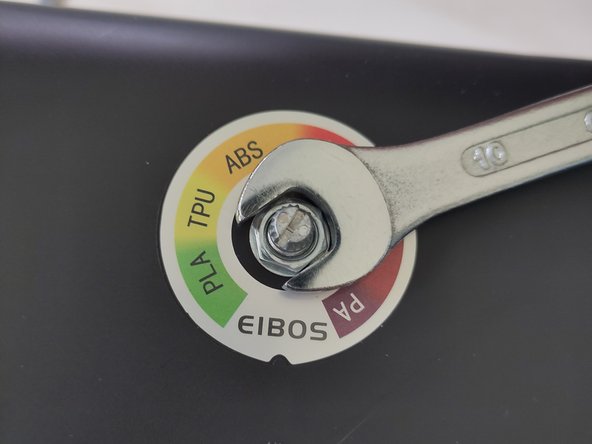
The potentiometer is kept in place by a screw nut. Remove this nut with a 10mm wrench.
-
Once the nut is off, pull the potentiometer out of the case.
-
Put the old potentiometer away, but keep the black cap.
-
-
-
The heating element is kept in place by two black clips on each side of the element.
-
Put two metal spudgers on each side of the heating element, between the element and the casing, next to the black clips.
-
Apply a bit of outward force to free up space for the heating element to slide out.
-
Gently pull on the two wires coming out of the heating element to pull it out of its casing.
-
Put the old heating element away.
-
-
-
Insert the new potentiometer in the same slot as the old one came out of.
-
Note that the potentiometer has a small clip that neatly falls inside the upper part of the slot. Make sure the potentiometer is oriented so that its clip falls into this slot as well.
-
Put both the washer and the nut screw back over the potentiometer, and tighten them with the wrench.
-
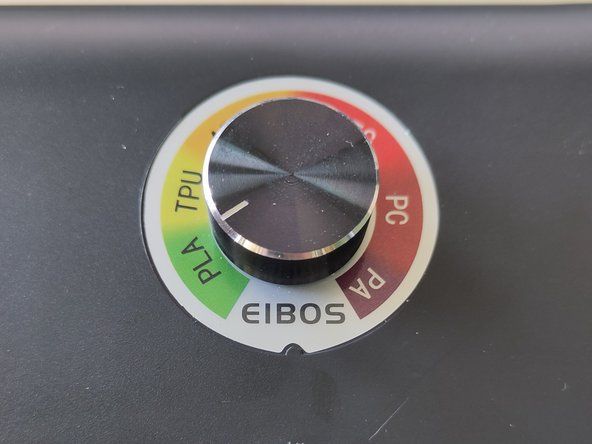
Grab the knob of the potentiometer with two fingers, and turn it counterclockwise until it stops.
-
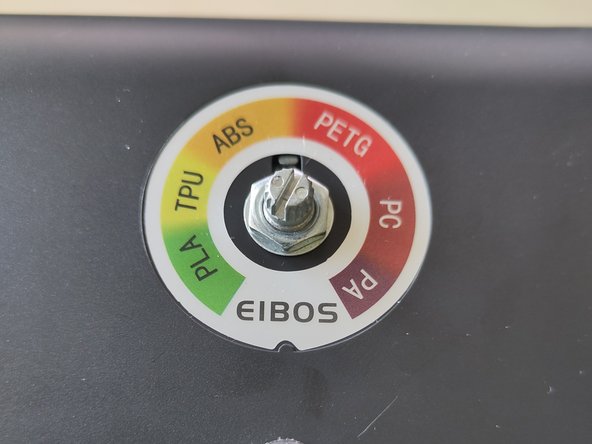
Place the black cap back on top of the potentiometer, with the white indicator at the start of the green PLA section.
-
Once mounted, turn the black knob clockwise all the way, and verify that it is at the end of the dark-red PA section.
-
-
-
Put the new motherboard back in its housing at the bottom left of the casing.
-
-
-
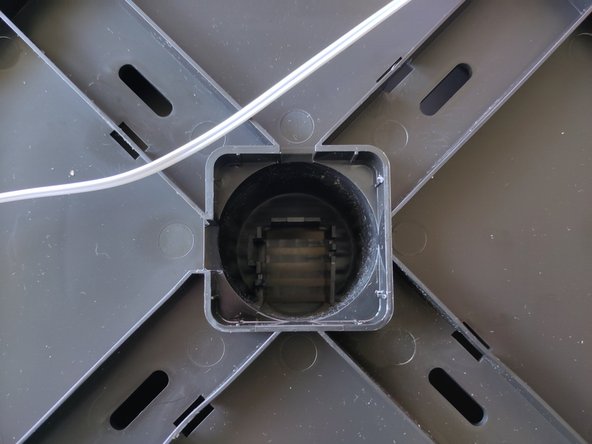
Guide all wires along their respective little trenches, to ensure no wires get pinched when the backplate is reassembled.
-
Insert the fan in its slot, while keeping the wires that go behind the fan down.
-
Guide the remaining wire of the fan along its little trench, with the rest of the wires.
-
-
-
Place the backplate back on top, with the warning text upright.
-
Push on all sides of the plate until it clicks into place.
-


Congratulations on replacing the heating system! Turn the temperature knob to its highest setting, turn the dryer on, and check after 10 minutes if the inside of the dryer box is indeed hot. You can also check this by using a multimeter with temperature setting, if you have one.
Congratulations on replacing the heating system! Turn the temperature knob to its highest setting, turn the dryer on, and check after 10 minutes if the inside of the dryer box is indeed hot. You can also check this by using a multimeter with temperature setting, if you have one.