Giriş
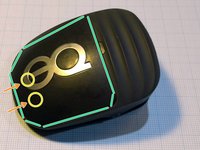
The Equestic SaddleClip from www.equestic.com is a sensor that aids in the training of horses.
The USB Micro-B charging connector can easily be damaged by mis-insertion of the charging cable.
The lithium battery can also be replaced.
This guide covers disassembly of the product, replacing the USB connector and battery, and reassembly of the product.
Neye ihtiyacın var
-
-
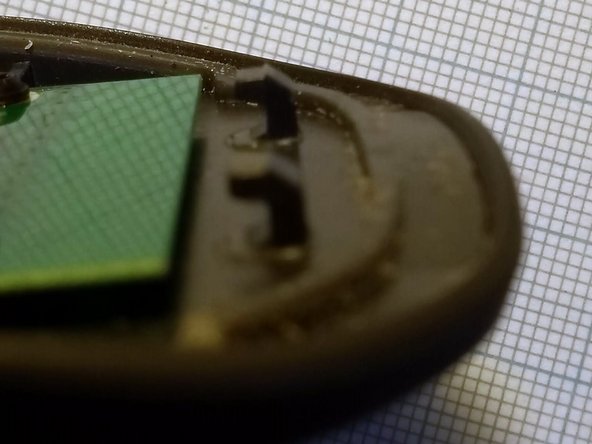
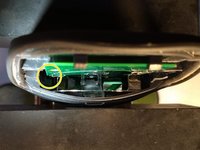
The T8 screws visible inside the clip jaws are not accessible at this stage.
-
-
-
The hinge pin needs to be pressed out to remove the clip
-
The overmoulded rubber hides one side of the pin as shown in the picture.
-
Align a sharp pointed driver or pin over where the end of the pin is hidden.
-
Gently tap the driver or pin with a hammer until the opposite end protrudes far enough to grip with pliers
-
Grip the protruding pin with pliers and pull it out
-
-
-
Using T8 driver remove the two screws on the back of case.
-
The hinge block and front panel (with the 'eq' logo) should now feel loose - but is not removeable yet.
-
-
-
-
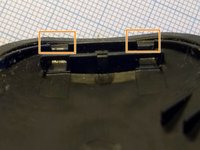
There are two hidden clips approximately circled in yellow.
-
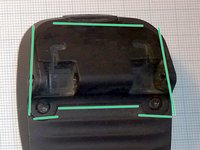
Two options for removing panel
-
If you have two thin pins you can try inserting them where the orange arrows are in the first image, through the orange slots in the second image.
-
Or you can gently pull the panel on an angle in the direction of the indicator LED until the clips disengage.
-
The clips and retainers are shown in the second and third images.
-
-
Bu adımda kullanılan alet:Tweezers$4.99
-
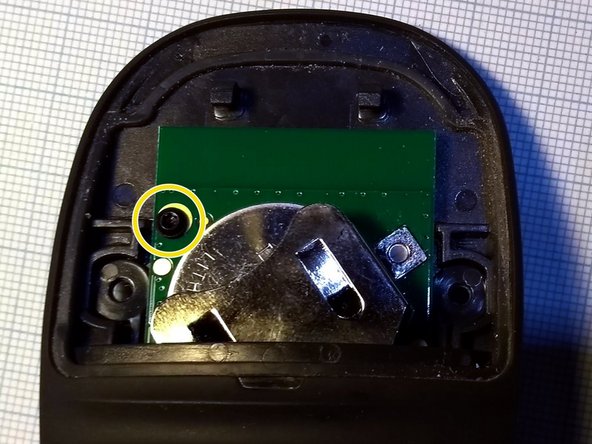
The hinge block highlighted in green (with the screws removed in step 3) feels loose, but is still retained with 2 clips
-
If you look down inside the open front, you can just make out two triangular clips located in the yellow circles. These clips hold the hinge block to the PCB.
-
Using some sharp tweezers gently release the pcb clips and the hinge block will release.
-
-
-
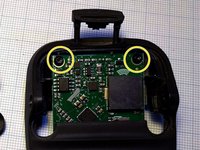
Using the T5 driver remove the three screws (one under front panel, and two under hinge block).
-
The PCB will now release easily.
-
-
-
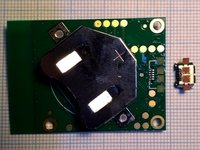
The Li-Ion battery holder is visible on one side, along with the USB Micro-B connector that in this case has been damaged.
-
USB Connector is a Wurth Electronics part #629105136821
-
Battery is a LIR2450 3.6V 120mAh rechargeable Lithium-Ion button cell.
-
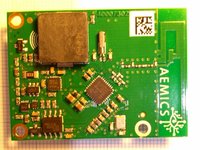
The other side of the PCB shows the main components including:
-
CC2640: Texas instruments wireless MCU with Bluetooth
-
MX25L3233FM2I-08G: Macronix 32Mbit Serial Flash
-
MPU-6500: InvenSense 6-Axis motion tracker (3-Axis Gyroscope and 3-Axis Accelerometer)
-
-
-
Repair and replace as required for your circumstances.
-
In this case the USB connector is replaced and reinforced as the locating pads have pulled off the PCB.
-
Note that only pins 1 and 5 are used (VBus and GND). No data connection is present.
-
-
-
Follow these instructions in reverse order to reassemble the Equestic SaddleClip
-
Note that the battery must be installed before the PCB screws.
-


To reassemble your device, follow these instructions in reverse order.
To reassemble your device, follow these instructions in reverse order.