Ana içeriğe geç

Bu sürüm, hatalı düzenlemeler içerebilir. En son doğrulanmış bellek kopyası dönün.

Neye ihtiyacın var

  1. Bu adım çevrilmemiş. Çevrilmesine yardım edin

    : adım 1, 3 resimden 1. : adım 1, 3 resimden 2. : adım 1, 3 resimden 3.
    • There is a small indentation in the side of the phone near the bottom of the back cover.

    • With the indentation as leverage, use your fingernail to pry the bottom portion of the back cover from the phone.

  2. Bu adım çevrilmemiş. Çevrilmesine yardım edin

    : adım 2, 3 resimden 1. : adım 2, 3 resimden 2. : adım 2, 3 resimden 3.
    • Slide the back cover down and remove it from the phone.

  3. Bu adım çevrilmemiş. Çevrilmesine yardım edin

    : adım 3, 3 resimden 1. : adım 3, 3 resimden 2. : adım 3, 3 resimden 3.
    • There is a small indentation in the back of the phone just below the battery.

    • Use a fingernail in this indentation to push the battery toward the top of the phone

    • Pull the battery out away from the phone.

  4. Bu adım çevrilmemiş. Çevrilmesine yardım edin

    : adım 4, 1 resimden 1.
    • Remove the battery from your Fairphone.

  5. Bu adım çevrilmemiş. Çevrilmesine yardım edin

    : adım 5, 3 resimden 1. : adım 5, 3 resimden 2. : adım 5, 3 resimden 3.
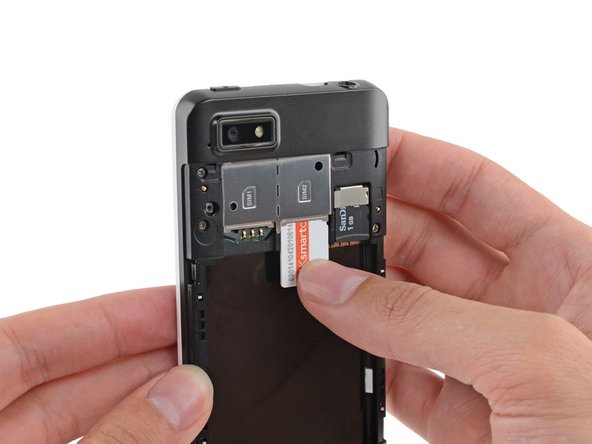
    • Use your finger to slide the SIM card straight down out of its tray.

    • Remove the SIM card from your Fairphone.

    • Repeat this procedure if you have a second SIM card.

    • Be sure to remove all SIM cards before servicing your phone.

  6. Bu adım çevrilmemiş. Çevrilmesine yardım edin

    : adım 6, 2 resimden 1. : adım 6, 2 resimden 2.
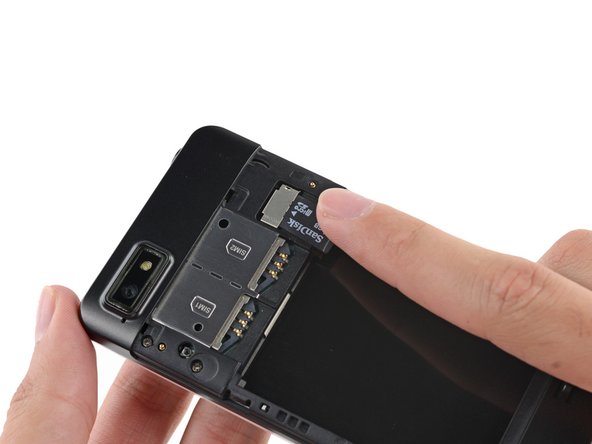
    • If you have a microSD card, use your finger to slide it straight out of its slot.

    • Remove the microSD card from your phone.

  7. Bu adım çevrilmemiş. Çevrilmesine yardım edin

    : adım 7, 1 resimden 1.
    • Remove the five 3.9 mm Phillips #000 screws securing the midframe to the display assembly.

  8. Bu adım çevrilmemiş. Çevrilmesine yardım edin

    : adım 8, 3 resimden 1. : adım 8, 3 resimden 2. : adım 8, 3 resimden 3.
    • The midframe is secured to the display assembly by several small plastic clips.

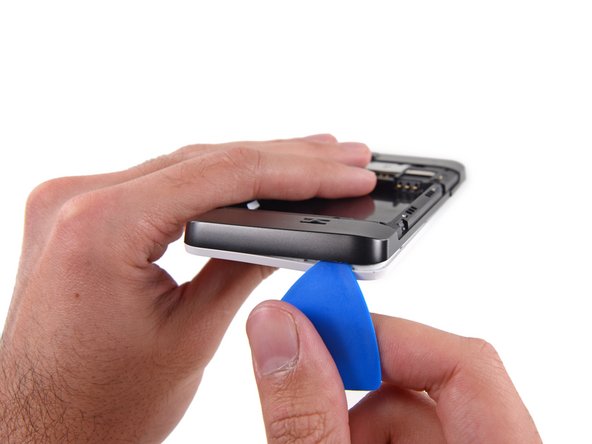
    • Use an opening pick to carefully pry the midframe away from the display assembly.

    • Start just below the volume rocker and work your way down toward the bottom of the phone, freeing the plastic clips along the side.

  9. Bu adım çevrilmemiş. Çevrilmesine yardım edin

    : adım 9, 2 resimden 1. : adım 9, 2 resimden 2.
    • Carefully round the corner, separating the midframe from the display assembly.

  10. Bu adım çevrilmemiş. Çevrilmesine yardım edin

    : adım 10, 1 resimden 1.
    • After rounding the next corner, the midframe should be free along the bottom and the sides.

  11. Bu adım çevrilmemiş. Çevrilmesine yardım edin

    : adım 11, 3 resimden 1. : adım 11, 3 resimden 2. : adım 11, 3 resimden 3.
    • Run the opening pick and pry along the top seam.

    • To avoid bending or damaging the opening picks, do not pry near to the power switch, USB port, or headphone jack.

  12. Bu adım çevrilmemiş. Çevrilmesine yardım edin

    : adım 12, 1 resimden 1.
    • Separate any remaining clips and remove the midframe from the phone.

  13. Bu adım çevrilmemiş. Çevrilmesine yardım edin

    : adım 13, 2 resimden 1. : adım 13, 2 resimden 2.
    • The speakerphone speaker is held to the midframe with some mild adhesive.

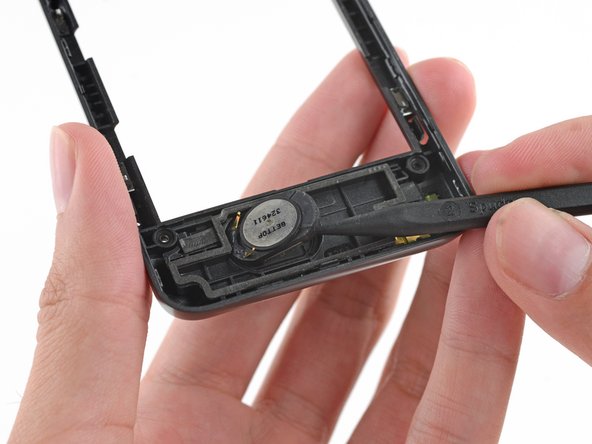
    • Use the tip of a spudger to pry the speaker off of the midframe.

  14. Bu adım çevrilmemiş. Çevrilmesine yardım edin

    : adım 14, 1 resimden 1.
    • Remove the speaker from the midframe.

Bitiş Çizgisi

10 farklı kişi bu kılavuzu tamamladı.

Sam Goldheart

Üyelik tarihi: 10/18/12

465.807 İtibar

538 adet Kılavuz yazıldı

Ekip

iFixit iFixit üyesi

Staff

135 Üyeler

16.820 adet Kılavuz yazıldı

0 Yorum

Yorum Ekle

İstatistikleri Görüntüle:

Son 24 Saat: 3

Son 7 gün: 5

Son 30 gün: 13

Her zaman: 10,942