Giriş
This guide will show you how to replace the headphone module of the Fairphone 2.
Neye ihtiyacın var
-
-
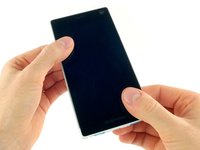
Pick a corner of your slim case and get between the two parts with your thumb's fingernails.
-
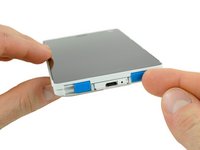
Pull up the back part of the slim case to separate the small snap fit connections.
-
Remove the back part of the slim case.
 FixBot'a Sor
-
-
-
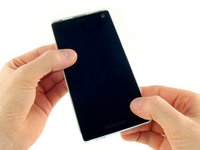
Get in between the front part of the slim case and the phone's body with your thumb nail.
-
Separate the snap fit connectors on the front part by pulling it to the side and pushing against the display.
-
-
-
-
Push the battery toward the top of the phone.
-
Pull the battery out away from the phone.
-
-
-
After taking out the battery you can unlock the display assembly.
-
Flip the two blue switches to the inner position.
-
Slide the display assembly towards the bottom of the phone.
-
-
-
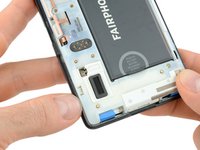
Remove the two Phillips #0 screws of the headphone module marked by the blue circles.
-
-
-
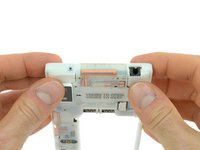
Turn the mainframe around so you're looking at it from the back and can see the two blank parts of the module.
-
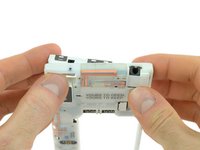
Take out the module by first pushing the left part out with your thumb while holding the right side in place.
-
Then push out the right part with your other thumb.
-


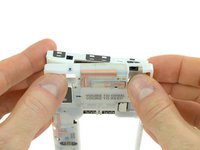
To reassemble your device, follow these instructions in reverse order.
Information on what to do with the old module can be found on the FairPhone support page and in the FairPhone forum.
İptal et: Bu kılavuzu tamamlamadım.
37 farklı kişi bu kılavuzu tamamladı.

Ekip

Tobias Isakeit - Repairability Engineer Tobias Isakeit - Repairability Engineer üyesi
Business
1 Üye
1.145 adet Kılavuz yazıldı
10Kılavuz Yorumları
Die beiden Schrauben, die blau gekennzeichnet sind - es sind vier Schrauben. Soweit bin ich jedoch nicht gekommen, da der Bildschirm sich auf beide genannten Weisen nicht abschieben lässt. Schraubstock und leichte Schläge mir einem breiten Schraubenzieher werden keine sinnvollen Werkzeuge sein. Schraubenzieher: Im Baumarkt gibt es keinen PH 0 sondern PH 0 x 60. Der Verkäufer meinte, es müsste der PH 00 x 60 sein; also beide mitgenommen. Zum Testen, welcher der richtige ist, bin ich nicht gekommen, siehe oben. Vielleicht sind auch beide falsch und es gibt per Internet tatsächlich den PH 0. Außerdem muss ich nicht das Kopfhörerteil austauschen, sondern den Lautsprecher, den ich nach Schwierigkeiten inzwischen erhalten habe. Über Lautsprecheraustausch finde ich keine Anleitung. cw@actanol.de
Hallo, die zwei blauen Schrauben lösen das Modul vom Rahmen, die beiden anderen sind Torx Schrauben und öffnen das Modul selbst. Das Display sitzt recht fest und muss ein wenig lose gewackelt werden. Eventuell hilft es Gummihandschuhe zu verwenden oder das Fairphone mit der Displayseite auf eine rutschfeste Matte zu legen und dann durch Hin-und Herbewegen zu lockern. Die Anleitung für das Mikrofonmodul zeigt, dass darin auch den Lautsprecher sitzt: Fairphone 2 Microphone Module Replacement
Um einen Fussel aus der Klinkenbuchse zu entfernen, benötigt man zusätzlich zum Philips #0 ,
einen Torx #5 um die beiden kleinen Schrauben zu lösen. Die Metallklammern solten kein Problem darstellen.
Nach dem Tausch muss der Näherungssensor (Proximity Sensor) neu kalibriert werden, sonst bleibt das Display beim Telefonieren immer schwarz!
Einstellungen->System->Wartung->Näherungssensor