Ana içeriğe geç
Onarım Topluluğuna Katılın - Hesap Oluşturun

Flip Video LCD Screen

Neye ihtiyacın var

    1. Flip Video LCD Screen, Outer Shell: adım 1, 2 resimden 1. Flip Video LCD Screen, Outer Shell: adım 1, 2 resimden 2.
      • Turn off the device and take the batteries out.

      • Remove metal sticker under the LCD screen with a spudger.

      • This may require a large force to pry off the glued sticker.

      FixBot'a Sor

      Yorum Ekle

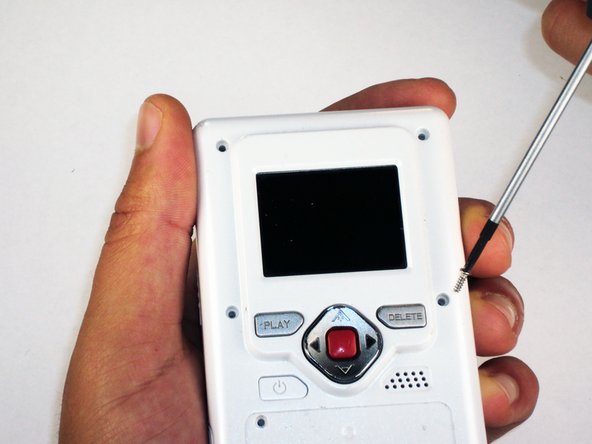
    2. Flip Video LCD Screen: adım 2, 1 resimden 1.
      • Remove the 4 gray screw caps with the spudger. These cover the screw heads and protect from dirt or grime.

      FixBot'a Sor

      Yorum Ekle

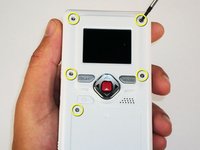
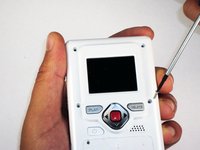
    3. Flip Video LCD Screen: adım 3, 2 resimden 1. Flip Video LCD Screen: adım 3, 2 resimden 2.
      • Remove the 5 10mm screws with the #00 Phillips screwdriver. These connect the back of the outer shell to the front of the outer shell.

      FixBot'a Sor

      Yorum Ekle

    4. Flip Video LCD Screen: adım 4, 1 resimden 1.
      • Open battery door. This can be done by gently depressing and sliding the battery down downward.

      FixBot'a Sor

      Yorum Ekle

    5. Flip Video LCD Screen: adım 5, 1 resimden 1.
      • Use the spudger to separate outer shells.

      • The spudger must be inserted between the shell halves to pry the edges apart.

      • Slowly work around the outside to separate the halves.

      FixBot'a Sor

      Yorum Ekle

    1. Flip Video LCD Screen, Circuit Board: adım 6, 1 resimden 1.
      • Remove the 3 5mm screws securing the circuit board to the front shell with the #00 Phillips screwdriver.

      FixBot'a Sor

      Yorum Ekle

    2. Flip Video LCD Screen: adım 7, 1 resimden 1.
      • Slowly lift the left side of the circuit board.

      • Do not attempt to remove the circuit board completely yet. It is still connected to the device.

      FixBot'a Sor

      Yorum Ekle

    3. Flip Video LCD Screen: adım 8, 1 resimden 1.
      • Disconnect the USB port cable from the back side of the circuit board.

      FixBot'a Sor

      Yorum Ekle

    4. Flip Video LCD Screen: adım 9, 1 resimden 1.
      • Slide out the battery contacts.

      • Battery contacts

      • Slot where battery contacts were located

      FixBot'a Sor

      Yorum Ekle

    1. Flip Video LCD Screen, LCD Screen: adım 10, 1 resimden 1.
      • With the LCD screen facing away from you, remove the 2 bronze 3 mm screws securing the LCD using the #00 Phillips screwdriver.

      FixBot'a Sor

      Yorum Ekle

    2. Flip Video LCD Screen: adım 11, 1 resimden 1.
      • Flip over the circuit board and unlock the two black tabs on the ribbon connector by sliding them upwards.

      FixBot'a Sor

      Yorum Ekle

    3. Flip Video LCD Screen: adım 12, 1 resimden 1.
      • Gently pull out ribbon cable.

      • If the ribbon cable does not come out easily you may not have fully unlocked the ribbon cable connector in the previous step.

      • The LCD screen is now removed and can be replaced.

      FixBot'a Sor

      Yorum Ekle

Sonuç

To reassemble your device, follow these instructions in reverse order.

İptal et: Bu kılavuzu tamamlamadım.

Bir başkası bu kılavuzu tamamladı.

Elizabeth

Üyelik tarihi: 04/15/10

100 İtibar

6 adet Kılavuz yazıldı

Ekip

Cal Poly, Team 26-21, Regan Spring 2010 Cal Poly, Team 26-21, Regan Spring 2010 üyesi

CPSU-REGAN-S10S26G21

4 Üyeler

18 adet Kılavuz yazıldı

0Kılavuz Yorumları

Yorum Ekle

İstatistikleri Görüntüle:

Son 24 Saat: 3

Son 7 gün: 9

Son 30 gün: 36

Her zaman: 5,754